TL;DR

Get sports gear delivered free — and shop member deals
- Fast, free delivery on millions of items
- Access to Prime Big Deal Days deals on October 6–7
- Prime Video, Amazon Music and more included
Mountain biking gear helps riders stay safer, control the bike, and ride comfortably across changing terrain. Start with a well-fitted helmet, suitable shoes and eye protection, reliable tires and brakes, and a basic repair kit; then match extras such as body armor, suspension, or e-bike equipment to your routes and riding style.
A sunny trailhead can turn into a muddy climb, a rocky descent, and a flat tire before lunch. The right mountain biking gear helps you stay comfortable and in control through those changes; the wrong setup can leave you fumbling with cold fingers or wishing you had packed one more tool.
You don’t need to buy every shiny component on the shop wall. Your choices should depend on where you ride, how long you’ll be out, your experience, and how far you’ll be from help. A short cross-country loop and a long backcountry route ask for different gear, even if they start on the same trail.
Here’s how to build a sensible setup, from protective basics to bike choices and repair supplies. You’ll also see where newer features can help—and where a simpler, less expensive option may serve you just as well.
Choose a well-fitted helmet, gloves, and eye protection before spending on performance upgrades.
Flat and clipless pedals offer different advantages; practice any new system in a safe place before a technical ride.
Match tires, brakes, and suspension to your weight, terrain, and riding style instead of copying another rider’s setup.
Carry a tube or tubeless repair option, inflation method, tire levers, and a multitool; add food, first aid, and navigation for remote routes.
Check compatibility, service access, trail rules, and maintenance needs before buying electronic components or an e-mountain bike.
Start with the gear that protects you and keeps you comfortable
Mountain biking gear should first protect your head, hands, and eyes, then keep you comfortable enough to focus on the trail. Choose a helmet that fits securely, gloves that let you hold the bars without bunching, and eye protection that keeps grit, branches, and insects out. These basics help riders stay prepared across changing terrain, from dusty corners to damp, shaded roots.
A helmet should sit level, feel snug, and stay in place when you move your head. Trail and enduro helmets often cover more of the back of the head than lightweight cross-country designs, while full-face helmets are common for downhill and bike-park riding. More coverage can make sense when speed, jumps, or steep terrain raise the consequences of a fall, but it can also add weight and warmth. Some helmets include rotational-impact systems such as MIPS; treat that as one design feature, not a promise that you can’t get hurt.
Clothing should suit the day rather than a fashion rule. Padded shorts or a liner can reduce discomfort on a two-hour ride, while a breathable layer helps on a chilly morning climb. The tradeoff is that extra layers can trap heat once you’re working hard, so removable layers are useful when temperatures or effort will change. For example, if you’re riding a forest loop after rain, gloves with a grippy palm and glasses that shed droplets may matter more than a lightweight race jersey.
Think about what a fall or a long day would feel like on your particular route. A beginner riding a smooth local trail may prefer an open-face helmet and simple gloves; a rider heading to a bike park may choose more coverage and body protection. Protection can reduce exposure to some impacts and scrapes, but it adds cost and may restrict movement or increase heat. Fit and trail demands matter more than a label or price tag.
As an affiliate, we earn on qualifying purchases.
Choose shoes and pedals that match how you ride
Mountain biking shoes and pedals work best when they suit your comfort, skill, and trail conditions. Flat pedals pair with grippy-soled shoes and let you take a foot off quickly, while clipless pedals attach compatible shoes to the pedals for a more connected feel. Neither system wins for every rider; the useful question is which one lets you ride with confidence.
Flats can be a comfortable starting point because you can reposition your foot or step down in a hurry. Their broad platform and grippy shoes can also make it easier to adjust foot position on rough terrain. The tradeoff is that your feet can bounce off if your technique or shoe-pedal grip is lacking, especially on repeated bumps. On a loose, rocky descent, a rider who likes to dab a foot around tight turns may appreciate that freedom.
Clipless pedals keep your shoe attached until you release it with a practiced twist. Many riders like the secure connection and consistent foot placement, especially on longer climbs; it can help keep feet from slipping when the trail gets rough. But attachment does not automatically make you faster or eliminate the need for good technique. You need to learn the release motion, and a fall can feel more intimidating before that movement becomes automatic. Practice in a safe, open area rather than discovering the mechanism on a steep hillside.
Try shoes with the socks you normally ride in, and check for pressure points before committing to a long outing. A shoe that feels comfortable in the shop but pinches after an hour can turn a great trail into a foot-numbing slog. Sole stiffness and tread also affect comfort when you have to walk, so consider whether your routes include hike-a-bike sections. If you’re switching pedal systems, make the change gradually and give yourself time to build familiarity.
Tune tires, brakes, and suspension for your local trails
Mountain biking gear has a direct effect on control when tires, brakes, and suspension match your terrain and riding style. Tires balance grip, rolling resistance, casing strength, and puncture protection; suspension settings need to suit your weight, trail, and how you ride. A fast, firm setup can feel lively on smooth paths but unsettled on rocks and roots because it gives the tire less help maintaining contact with the ground.
Start by checking tire condition and pressure rather than buying a new wheelset. A rider on dry, hardpack trails may value a quicker-rolling tire, while someone riding sharp, rocky terrain may choose a tougher casing for added puncture resistance. That tougher casing can resist damage but may weigh more and feel less lively. There is no pressure number that works for everyone: tire width, rider weight, rim, and conditions all matter. Too much pressure can make the bike skip across rough ground; too little can cause tire squirm or rim strikes, so make small adjustments and pay attention to traction and support.
Tubeless tires can reduce pinch flats and seal some small punctures, but they require compatible tires and rims, sealant, and occasional upkeep. Sealant can dry out, and larger cuts may still need a plug or tube. Tubes are simpler to understand and replace, though they can be more vulnerable to pinch flats when a tire hits a sharp edge. Before a weekend ride, for instance, check your sealant and bring a tube in case a cut is too large to seal.
Brakes need to feel predictable, with pads and rotors in good condition. Reliable braking matters not just for stopping, but for controlling speed before a corner or steep section; worn pads or inconsistent feel can make riders hesitate or brake too late. Suspension should not bottom out constantly or feel harsh over every bump. If you’re new to setup changes, adjust one thing at a time and ask a qualified mechanic or coach for help; changing several settings together makes it hard to tell what helped, and progressive practice beats making unfamiliar changes right before a technical ride.
Pack a repair kit that can rescue an ordinary trail problem
A practical repair kit gives you a way to handle common problems such as a flat tire or a loose bolt without turning a ride into a long walk. For most outings, carry a spare tube or tubeless plug kit, tire levers, a pump or CO₂ inflator, and a multitool. Add water and a phone; longer or remote rides call for food, first aid, navigation, and a way to contact help. The right amount of gear is a balance: carrying too little can leave you stranded, while packing tools you don’t know how to use adds weight without much benefit.
- Check the route and weather. A short, familiar loop close to town asks less of you than a long backcountry ride with limited cell service. The farther you are from help, the more a minor problem can affect your day, so tell someone your plan when you’ll be far from assistance.
- Match supplies to likely problems. Take a tube or plugs, an inflation method, and tools that fit your bike’s bolts. If your bike uses a less common component, check whether you can make a basic repair with what you carry. A CO₂ inflator is compact and quick, while a pump lets you add air more gradually and can be reused; choose an option you know how to operate.
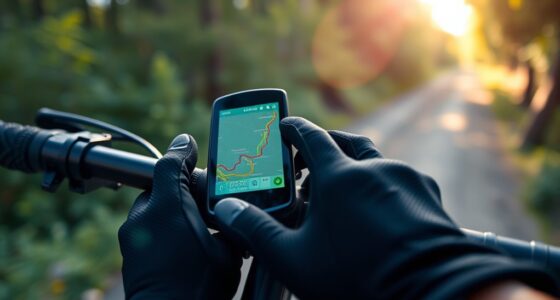
- Add comfort and safety items. Pack water, a snack for longer rides, and a compact first-aid kit. Remote routes may justify a navigation device or emergency communication equipment. These items do not prevent every problem, but they help you make decisions and manage delays if the ride takes longer than expected.
- Test your kit at home. Practice changing a tube or using your plugs before you’re kneeling in wet leaves with daylight fading. A tool is only useful if it fits your bike and you can use it under pressure.
Imagine getting a flat halfway through a wooded loop: a pump and tube turn the problem into a short roadside stop. Without them, even an easy trail can become a tiring walk. Keep your kit in a pack or secure frame bag, and check that it stays put when the trail gets bumpy. On longer rides, keeping supplies organized also helps you find what you need quickly instead of unpacking everything.
Before each ride, check tire pressure, brakes, and obvious loose bolts. After a muddy or wet outing, clean and inspect the bike, then follow manufacturer guidance for drivetrain, brake, and suspension service. Mud and grit can wear moving parts faster, while neglected brake wear can compromise control. A quick five-minute check is easier than finding a worn brake pad halfway down a descent.
Spend on the upgrades that solve your actual ride problems
The best mountain biking gear upgrade is the one that fixes a problem you actually encounter. Newer bikes and components can bring useful changes—more capable trail-bike designs, wider tire choices, electronic shifting, and growing e-mountain-bike options—but no feature automatically makes every ride safer or faster. Fit, compatibility, maintenance, and local trail conditions still decide whether an upgrade pays off. Before buying, identify what currently limits your ride: discomfort, poor grip, unreliable shifting, or the effort required to climb are different problems with different solutions.
Electronic shifting can deliver consistent gear changes and simplify cable routing, but it adds cost and means you need to manage battery charge. A rider who enjoys long weekend climbs may welcome the convenience; someone who values a simple, easy-to-fix bike may prefer a mechanical drivetrain. Electronic systems can reduce some routine cable-related adjustments, but they still require compatible parts and troubleshooting knowledge. Check that replacement parts and service are available near you before buying.
An e-mountain bike can make more climbing accessible and change how you plan a route, but it also brings extra weight, range and charging questions, maintenance needs, and trail-access rules. The motor can help riders cover more elevation, but the added weight affects handling and makes a depleted battery more consequential on a long climb. Before a long ride, check the battery range for your expected route and confirm where e-bikes are allowed. Local rules matter more than assumptions based on another trail network.
Durable, repairable gear can also be a smart use of money. Replaceable parts, available spares, and materials that hold up to regular use may matter more than a flashy new finish. A cheaper component that is difficult to service or replace can cost more in downtime over time. If your current tires grip well and your brakes work reliably, a comfortable helmet or a proper pump may improve your next ride more than a costly drivetrain upgrade.
For beginners, get a qualified bike fit or coaching advice when you’re unsure about setup or technique, and build skill progressively. A more capable bike can help across changing terrain, but it won’t replace practice. Spend first on secure fit, reliable control, and repairs you can manage on the trail.
Use a simple checklist before you leave the trailhead
A quick pre-ride check catches small problems before they become trail problems. Confirm that your helmet fits, tires hold air, brakes work, and your repair kit matches the bike you’re riding. Then check the route, weather, water, and how far you’ll be from help. This is not just a gear inventory: it helps you notice mismatches, such as carrying a tube that does not fit your wheel or wearing a layer that will be uncomfortable once you warm up.
- For a short cross-country ride: Take water, a phone, basic repair supplies, and a comfortable helmet, gloves, and glasses.
- For a long backcountry ride: Add food, navigation, first aid, weather layers, and a plan for limited cell coverage.
- For a bike park or steep descent: Choose protection suited to the consequences of a fall, and inspect brakes and tires carefully.
- For wet or muddy trails: Use clothing that handles moisture, and plan to clean and inspect the bike afterward.
Picture a damp morning at the trailhead. You squeeze each brake lever, scan the tire tread, tuck a snack into your pack, and check the forecast. That small routine can reveal a soft tire or missing rain layer before the trail disappears into the trees. It also gives you a chance to change the plan if weather or equipment makes the route less suitable than expected.
Keep the checklist flexible. A familiar one-hour ride near town doesn’t require the same kit as a remote route, and a beginner may benefit from going with an experienced rider or coach. The goal isn’t to carry your entire garage; it’s to bring the equipment that matches the ride you’re about to take. As you gain experience, note which items you actually use and which gaps cause trouble, then adjust your kit rather than adding gear by habit.
Frequently Asked Questions
What gear do I need for my first mountain bike ride?
Start with a properly fitted helmet, gloves, eye protection, water, and comfortable clothing and shoes suited to your pedals. A basic repair kit with a tube or tubeless plug option, tire levers, inflation method, and multitool can help you handle common problems. For your first ride, choose a route that matches your experience and consider going with a more experienced rider.
Should I choose a full-face or open-face helmet?
Open-face helmets work well for many trail rides, while full-face helmets are common for downhill, bike parks, and more consequential terrain. The right choice depends on the ride and the helmet’s fit, coverage, and certification. A full-face design doesn’t make you immune to injury, so ride within your ability.
Are clipless pedals better than flat pedals?
Neither is universally better. Flat pedals make it easy to move your feet or put one down, while clipless pedals keep compatible shoes attached until you release them. Choose the system that fits your confidence and riding style, and practice before taking unfamiliar pedals onto a technical trail.
Do I need tubeless tires?
No. Tubeless tires can reduce pinch flats and seal some small punctures, but they need compatible rims and tires, sealant, and periodic maintenance. Tubes are simple to carry and remain useful as a backup, including on tubeless rides.
What should I carry on a long mountain bike ride?
Carry water, food, a phone or navigation device, a multitool, tire levers, and an inflation method with a tube or tubeless repair kit. Add first aid, weather layers, and emergency communication equipment when your route is remote or cell service may be limited. Check the weather and tell someone your plan before you leave.
Is expensive mountain biking gear worth it?
Sometimes higher-priced equipment gives you lower weight, more adjustment, or added durability, but cost alone doesn’t make it the right choice. Fit, compatibility, trail suitability, and access to service matter more. A well-maintained, reasonably priced setup can work very well on real trails.
Conclusion
Build your setup around the ride you’re actually doing: protect your head and eyes, choose shoes and tires you trust, and carry the tools to handle a flat. Add specialized gear when your terrain or experience calls for it—not just because a product is new.
Then check your bike, tell someone where you’re going on remote routes, and ride within your skill while you build it. The best kit is the one that lets you enjoy the trail instead of thinking about what you forgot.
Fall Picks
fall essentials
As an affiliate, we earn on qualifying purchases.