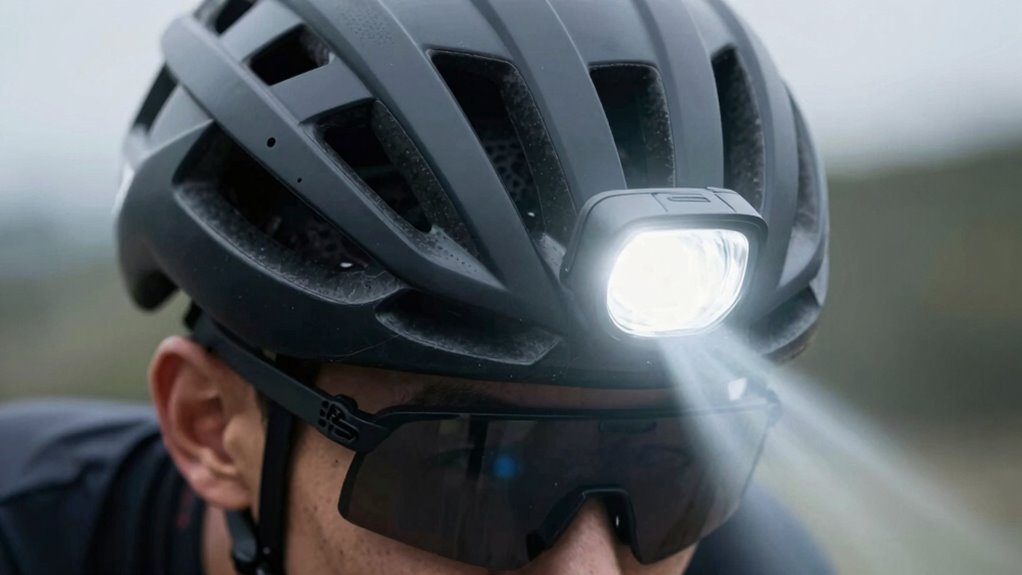
When placing a helmet light, make sure it’s secure, well-positioned, and directed forward and slightly downward to maximize visibility while preventing glare. The light should be mounted at an ideal height and angle to illuminate the trail without blinding others. Comfort and stability matter—adjust your mount so it doesn’t shift during rides. Proper placement helps you see hazards and stay safe. Keep exploring to discover even more tips for making your ride safer and brighter.

Get sports gear delivered free — and shop member deals
- Fast, free delivery on millions of items
- Access to Prime Big Deal Days deals on October 6–7
- Prime Video, Amazon Music and more included
Key Takeaways
- Mount the light at a height that directs the beam forward and slightly downward to maximize visibility and reduce glare.
- Ensure the light is securely attached to prevent shifting and maintain proper beam alignment during the ride.
- Adjust the angle to illuminate the trail ahead clearly without blinding oncoming riders or pedestrians.
- Choose a mounting location that avoids discomfort or shifting, fitting your helmet shape and riding posture.
- Use adjustable and versatile lights to adapt beam patterns and brightness for different riding conditions.
Proper helmet light placement is essential for ensuring visibility and safety while riding, especially in low-light conditions. When you’re out on the road or trail during dawn, dusk, or nighttime, your helmet light becomes a critical tool to alert others of your presence and help you see obstacles ahead. Correct placement isn’t just about attaching the light somewhere; it’s about positioning it to maximize its effectiveness. If you want to improve your overall bike safety, understanding how to properly place your helmet light is a fundamental step. It also allows for gear customization, giving you the ability to tailor your setup to your specific riding style and environment.
Proper helmet light placement enhances safety and visibility in low-light riding conditions.
First, think about the height and angle of the light. You want the beam to be directed forward and slightly downward, illuminating the path in front of you without blinding oncoming riders or pedestrians. Proper positioning ensures your light isn’t too high, which can cause glare, or too low, which might not light up enough of the trail or road. When the light is mounted correctly, it enhances your visibility to others, making your presence known from a distance. This is a key aspect of bike safety, especially when sharing space with vehicles or pedestrians. It’s also important to keep the light steady; a secure attachment prevents shifting that can misalign the beam and compromise your visibility.
Another critical factor in helmet light placement is balancing visibility and comfort. If the light is mounted too far forward or to one side, it might cause discomfort or shift during rides, especially on bumpy terrains. Proper gear customization involves adjusting the mount and angle to fit your helmet shape and riding posture. Remember, your helmet isn’t just about protection; it’s also a platform for your lighting system. Many riders prefer mounts that allow easy adjustments, so you can tweak the angle as needed, depending on whether you’re riding on city streets or rugged trails. Additionally, understanding the importance of biodiversity and conservation can remind us that sustainable gear choices and responsible riding contribute to preserving our environment for future adventures. Being aware of helmet fit and comfort can also help you find the best setup that stays secure during your ride.
Furthermore, choosing a light with adjustable beam patterns can help you adapt to different riding conditions and environments, ensuring optimal visibility at all times. Lastly, consider the type of light you choose. Brightness levels and beam patterns differ, and some lights are designed to be mounted on helmets for maximum versatility. Proper helmet light placement ensures you get the most out of your investment, boosting your overall bike safety. When you position your light correctly, it not only improves your visibility but also helps you see hazards sooner, giving you more time to react. Customizing your gear in this way makes every ride safer and more enjoyable, whether you’re commuting or exploring off-road trails. Properly understanding and adjusting your helmet light can optimize your safety and riding experience significantly.
As an affiliate, we earn on qualifying purchases.
Frequently Asked Questions
How Do I Choose the Brightest Helmet Light for My Needs?
To choose the brightest helmet light, consider helmet mounting options and battery types. Look for lights with high lumens for maximum brightness, and make sure they securely attach to your helmet. Rechargeable batteries, like Li-ion, provide longer-lasting power, while AAA batteries offer convenience. Assess your riding needs—if you ride at night or in low light, prioritize higher lumens and easy-to-replace batteries to keep your light bright and reliable.
Can Helmet Lights Be Used in All Weather Conditions?
Did you know that most helmet lights are designed to withstand various weather conditions? Yes, helmet lights with good weather resistance can be used in rain, fog, and even snow. They enhance light visibility, ensuring you stay safe and seen regardless of the weather. Just check the product specs for water resistance ratings like IPX4 or higher, so you know your light can handle whatever Mother Nature throws your way.
Are Helmet Lights Legal to Use During Night Rides?
Helmet lights are generally legal to use during night rides, but you need to be aware of helmet light regulations and legal considerations in your area. Many regions allow them as a safety feature, but some places may restrict overly bright or flashing lights. Always check local laws to guarantee you’re compliant, and use a helmet light that’s properly mounted and not distracting other riders or drivers. This way, you stay safe and within legal limits.
How Long Does a Typical Helmet Light Battery Last?
A typical helmet light battery lasts between 2 to 8 hours, depending on the brightness setting and model. To maximize battery life, keep your light on lower settings when possible, and charge it fully before rides. Charging tips include using the original charger, avoiding overcharging, and storing it in a cool, dry place. Regularly check your battery life to guarantee your helmet light stays reliable during night rides.
What Safety Precautions Should I Take When Installing a Helmet Light?
Think of helmet light installation like balancing on a tightrope—precision matters. When mounting your helmet light, make sure it’s securely attached to prevent it from falling, and position the light so it illuminates your path without blinding others. Always check the helmet mounting points for stability, and avoid loose wires or parts. Test the light’s angle and brightness before riding, guaranteeing safe light positioning to enhance visibility without distractions.
Conclusion
As you navigate winding roads and quiet trails, remember that the right helmet light placement is your beacon in the darkness. Picture your light as a guiding star, illuminating the path ahead and keeping you visible to others. When positioned correctly, it becomes an extension of your awareness, like a lighthouse cutting through fog. With this simple step, you’ll ride confidently, your journey shimmering with safety and clarity even when night falls.
Fall Picks
fall essentials
As an affiliate, we earn on qualifying purchases.