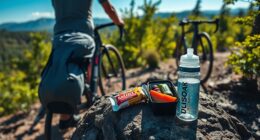
To replace a bike tube at the curb, start by loosening the axle nuts or quick-release to free the wheel. Remove the wheel from your bike, deflate the remaining air, and pry off the tire with tire levers, being careful not to damage the rim. Take out the damaged tube, inspect the inside of the tire for debris, then carefully install and inflate a new tube, making sure everything is seated properly. If you want to master this process, keep going for more tips and details.
Key Takeaways
- Loosen and remove the wheel from the bike frame at the curb to access the tube.
- Deflate the existing tube completely and pry off the tire with tire levers carefully.
- Extract the damaged tube and inspect the tire for debris or sharp objects that caused the flat.
- Install the new or repaired tube, ensuring it’s free of twists and properly seated inside the tire.
- Inflate the tire to the recommended pressure, check for proper seating, then reattach the wheel to resume riding.

When your bicycle’s inner tube goes flat, replacing it at the curb is a quick and cost-effective fix. You’ll want to start by removing the wheel from your bike, which typically involves loosening the axle nuts or quick-release lever. Once the wheel is free, deflate any remaining air in the tube and carefully pry off the tire using tire levers. Be gentle to avoid damaging the rim or bending the tire beads. Once the tire is loose, you can pull out the flat inner tube. Now, it’s time for the tire installation—placing the new or repaired tube inside the tire, making sure it’s evenly seated and free of twists or pinches.
Replacing a flat tube involves removing the wheel, deflating, and carefully installing a new tube without twists or pinches.
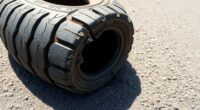
Before reinserting the tube, inspect the inside of the tire for debris or sharp objects that could puncture the new tube. If you find anything, remove it carefully. When reinstalling the tire onto the rim, start by aligning the bead on one side, then work your way around, pushing the bead onto the rim. Be cautious to avoid pinching the tube between the tire and rim, which could cause another flat. Once the tire is back in place, inflate the tube gradually, checking to ensure the tire beads are evenly seated and that the tube isn’t bulging or pinched. Also, ensure that proper symptoms of flat tires are checked if you experience issues during the process.
Safety precautions are essential throughout this process. Always wear gloves to protect your hands from dirt and sharp edges. Make sure your bike is stable—either supported by a bike stand or leaned securely against a solid object—so it doesn’t topple while you work. When inflating the tire, do so in a clear, open space, and keep a safe distance from the valve to avoid sudden bursts of air. Use a pump that’s appropriate for your tire size, and don’t overinflate; check the recommended pressure printed on the tire sidewall. Overinflation can cause the tire to blow off the rim or burst, creating a hazard.
After everything’s reassembled, double-check that the tire is seated properly and the valve is secure. Spin the wheel to confirm it rotates smoothly without wobbling, and listen for any hissing sounds that might indicate a leak. Finally, ride cautiously for a few yards to make sure the repair holds well. Replacing a tube at the curb is straightforward when you follow proper tire installation techniques and prioritize safety precautions—getting you back on your ride quickly and safely.
Frequently Asked Questions
How Do I Identify a Damaged or Leaking Curb Tube?
You can identify a damaged or leaking curb tube by performing a visual inspection for cracks, holes, or corrosion. Look for water pooling or damp spots around the curb area, which may indicate a leak. Use leak detection methods like listening for hissing sounds or using a dye test to confirm leaks. If you notice any irregularities, it’s time to replace the curb tube to prevent further damage.
What Safety Precautions Should I Take Before Replacing a Curb Tube?
Before replacing a curb tube, you should wear personal protective equipment like gloves, safety glasses, and a mask to prevent injuries. Make sure you turn off the water supply and depressurize the system. When working with tools, handle them carefully and use the right ones for the job. Keep your workspace clean and stay alert to avoid accidents. Taking these precautions helps guarantee your safety throughout the process.
Can I Replace a Curb Tube Without Professional Tools?
Like a knight without armor, trying to replace a curb tube without professional tools isn’t advisable. DIY techniques might seem tempting, but you risk damage or injury. You’ll need specialized equipment to guarantee a proper fit and safety. It’s best to seek professional assistance, especially if you’re unfamiliar with plumbing. Save yourself trouble and potential hazards—call a professional who has the right tools and expertise for the job.
How Long Does It Take to Replace a Curb Tube?
Replacing a curb tube typically takes about 30 minutes to an hour, depending on your experience and the specific setup. During curb tube maintenance, you’ll need to gather the right tools and be prepared for some dirt and debris. The replacement costs vary, but expect to spend between $50 and $150, including parts and labor if you hire someone. Doing it yourself can save money but requires careful attention to detail.
Are There Specific Brands or Models Recommended for Curb Tube Replacement?
When you’re replacing a curb tube, stick with trusted brands like ZoneGuard or FlexiFlow, known for durability and reliable performance. Compare models by checking their material quality and compatibility with your system. Visualize a sturdy, weather-resistant tube fitting snugly into your curb, guaranteeing no leaks. By choosing reputable brands and doing model comparisons, you’ll secure a smooth, long-lasting replacement that keeps your curb functioning perfectly, rain or shine.
Conclusion
Now that you know how to replace a tube at the curb, you’re all set to handle flats with confidence. Just remember, when the going gets tough, the tough get going—don’t let a flat slow you down. With a little practice, you’ll be able to tackle this task smoothly and quickly, keeping your ride in top shape. Think of it as fixing the leak before it sinks your day—staying prepared makes all the difference.