If you get a flat tire, first pull over safely and assess the damage. Use emergency tools like a jack, lug wrench, and patch kit to inspect and repair if possible. For small punctures, you can patch the tire or use a sealant as a temporary fix. If the damage is severe, replacing the tire with a spare might be best. Continuing will teach you step-by-step techniques to handle flats confidently and efficiently.
Key Takeaways
- Safely pull over and assess the tire for damage or embedded objects at the first sign of a flat.
- Use emergency tools like a jack, lug wrench, and tire patch kit to prepare for repair or tire replacement.
- Clean the puncture area thoroughly before applying a patch or sealant for a secure, long-lasting fix.
- Follow the patch kit instructions carefully to ensure proper adhesion and seal the puncture effectively.
- Verify the repair’s stability and inflate the tire to the recommended pressure before driving again.
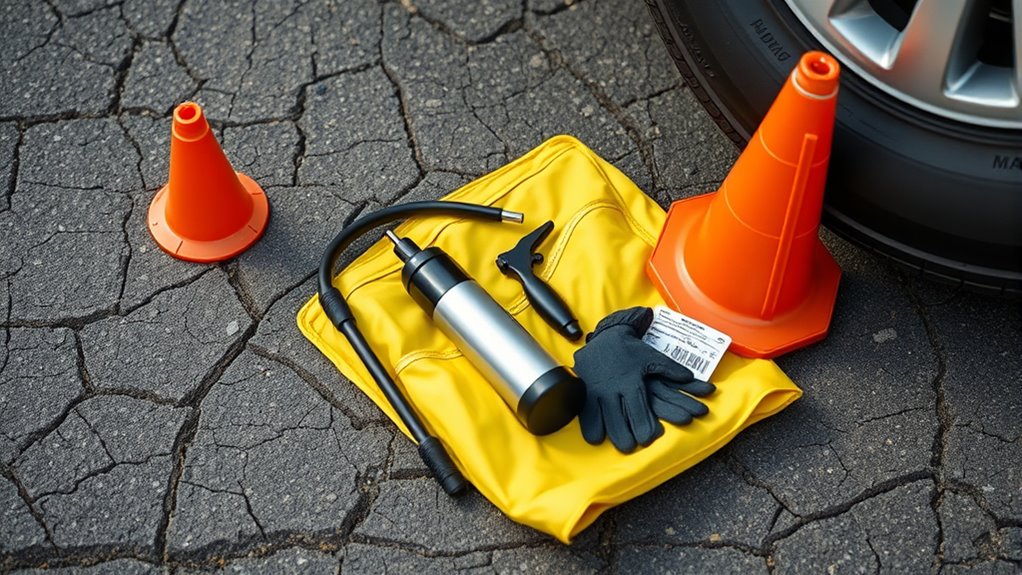
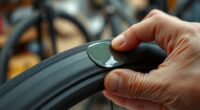
Ever experienced the frustration of a flat tire while on the road? It’s frustrating, inconvenient, and can throw off your entire day. The good news is, with a little preparation and know-how, you can handle it yourself. One of the most effective ways to fix a flat is through tire patching, which involves sealing the puncture from the inside or outside of the tire to restore its integrity. Before you hit the road, it’s smart to keep a set of emergency tools in your vehicle—these might include a tire patch kit, a jack, a lug wrench, and a portable air compressor. Having these items on hand means you’re ready to act quickly when trouble strikes.
When you notice the warning signs of a flat—like a thumping sound, loss of control, or visual damage—you should pull over safely. Once stopped, your first task is to assess the problem. If you have a spare tire, the process becomes simpler, but if you’re going for a more permanent fix like tire patching, you need to prepare accordingly. First, use your emergency tools to lift the vehicle safely, then remove the tire. If you see a puncture, you can attempt to patch it yourself by following the instructions in your tire patch kit. Typically, this involves cleaning the area around the puncture thoroughly, applying the patch, and ensuring it adheres well. This method is a reliable, cost-effective way to get you back on the road without waiting for roadside assistance.
If you don’t have a patch kit, or if the damage is too severe, your emergency tools can still assist. Many roadside emergency kits include sealant sprays that temporarily seal small punctures, allowing you to drive to the nearest service station. However, these are only temporary fixes. For a long-term solution, a proper tire patch is your best bet. Keep in mind that tire patching requires some basic mechanical skills, so it’s worth practicing at home before you’re stranded on the side of the road. Additionally, always check your tire’s condition after patching to ensure it’s secure and safe to drive.
Having emergency tools ready and knowing how to apply a tire patch can save you time, money, and stress. It’s a skill that every driver should learn, so you’re not left stranded or forced into expensive roadside services. With patience and the right tools, fixing a flat can be a manageable task, restoring safety and confidence in your driving experience. Remember, being prepared is your best defense against unexpected setbacks on the road. Knowing your headphone compatibility options can also prevent future inconveniences when using audio devices on the go.

AUTOWN Tire Repair Kit – 68pcs Heavy Duty Tire Plug Kit, Universal Tire Repair Tools to Fix Punctures and Plug Flats Patch Kit for car Motorcycle, Truck, ARB,ATV, Tractor, RV, SUV, Trailer
- Professional Quality Materials: Made of high-quality steel for durability
- Safe and Long-lasting: Excellent adhesion and flexibility for tough repairs
- Versatile Tire Repair Kit: Suitable for cars, motorcycles, trucks, and more
As an affiliate, we earn on qualifying purchases.
As an affiliate, we earn on qualifying purchases.
Frequently Asked Questions
Can I Fix a Flat Tire on All Types of Vehicles?
You can fix a flat tire on most vehicle types, but the repair techniques vary. For cars and trucks, a simple patch or plug often works, while motorcycles may need specialized tools and methods. Larger or specialized vehicles, like RVs or trailers, might require professional repairs. Always assess your vehicle type and use appropriate repair techniques to guarantee safety and effectiveness, and consider calling a professional if you’re unsure.
What Should I Do if the Sealant Doesn’T Work?
You might find it surprising, but if the sealant doesn’t work, don’t panic. Instead, consider Sealant Alternatives like a spare tire or a plug kit to get you moving. If these options fail or you’re unsure, it’s best to seek Professional Repairs. Sometimes, sealants just can’t fix certain punctures, and calling for help guarantees your safety and proper tire repair without risking further damage.
Is It Safe to Drive Long Distances After Using Fix a Flat?
You shouldn’t drive long distances after using Fix a Flat because it can jeopardize tire maintenance and roadside safety. The sealant might not securely fix the flat, leading to potential blowouts or further damage. Always check your tire pressure and inspect the repair before hitting the road again. If you’re unsure, it’s safer to have a professional inspect or replace the tire to ensure your safety and proper roadside safety.
How Often Should I Check My Spare Tire?
You should check your spare tire at least once every six months. During these checks, guarantee the tire pressure is at the recommended level and inspect for any signs of damage or wear. Regular tire rotation helps maintain even tread wear, which also benefits your spare. Keeping your spare in good condition ensures you’re prepared if you need to replace a flat tire, providing peace of mind on the road.
Can I Use Fix a Flat on a Slow Leak?
You can use Fix a Flat on a slow leak, but proceed with caution. While it temporarily seals the leak, it’s not a permanent fix. Afterward, check your air pressure maintenance and schedule a professional tire rotation to ensure safety and longevity. Remember, sealing a slow leak with Fix a Flat should be a short-term solution, not a substitute for proper repairs. Always get your tire inspected soon after using the product.
Conclusion
Now that you know how to fix a flat tire, you’re better prepared for unexpected roadside emergencies. Did you know that about 78% of drivers have experienced a flat tire at least once? Being confident in changing your tire not only saves time and money but also keeps you safe on the road. Keep your toolkit handy, stay calm, and remember these steps—you’re ready to handle a flat like a pro!