When installing or removing bike pedals, remember to check the markings “L” and “R” and use the right tools. Hand-thread pedals first to avoid cross-threading, then tighten securely with a wrench or Allen key—don’t overtighten. For removal, turn the right pedal counterclockwise and the left clockwise. Applying grease to threads helps prevent seizing. If you want to keep your pedals working smoothly and avoid damage, these tips are just the beginning.
Key Takeaways
- Always identify pedal side markings (“L” or “R”) and install accordingly to prevent thread damage.
- Hand-tighten pedals into crank arms before using tools to ensure proper threading and avoid cross-threading.
- Apply a thin layer of bike-specific grease to pedal threads to prevent seizing and facilitate future removal.
- Turn right pedals clockwise and left pedals counterclockwise during installation; reverse directions for removal.
- Use the correct size tool and avoid overtightening to prevent stripping threads and damage to crank arms.
Whether you’re upgrading your bike or replacing worn-out pedals, installing and removing pedals properly is vital to guarantee safety and performance. The first step is understanding the tools needed for the job. Typically, you’ll need a pedal wrench or a compatible Allen wrench, depending on your pedals’ design. Some pedals require a 15mm wrench, while others use a 6mm or 8mm Allen key. It’s also helpful to have some bike grease on hand to prevent seizing and make future removals easier. Before you begin, check that you have the right tools to avoid damaging the pedals or crank arms.
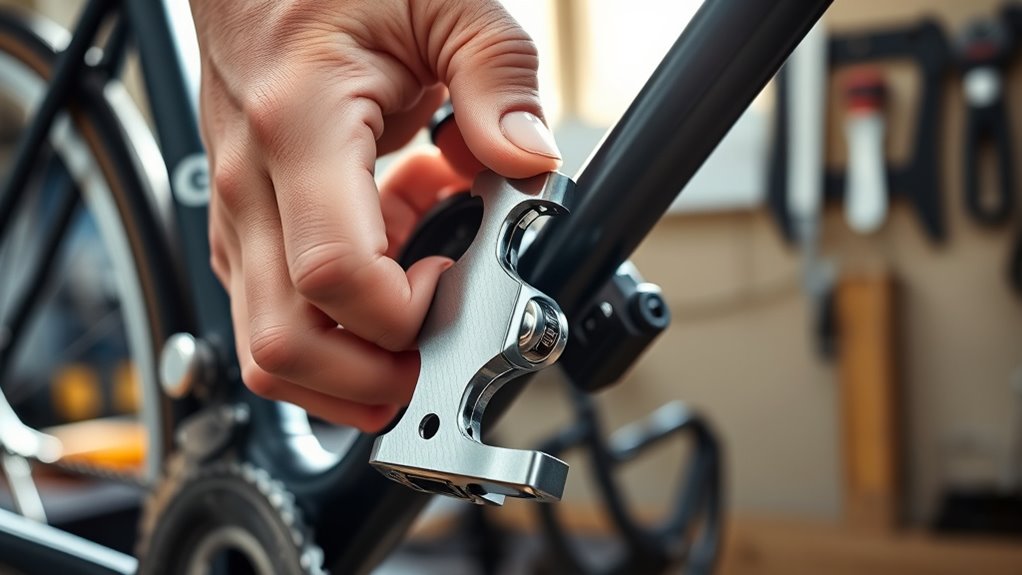
When installing pedals, it’s indispensable to pay attention to the thread direction. Most pedals are marked with an “L” or “R” to indicate left or right. Right pedals tighten clockwise, while left pedals tighten counterclockwise. A common mistake is installing pedals on the wrong side or forcing them in the wrong direction, which can strip the threads or damage the crank arm. To avoid this, always double-check the markings and apply a thin layer of grease to the pedal threads. Grease helps prevent corrosion and makes future removal smoother. Carefully thread the pedal into the crank arm by hand first, ensuring it turns smoothly and doesn’t cross-thread. Once hand-tight, use your wrench or Allen key to tighten the pedal securely, but avoid overtightening, which can damage the crank or strip the threads.
Removing pedals can sometimes be trickier than installing them, especially if they’ve been on for a long time or exposed to the elements. Use the correct tool and turn in the opposite direction of tightening: for the right pedal, turn counterclockwise; for the left pedal, turn clockwise. Applying a bit of penetrating oil beforehand can loosen stubborn pedals. When using your tools, ensure they are fully engaged with the pedal flats to prevent slipping and damaging the pedal or crank arm. If you encounter resistance, don’t force it excessively—try gently rocking the pedal back and forth or applying more penetrating oil and giving it some time to work.
A common mistake during removal is using the wrong tool or applying uneven force, which can strip the pedal’s flats or damage the crank arm. Always use the appropriate tools, and if a pedal won’t budge, stop and reassess—forcing it can lead to costly repairs. Additionally, understanding the thread direction and proper technique is essential for preventing damage and ensuring smooth operation. By taking your time, using the right tools, and paying attention to thread directions, you’ll make pedal installation and removal a straightforward process. Proper technique not only prolongs the life of your pedals and crank arms but also guarantees your safety during rides.

Bike Pedal Wrench, Bicycle Pedal Removal Tool with Extra Long Handle for Efficient Repair of Road and Mountain Bikes
- Multi-Function Design: Includes spanners and hex sockets for various pedals
- Durable Construction: Made from heavy-duty steel with laser-cut finish
- Extended Handle: 320mm handle for increased leverage and ease of use
As an affiliate, we earn on qualifying purchases.
As an affiliate, we earn on qualifying purchases.
Frequently Asked Questions
Can I Reuse Old Pedals or Should I Always Replace Them?
You can reuse old pedals if they still show no signs of damage or excessive wear, but it’s wise to contemplate their pedal lifespan and replacement frequency. If pedals are cracked, loose, or squeaking, replace them to ensure safety and performance. Regularly inspecting your pedals helps determine if they’re still reliable. Generally, replacing pedals every couple of years or after noticeable wear keeps your ride smooth and safe.
What Tools Are Essential for Pedal Installation and Removal?
You’ll need a pedal wrench or an Allen key, depending on your pedal’s compatibility and threading. A pedal wrench is essential for most standard pedals, providing enough leverage to loosen or tighten without damaging the threading. For bikes with clipless pedals, an Allen key (usually 6mm or 8mm) is required. Always verify your tools match your pedal’s threading to avoid cross-threading or stripping, making installation and removal smoother.
How Do I Identify the Correct Pedal Thread Type?
Did you know that most bikes use either English or Italian pedal thread standards? To identify the correct pedal thread type, check your bike’s manufacturer specifications or inspect the existing pedals for markings. Understanding pedal compatibility is essential, as mismatched threads can strip or damage the crank arms. Always make sure you match the pedal thread standards with your bike’s crank threads for a smooth, safe ride.
Are There Safety Precautions to Consider During Pedal Removal?
When removing pedals, you should always wear protective gear like gloves and goggles to prevent injury. Use proper technique by turning the wrench counterclockwise for the left pedal and clockwise for the right. Apply steady pressure to avoid slipping. Be cautious of sharp edges and guarantee your bike is stable. Taking these safety precautions helps prevent accidents and makes pedal removal safer and more efficient.
How Often Should I Inspect and Maintain My Bike Pedals?
You should inspect and maintain your bike pedals every 3 to 6 months, depending on your riding frequency and conditions. Regular maintenance extends their lifespan, ensures safety, and improves performance. Look for signs of wear, looseness, or damage, and apply lubricant as needed. Creating a consistent maintenance schedule helps you catch issues early, keeping your pedals in top shape and preventing potential accidents during rides.
Conclusion
Think of your pedals as the heartbeat of your bike—keeping everything moving smoothly. With these tips, you’ll tackle installs and removals like a pro, avoiding unnecessary scrapes and slips. Remember, patience and the right tools are your best friends on this ride. Keep your hands steady and your mind focused, and soon you’ll be cruising confidently, knowing you’ve got the skills to keep your bike in perfect rhythm. Happy riding!