
To guarantee a silent ride, plan your cable routes carefully before installation, keeping cables close to the frame and avoiding sharp bends or kinks. Use suitable guides and clips to secure cables firmly without over-tightening, and maintain proper tension to prevent rattling. Regularly check and adjust cable positioning, trim excess lengths, and keep cables away from moving parts or heat sources. For more tips on achieving a smooth, quiet bike, keep exploring these strategies.
Key Takeaways
- Plan cable routes carefully, minimizing sharp bends and ensuring direct paths to reduce noise and interference.
- Use appropriate guides and clips to secure cables tightly, preventing movement and rattling during rides.
- Route cables along natural curves with smooth bends, avoiding sharp kinks to prolong cable life and maintain quiet operation.
- Label and organize cables clearly to prevent tangling, wear, and noise caused by loose or misrouted cables.
- Regularly inspect, adjust tension, and re-secure cables to maintain optimal alignment and silence over time.
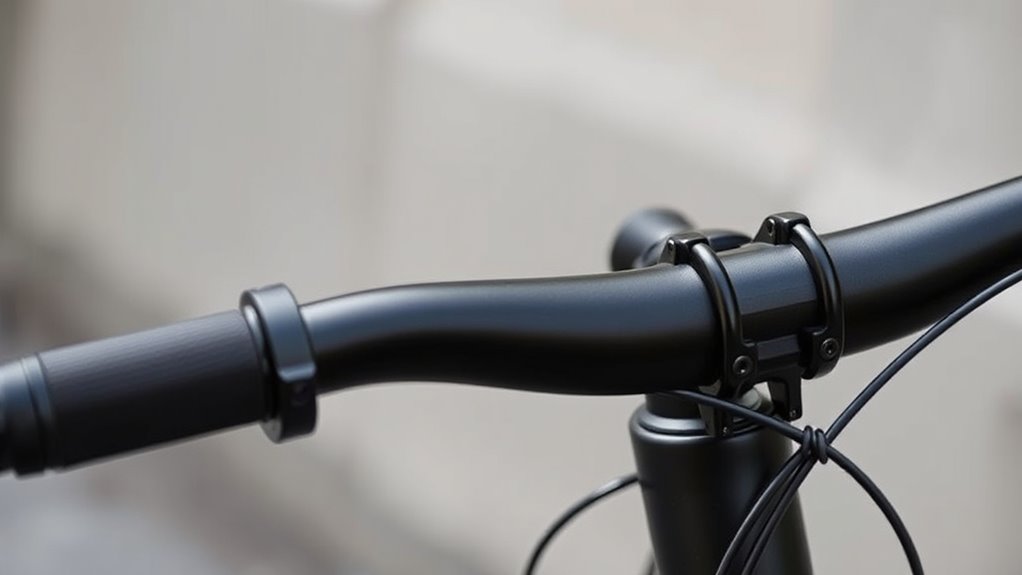
Choosing the Right Cable Guides and Clips

Selecting the right cable guides and clips is vital for maintaining an organized and safe wiring setup. Start by considering cable guide materials—choose durable, flexible, and heat-resistant options like plastic or rubber, which prevent abrasion and reduce noise. When it comes to clip installation techniques, make sure you secure clips firmly but not too tight, to avoid damaging cables. Proper spacing is essential—place clips at regular intervals to prevent sagging and movement. Use clips designed for your cable type and environment, whether for indoor, outdoor, or off-road use. Select guides and clips that match your cable diameter to avoid compression. Well-chosen materials and proper installation techniques keep cables protected, organized, and reduce the risk of wear, guaranteeing a smoother, quieter ride. Additionally, understanding suction power and filtration systems can help ensure your setup maintains optimal performance and longevity. For vehicles like the Kia Sportage or Forte, appropriate cable routing can also contribute to performance tuning, ensuring all modifications function seamlessly without interference.
Planning Your Cable Route Before Installation

Before starting your installation, take a moment to map out your cable route. Choose the most efficient paths that guarantee a cleaner, more reliable setup with easier maintenance down the line. Considering airless technology can also help you stay patient and focused during this process. Additionally, understanding personal finance management strategies can ensure you budget effectively for any necessary tools or upgrades to your setup. Being aware of signs of spoilage in lemon juice can help you avoid using spoiled liquids that might cause issues with your equipment or setup. Exploring sound healing science principles can also inspire you to incorporate calming elements into your workspace environment.
Map Your Path
Planning your cable route before installation is essential to guarantee a smooth process and reliable connections. Start by mapping out the path, considering the layout of your components and potential obstacles. Use cable color coordination to easily identify different circuits or functions, which simplifies troubleshooting later. Focus on cable length optimization by measuring accurately to avoid excess slack or tight pulls that could cause noise or damage. Keep your route as direct as possible, minimizing bends and avoiding sharp turns that can increase signal interference. Remember to plan for future upgrades or additions, leaving some slack where needed. A well-mapped route ensures a neat, organized setup, reduces installation time, and helps maintain the silence and performance of your system.
Choose Optimal Routes
Choosing the best routes for your cables is crucial to guarantee peak performance and ease of maintenance. Start by considering the cable material, as flexible and durable options like silicone or rubber make routing smoother and reduce noise. Plan your path to minimize bends and avoid sharp angles that can stress the cable. Use cable color strategically to distinguish different types—power, data, or audio—making future adjustments easier. Keep cables away from heat sources, moving parts, and high-traffic areas to prevent damage. Secure cables neatly along the route with clips or ties, avoiding unnecessary tension. Additionally, selecting appropriate cable materials that are resistant to environmental factors can prolong their lifespan and ensure quieter operation. Incorporating cable shielding techniques can further reduce electromagnetic interference and noise, enhancing overall performance. Properly cable management techniques can help prevent tangling and accidental disconnections. Considering cable routing best practices from industry standards can also optimize your installation process. By thoughtfully selecting your route, you’ll ensure your cables stay organized, functional, and silent, contributing to a cleaner, more efficient setup.
Keeping Cables Close to the Frame for Reduced Noise

To keep noise levels down, you should use cable guides effectively to secure cables close to the frame. Tucking cables tightly away minimizes movement and vibrations that cause noise. Opting for inner frame routing is also a smart choice to keep cables neat and quiet. Incorporating cozy textiles such as blankets and throws can create a more comfortable and inviting atmosphere in your bedroom. Additionally, understanding support hours for related services can help when seeking assistance with cable management tools or accessories. Proper cable routing not only reduces noise but also helps in maintaining the overall integrity and performance of your vehicle’s electrical system. Employing encryption software to protect your data during installation can further enhance your system’s security. Checking retail hours today for stores that carry cable management supplies ensures you can get the necessary materials at convenient times.
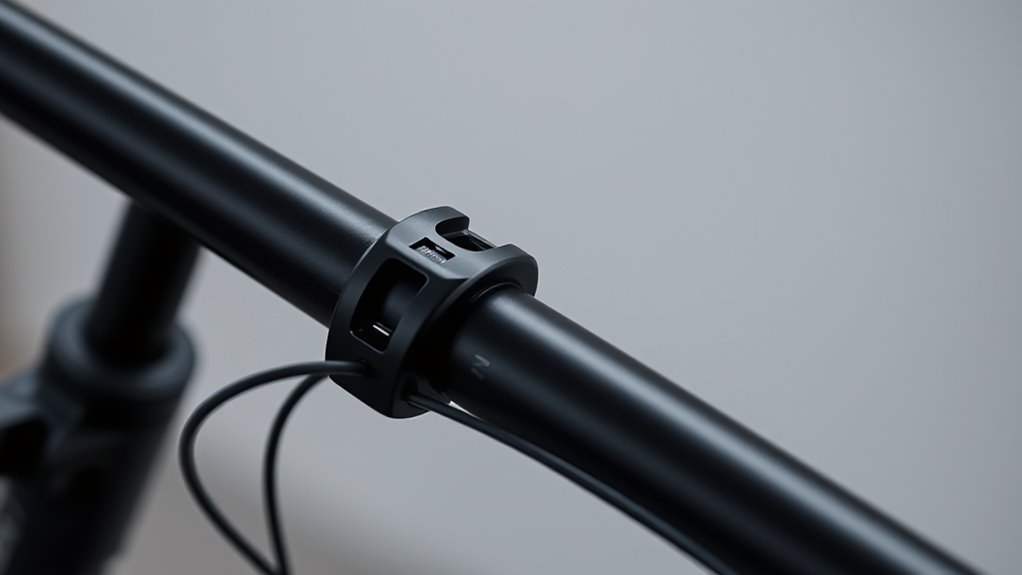
Use Cable Guides Effectively
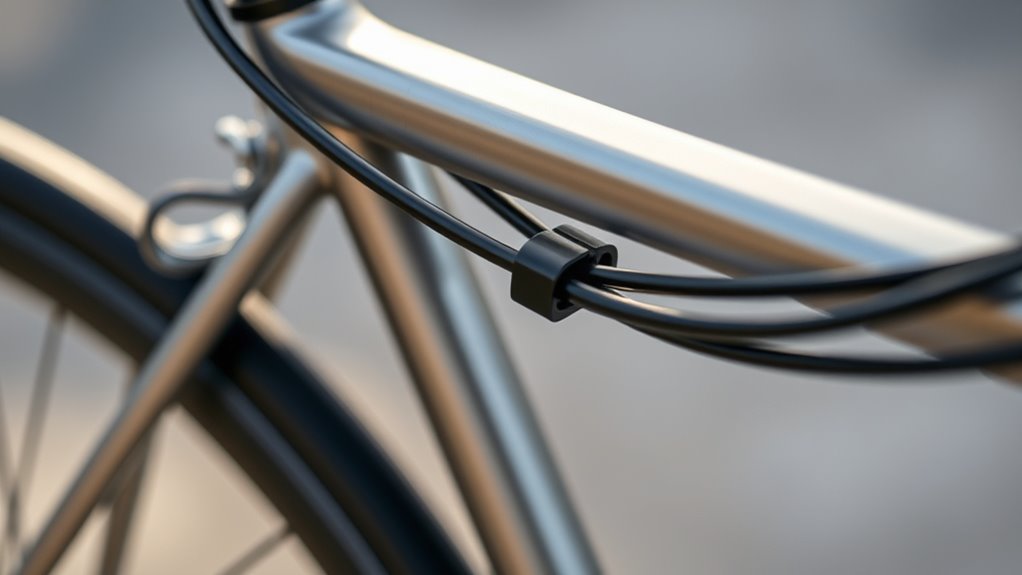
Using cable guides effectively is key to keeping cables close to the frame, which helps reduce noise during rides. Selecting the right cable guide types guarantees a snug fit and minimizes movement. Focus on proper clip installation techniques to secure cables firmly without damaging them or the frame. Properly placed guides prevent rattling, chafing, and vibrations that cause noise. Whether you’re using clips, mounts, or zip ties, ensure they’re tight but gentle on your cables. Regularly check and adjust guides for wear or looseness. When installed correctly, cable guides transform a noisy ride into a whisper-quiet experience. Feel the difference as your cables stay in place, letting you focus solely on the road ahead. Keep your cables close, secure, and silent. Security systems are an example of technology designed to enhance safety and deter theft, similar to how well-installed cable guides prevent unwanted noise and movement.
Tuck Cables Tightly Away
Keeping your cables tightly tucked away is essential for a quiet and smooth ride. When cables stay close to the frame, noise from vibrations decreases markedly. Secure them with zip ties or clips, ensuring they don’t rub against the frame or each other. Proper cable insulation prevents squeaks and rattles, while clear cable labeling helps you identify and adjust cables easily during maintenance. To optimize cable management, consider this quick reference:
| Cable Type | Labeling Tips | Insulation Benefits |
|---|---|---|
| Brake Cables | Use colored tags | Prevents squeaks |
| Shift Cables | Mark with tape | Reduces rattling |
| Derailleur Cables | Numbered tags | Protects against wear |
| Hydraulic Lines | Custom labels | Minimizes noise |
| Electrical Cables | Clear labeling | Keeps cables organized |
Additionally, cable routing techniques help organize cables more effectively and reduce unwanted movement. Tucking cables tightly minimizes movement, noise, and potential damage, ultimately contributing to a quieter and smoother ride. Additionally, proper cable routing ensures cables are less prone to wear and damage over time.
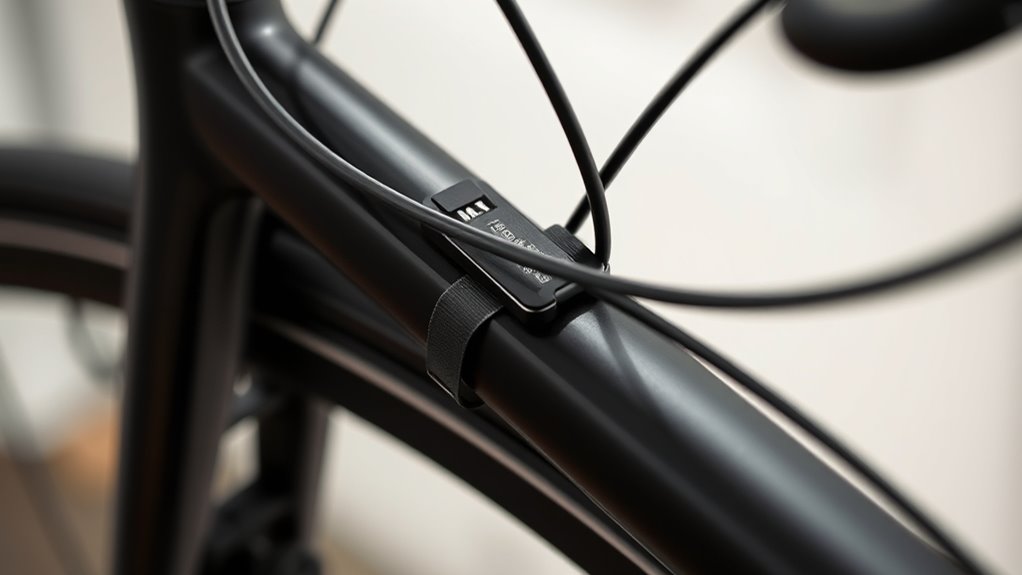
Opt for Inner Frame Routing
Opting for inner frame routing keeps cables close to the bike’s structure, which considerably reduces noise caused by vibrations and movement. Internal routing hides cables, creating a sleek look and minimizing exposure to dirt and debris. This method guarantees your cables stay secure, preventing rattling and unwanted sounds during rides. By choosing hidden cables, you also protect them from damage, extending their lifespan.
Feel the difference as your ride becomes smoother and quieter:
- Experience serenity with less clatter and creaking
- Enjoy a cleaner, more aerodynamic appearance
- Feel confident knowing cables are protected
- Revel in a silent, more enjoyable cycling experience
Using Proper Tension to Prevent Rattling

When cables are too loose, they tend to rattle and create unwanted noise, which can be distracting and reduce overall system stability. Proper cable tension is crucial for rattling prevention and a quiet ride. If the tension is too low, vibrations cause noise; too tight, and it strains components. To find the right balance, gently pull the cable—there should be slight tension without resistance. Use a cable tension gauge if needed, ensuring smooth, firm control. Proper tension keeps cables snug against guides, preventing movement. Maintaining correct tension also supports the system’s overall reliability and prolongs component lifespan. Regular adjustments and inspections help maintain optimal tension and prevent issues caused by cable slack.
Securing Cables to Avoid Excess Movement
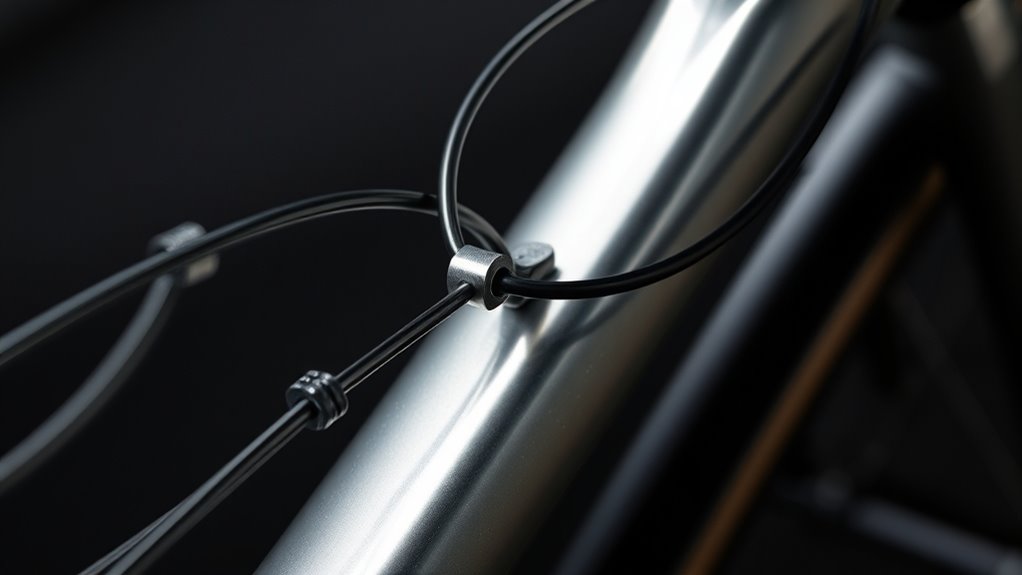
After setting the proper tension, securing cables firmly in place prevents them from shifting during operation. Properly fixed cables avoid unnecessary noise and wear, guaranteeing a smoother, quieter ride. Use cable insulation to protect against friction and vibration, reducing movement that can cause rattling. Label your cables clearly to easily identify and adjust them later, preventing accidental loosening. Secure cables with high-quality clips or zip ties, but avoid overtightening, which can damage insulation. Regularly check connections to guarantee everything stays in place. When cables are stable, you reduce the risk of chafing and noise, creating a more peaceful experience. Remember, well-secured cables not only improve silence but also extend their lifespan and maintain peak performance.
Avoiding Sharp Bends and Kinks in Cables
To prevent damage and guarantee smooth cable operation, you should avoid creating sharp bends or kinks in your cables. Sharp bends reduce cable flexibility, increasing stress on the internal wires and risking breakage. Always pay attention to the bend radius—the minimum curve your cable can handle without damage. Keeping bends gentle ensures the cable maintains its integrity and suitable performance. Use cable guides or clips to direct routing along natural curves, avoiding tight loops or angles. If a bend must be made, do so gradually, maintaining the recommended bend radius. This not only prolongs the lifespan of your cables but also ensures quieter, more efficient operation of your components. Proper routing with smooth curves is essential for a clean, silent ride.
Regular Maintenance and Re-Check of Cable Routing
Regularly inspecting your cable routing helps catch issues before they cause problems. Over time, cables can shift, loosen, or develop wear, affecting your ride’s silence and performance. During maintenance, focus on lubrication maintenance to keep cables moving smoothly and prevent squeaks. A thorough cable inspection helps identify frays, corrosion, or any tight bends that might cause noise or damage.
Remember to:
- Feel for any resistance or stiffness in cables
- Look for signs of wear or corrosion
- Re-route cables to avoid sharp bends or kinks
- Tighten or replace loose or damaged fittings
Consistent maintenance ensures your cables stay silent and reliable, giving you a smoother, more enjoyable ride every time.
Tips for Discreet and Aesthetic Cable Management
Achieving a clean and unobtrusive look for your bike’s cable setup enhances both aesthetics and performance. Start by coordinating cable colors with your bike’s frame or components to create a seamless appearance. This simple step reduces visual clutter and highlights a professional finish. Next, focus on cable length optimization—cut excess cable and use adjustable housing stops to prevent slack and tangling. Properly trimmed cables stay out of the way, reducing noise and potential snagging. Use cable guides and clips strategically along the frame to keep everything tidy and secure. Avoid leaving loose ends or excess slack, which can compromise the look and function. With thoughtful cable color coordination and precise length adjustments, your bike will look sleek and operate silently.
Frequently Asked Questions
How Can I Identify the Best Cable Routing Method for Different Bike Types?
To identify the best cable routing method, you should first consider your bike frame compatibility. Different bike types, like road or mountain bikes, require specific cable routing patterns for ideal performance. Check your bike’s design and manufacturer recommendations, and look for routing options that reduce cable friction and noise. Experiment with internal or external routing based on your riding style, ensuring the chosen pattern suits your bike’s frame and enhances your ride.
What Tools Are Essential for Effective Cable Management During Installation?
To manage cables effectively during installation, you’ll need essential tools like cable clips and cable ties. Cable clips help secure cables neatly along the frame, preventing movement and noise, while cable ties keep bundles tight and organized. Use a cable cutter for clean cuts, and a flat-head screwdriver or pliers to tighten clips. These tools guarantee your cables stay in place, creating a clean, silent, and efficient setup.
How Often Should I Inspect and Recheck Cable Routing for Optimal Performance?
Think of your cable routing as a garden needing regular tending. You should follow a steady maintenance schedule, inspecting your cables every 1 to 3 months to catch any issues early. This inspection frequency guarantees your setup stays silent and efficient, preventing tangles or wear that could disrupt performance. Regular checks help you nurture a smooth, quiet ride, just like tending a healthy garden keeps it thriving.
Are There Specific Materials That Reduce Cable Noise More Effectively?
When choosing materials for cable routing, opt for those with excellent noise dampening qualities. Silicone or rubber-lined clips and sleeves help reduce vibrations and cable noise effectively. Avoid hard plastics that amplify sound. Your goal is to select material that absorbs and dampens vibrations, ensuring a quieter ride. Regularly inspecting your cable setup with these materials improves performance and keeps noise levels minimal, making your cycling experience more pleasant.
Can Custom Cable Guides Improve Both Aesthetics and Noise Reduction?
Custom cable guides can definitely improve both cable aesthetics and noise reduction. By choosing guides that hold cables snugly and prevent movement, you minimize rattling and unwanted noise. Additionally, well-designed guides make your bike look cleaner and more streamlined. Incorporating noise reduction techniques, like rubber-lined guides or smooth routing paths, enhances silence and visual appeal. Overall, custom guides are a smart upgrade for a quieter, more polished ride.
Conclusion
By choosing the right guides, planning your route, and securing cables properly, you create a smoother, quieter ride. Keep cables close to the frame, avoid sharp bends, and perform regular maintenance to maintain silence and performance. When you prioritize neatness, you enhance both function and aesthetics. Ultimately, good cable routing isn’t just about silence; it’s about the confidence of knowing your ride is optimized, quiet, and ready to move seamlessly—every time you hit the road.