To replace brake pads yourself, start by gathering quality tools like a jack, lug wrench, and caliper piston tool, along with new brake pads and safety gear. Safely lift your vehicle, chock the wheels, and remove the tire to access the brake assembly. Carefully remove the old pads, inspect the rotors, then install the new pads, ensuring everything is torqued correctly. Finish with bedding the pads properly; if you keep going, you’ll master this simple, cost-saving process.
Key Takeaways
- Gather all necessary tools, high-quality brake pads, and safety gear before starting to ensure a smooth, safe replacement process.
- Properly lift and support the vehicle using a jack and jack stands, then remove the wheel to access brake components safely.
- Inspect brake rotors and calipers; remove old brake pads carefully, checking for damage or uneven wear.
- Install new brake pads, press the caliper piston back, and reassemble all components, ensuring everything is tightened to manufacturer specs.
- Bed-in the new pads with controlled braking to ensure optimal performance and check for leaks or issues before driving regularly.
Gathering the Right Tools and Materials

Before you begin replacing your brake pads, having all the necessary tools and materials is vital. Start by organizing your tools to guarantee everything is within reach and easy to find—this saves time and keeps you focused. Essential tools include a jack, lug wrench, socket set, brake caliper piston tool, and screwdrivers. For material selection, choose high-quality brake pads compatible with your vehicle, along with brake cleaner, gloves, and safety glasses. Proper tool organization minimizes mistakes and streamlines the process, making the job smoother and safer. Double-check that you have everything before starting, so you don’t face delays or interruptions. Well-selected materials and an organized toolkit set the foundation for a successful brake pad replacement. Additionally, understanding the best airless paint sprayer options can help you complete related projects more efficiently. To ensure optimal performance of your tools, regular maintenance, such as filter replacement and proper oiling, can extend their lifespan and reliability. Staying informed about market trends in automotive tools can also help you invest in the most effective equipment for future projects. Incorporating safety equipment, like gloves and safety glasses, further enhances your protection during the process.
Safely Preparing Your Vehicle for Brake Work

Before you start working on your brakes, make sure your vehicle is secure on a flat surface. Use wheel chocks and properly lift and support the car with jack stands. Gather all the necessary tools so you’re ready to work efficiently and safely. Additionally, familiarize yourself with the importance of proper lighting and workspace setup to ensure safety and precision during your brake maintenance.
Secure Vehicle Properly
To make certain your safety and prevent accidental movement, it’s vital to secure your vehicle properly before starting brake work. First, engage the parking brake and place wheel chocks behind the tires that remain on the ground. This prevents any rolling, especially if your vehicle has a poor vehicle alignment. If you’re lifting the car, use a jack and jack stands rated for your vehicle’s weight. Confirm the car is stable before working underneath. Securing the vehicle also helps keep it steady during brake fluid bleeding, avoiding unexpected shifts. Double-check that the stands are on a flat surface and that the vehicle is level. Properly securing your car minimizes risks and creates a safe environment for replacing brake pads effectively. Utilizing appropriate vehicle safety precautions ensures a safer and more efficient brake replacement process. Additionally, consulting tuning guidelines can provide insight into handling modifications safely during maintenance. Remember that properly securing your vehicle is essential for both safety and effectiveness during maintenance tasks. Incorporating cybersecurity best practices when working with online repair manuals or digital tools can further protect your data and devices during the process. Using proper tool selection can also improve the efficiency and safety of your brake work.
Gather Necessary Tools
Ensuring you have all the necessary tools ready is essential for a smooth brake pad replacement. Start with a tools checklist that includes a jack, jack stands, lug wrench, socket set, brake caliper piston tool, screwdrivers, and pliers. Don’t forget to have brake fluid on hand, as you may need it for bleeding the brakes later. Check your vehicle’s manual if you’re unsure about specific tools. Prepare a container to catch any brake fluid that may leak. Having everything organized before you begin prevents delays and keeps the process safe. Confirm your tools are in good condition to avoid mishaps. Familiarizing yourself with Kia Tuning techniques can help you understand the importance of precise techniques in delicate tasks. With your tools checklist complete and brake fluid ready, you’re set to work efficiently and safely on your brake pads.
Removing the Wheel and Accessing the Brake Assembly

Start by loosening the wheel lug nuts while the tire is still on the ground. Then, lift the vehicle safely with a jack and secure it with jack stands. Carefully remove the wheel to gain clear access to the brake assembly. If working on an electric dirt bike, be mindful of any electrical components that may be present near the brake area. Additionally, understanding the best arcade machines for home game rooms can inspire your custom setup for a dedicated gaming or maintenance space. Recognizing the importance of proper safety precautions ensures a smooth and secure brake pad replacement process.
Loosen Wheel Lug Nuts
Before removing the wheel, loosen the lug nuts while the tire is still on the ground to prevent the wheel from spinning. This step guarantees stability as you work. Next, follow these tips:
- Use a properly sized lug wrench for leverage and avoid stripping nuts.
- Loosen each lug nut a little at a time in a star pattern to maintain even pressure.
- Don’t fully remove the nuts yet; just loosen them enough for easy removal later.
- Remember, a misaligned wheel can affect wheel alignment and brake fluid flow, so handle nuts carefully.
- Properly loosening lug nuts helps prevent potential damage to the brake assembly and ensures safer removal.
- Ensuring the wheel is properly supported during removal is crucial for safety and to prevent damage. Additionally, maintaining proper digital literacy can aid in safely managing tools and understanding vehicle components.
- Familiarity with auto maintenance best practices can help you diagnose issues early and perform safer, more effective repairs. Incorporating appliance testing knowledge can also help prevent damage during repairs by ensuring safety standards are met.
Once the lug nuts are loosened, you can safely lift the vehicle, remove the wheel, and access the brake assembly without risking damage or injury.
Elevate Vehicle Safely
With the lug nuts loosened, the next step is to lift the vehicle safely to remove the wheel. Properly elevating your vehicle is essential for safe vehicle maintenance and access to the brake assembly. Use a reliable jack rated for your car’s weight, and place it on a flat, stable surface. Always engage the parking brake and chock the tires that remain on the ground to prevent movement. Position the jack at the manufacturer’s recommended lift points to avoid damage. Once elevated, securely support the vehicle with jack stands. Never rely solely on the jack. Following these safety precautions guarantees stability while you work, reducing the risk of injury and making your brake pad replacement process safer and more efficient.
Remove Wheel Carefully
Once the vehicle is securely elevated and supported, you can begin removing the wheel. Before doing so, check the tire pressure to verify it’s at the recommended level; this helps prevent damage and makes removal easier. Follow these steps:
- Loosen lug nuts slightly while the wheel remains on the ground.
- Use a jack to lift the vehicle, then fully remove the lug nuts.
- Carefully pull the wheel straight off, avoiding tilting to prevent damaging the hub or affecting wheel alignment.
- Place the wheel aside in a safe spot, keeping it upright to avoid deformation.
Removing the wheel exposes the brake assembly for pad replacement. Keep in mind, proper handling preserves wheel alignment and ensures safe reinstallation.
Inspecting and Measuring the Existing Brake Pads and Rotors

To guarantee your brake system is in good shape, start by inspecting the thickness of your brake pads and the condition of your rotors. Check the brake pad thickness; if it’s less than 3mm, it’s time to replace them. Measure carefully using a ruler or a caliper to ensure accuracy. Next, examine the rotor surface quality—look for deep grooves, cracks, or uneven wear. The rotor should have a smooth, even surface; any scoring or warping indicates it may need resurfacing or replacement. Also, listen for unusual noises when braking, which can signal rotor issues. Proper inspection assures you catch problems early and helps you determine whether the rotors need attention before installing new brake pads.
Removing the Old Brake Pads and Preparing the Caliper
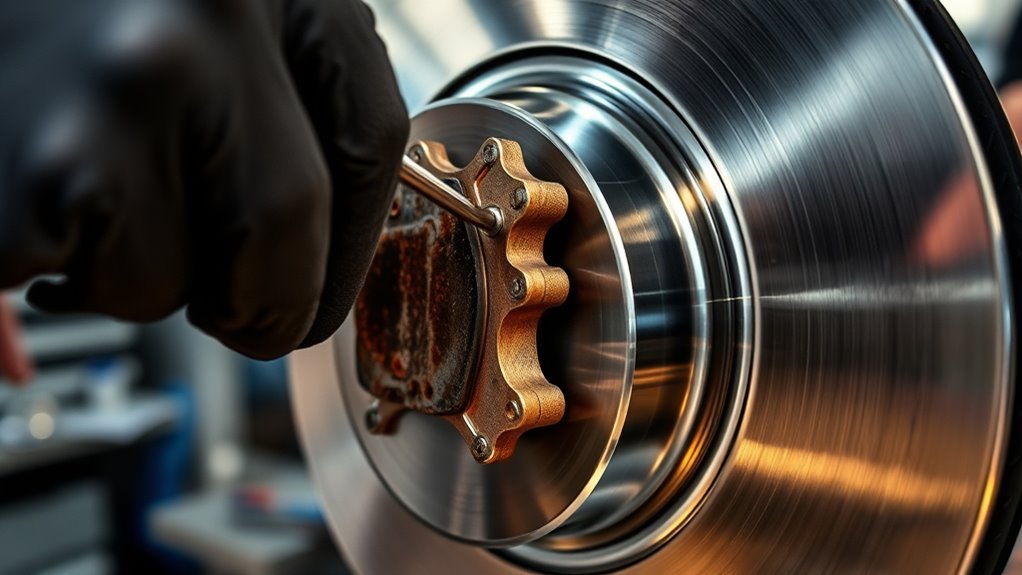
Before installing new brake pads, you need to remove the old ones and prepare the caliper. Start by safely lifting your vehicle and removing the wheel. Then, follow these steps:
- Carefully disconnect the brake caliper to access the brake pads.
- Remove the retaining clips or pins holding the old pads in place.
- Gently slide out the worn brake pads, keeping an eye on the brake fluid level to prevent overflow.
- Inspect the caliper for damage and consider caliper repair if needed before installing new pads.
This process ensures the caliper is clean and ready, preventing issues during pad installation. Proper caliper repair and attention to brake fluid levels help maintain brake performance and safety.
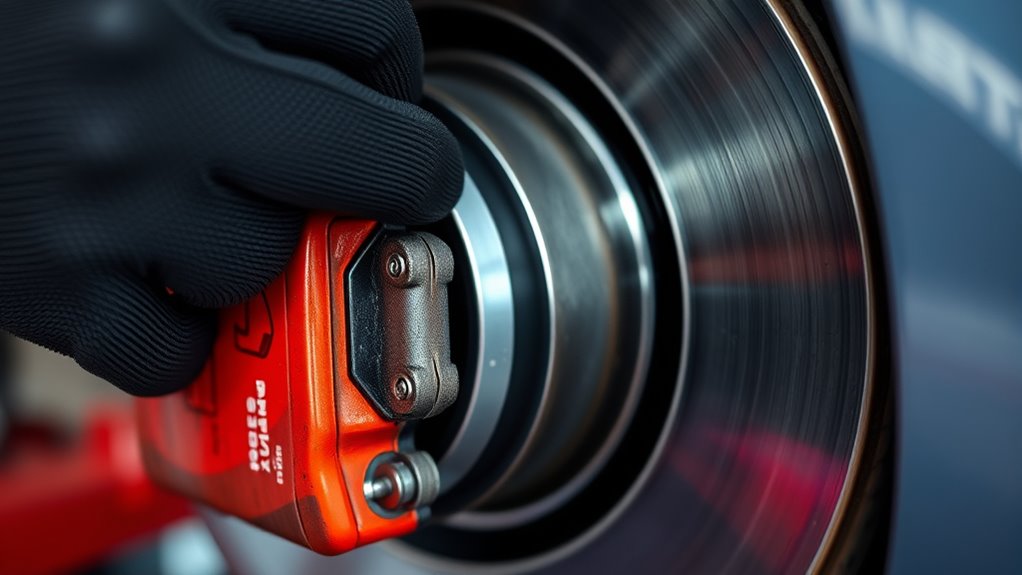
Installing the New Brake Pads and Reassembling the Caliper

After you’ve prepared the caliper and removed the old brake pads, it’s time to install the new ones. Begin by carefully pressing the caliper piston back into the caliper housing, using a piston tool if needed. This step makes room for the new pads and prevents pressure buildup. Make sure the piston moves smoothly and seats fully. Next, position the new brake pads into the caliper, aligning them with the rotor. Reassemble the caliper by securing it with the original bolts, tightening them to the manufacturer’s specifications. As you do this, keep an eye on brake fluid levels; bleeding or topping off may be necessary if fluid has been displaced. Once assembled, double-check all connections before moving on to test driving.
Bedding in the New Brake Pads for Optimal Performance
Bedding in your new brake pads is essential to guarantee they perform effectively and last longer. The bedding process helps transfer a thin layer of brake pad material onto the rotor, ensuring ideal contact and reducing noise. To properly bed your brakes, follow these steps:
- Accelerate to about 30 mph, then smoothly apply moderate braking to slow down without stopping.
- Repeat this 8–10 times to heat up the brake pad material.
- Apply firm, steady pressure to bring the vehicle to a complete stop, then release.
- Drive gently for a few minutes to let the brake pad material settle.
This process improves the bonding of the brake pad material with the rotor, maximizing stopping power and reducing uneven wear.
Final Checks and Test Drive to Ensure Proper Functioning

Once you’ve finished bedding in your new brake pads, it’s time to perform final checks and take a test drive to confirm everything functions properly. Start by inspecting the brake fluid level and quality—ensure it’s at the recommended level and free of contaminants. Check for any leaks around the calipers and brake lines. If the brake fluid appears dirty or low, consider brake system bleeding to remove air bubbles that could affect braking performance. During the test drive, gradually apply pressure to the brake pedal to verify it feels firm and responsive. Test braking at various speeds to ensure the pads grip smoothly without squealing or pulsing. These steps confirm your brake system’s safety and proper operation before hitting the road confidently.
Frequently Asked Questions
Can I Replace Brake Pads Myself if I Have No Prior Experience?
You can replace brake pads yourself, but it’s important to prioritize DIY safety. If you have basic mechanical skills and understand the process, you can tackle it. Make sure you have the right tool requirements, like a jack, lug wrench, and brake caliper tools. Follow detailed instructions carefully, and don’t rush. If you’re unsure, consulting a professional or watching tutorials can help you avoid mistakes and guarantee safe, effective repairs.
How Often Should I Check or Replace My Brake Pads?
Sure, you could wait until your brakes squeal or fade, but that’s like waiting for a fire to start before checking the extinguisher. Typically, you should inspect your brake pads every 10,000 to 20,000 miles, depending on your brake pad lifespan and driving habits. Stick to a regular maintenance schedule; it keeps you safe and saves money. Don’t ignore those subtle signs—they’re your car’s way of saying, “Check me.”
What Are Signs That My Brake Pads Need Immediate Replacement?
When your brake pads need immediate replacement, you’ll notice brake noise, like squealing or screeching, that doesn’t go away. You might also feel pedal vibration or pulsing when you press the brake pedal. These signs indicate worn-out pads or uneven wear, which can compromise your safety. Don’t ignore these symptoms—address them promptly to guarantee your braking system works effectively and prevents further damage.
Are There Different Types of Brake Pads I Should Consider?
Imagine choosing the perfect shield for your vehicle—brake pads come in various types, each with unique brake pad materials. You might consider ceramic pads for noise reduction and smoother stops, or semi-metallic pads for durability. Your choice influences your ride’s feel and longevity. Think about what matters most: quiet operation, cost, or performance. Picking the right brake pad type guarantees safe, effective braking tailored to your driving style.
How Long Does a Brake Pad Replacement Typically Take?
Replacing brake pads usually takes about 30 minutes to an hour, depending on your experience and tools. You should consider your brake pad lifespan, which varies but typically lasts 30,000 to 70,000 miles. With the right replacement tools, you can do it yourself efficiently. Just guarantee you have everything ready, follow proper steps, and take your time to avoid damaging components or compromising your safety.
Conclusion
Now that you’ve replaced your brake pads like a pro, you’ve taken control of your vehicle’s safety and performance. Think of this task as tuning a finely crafted instrument—you’ll enjoy smoother stops and quieter rides. Just remember, regular maintenance keeps your brakes singing in harmony. With your new skills and tools in hand, you’re ready to handle brake repairs anytime, turning a formidable chore into a confident DIY victory. Safe driving, and keep those brakes in top shape!