To replace a dropper post cable, start by securing your bike on a stand and noting the cable routing. Remove the old cable, lubricate the inside of the housing, and carefully thread the new cable through, ensuring there are no kinks. Adjust the tension at the lever or saddle clamp and test the dropper’s movement. If you follow these steps, you’ll achieve smooth, reliable control—there’s more to perfecting the process as you continue.
Key Takeaways
- Secure the bike and verify cable tension before removing the old cable.
- Remove shrouds or guides and note cable routing for accurate replacement.
- Lubricate the new cable and housing before carefully threading it through.
- Adjust cable tension at the anchor point for smooth dropper post operation.
- Test the dropper post’s responsiveness and secure all guides and components afterward.

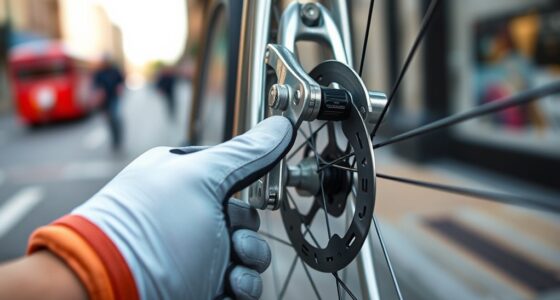
Replacing a dropper post cable is a straightforward process that can substantially improve your bike’s performance. Over time, cables can stretch or fray, causing sluggish or inconsistent dropper operation. When you replace the cable, you regain smooth, reliable control, making your rides safer and more enjoyable. The first step is to verify your bike is secure, ideally on a stand, so you can work comfortably. Before removing the old cable, check the existing cable tension—if it’s too loose or tight, it can affect the new cable’s performance. Correct cable tension is essential; too loose, and the dropper won’t respond promptly, too tight, and it might hinder movement or cause stress on the components.
Replacing a dropper post cable restores smooth, reliable control for safer, more enjoyable rides.
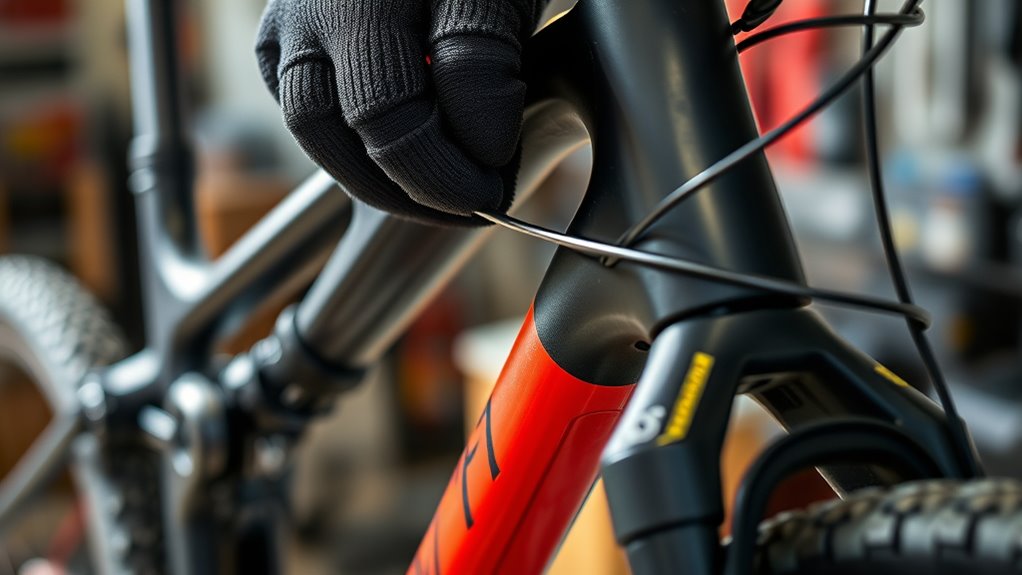
Next, you’ll need to access the cable housing. Carefully remove any shrouds or guide clamps that hold the cable in place along the frame. As you do this, take note of how the cable runs through the housing, so you can replicate it with the new cable. One common mistake is neglecting housing lubrication. Before installing the new cable, apply a suitable lubricant inside the housing. This step reduces friction, prevents premature wear, and ensures smooth operation. Use a cable-specific lubricant or a light oil designed for bike cables. Insert the cable into the housing carefully, making sure it threads smoothly without snagging or resistance. If you notice any kinks or bends in the housing, replace or straighten it to avoid affecting cable movement.
Additionally, choosing high-quality, compatible cables and housing can make a significant difference in performance trustworthiness of the brand. As you pull the cable through, continue to check the cable tension. Adjust it by tightening or loosening the cable at the anchor point, usually near the dropper post lever or saddle clamp. Proper tension allows the dropper post to extend and retract reliably without excess slack or tension. After securing the cable, test the dropper post’s movement. If it’s sluggish or doesn’t hold position well, revisit the tension adjustment. Remember, a well-lubricated housing combined with correct cable tension delivers peak performance.
Finally, reattach any guides or shrouds, ensuring everything is snug and free of debris or dirt. Double-check the operation by repeatedly using your dropper post, making sure it responds instantly and stays in position. Regular maintenance, including checking cable tension and lubrication, extends the life of your cable and keeps your dropper functioning smoothly. Replacing the cable might seem simple, but paying attention to details like housing lubrication and tension adjustment guarantees you’ll enjoy the full benefits of your upgraded dropper post.
Frequently Asked Questions
How Do I Know When My Dropper Post Cable Needs Replacing?
You’ll know your dropper post cable needs replacing if you notice cable corrosion or if the post feels sluggish or doesn’t hold position properly. Cable stretch over time can cause inconsistent movement, so if you’re experiencing difficulty adjusting your dropper or if the cable feels loose or frayed, it’s time to replace it. Regular inspection helps catch these issues early, ensuring smooth and reliable dropper post performance.
Can I Replace the Cable Myself or Should I Seek Professional Help?
You can definitely replace a dropper post cable yourself if you’re comfortable with DIY repair, but seeking professional assistance is a good idea if you’re unsure or want to avoid mistakes. Follow a step-by-step guide carefully, use the right tools, and take your time. If at any point it feels overwhelming, don’t hesitate to contact a bike shop for expert help to ensure your dropper post functions smoothly.
What Tools Are Required to Replace a Dropper Post Cable?
Replacing a dropper post cable is like tuning a musical instrument—you need the right tools for perfect performance. For cable maintenance and tool selection, grab a 5mm Allen wrench, cable cutters, and a cable puller or pick. You might also need a screwdriver. These tools make the process smoother and safer, but if you’re unsure, seeking professional help guarantees the job’s done right without damaging your bike.
How Long Does a Typical Cable Replacement Take?
Replacing a dropper post cable usually takes about 30 to 60 minutes, depending on your experience. You’ll want to verify cable compatibility with your bike model, and follow maintenance tips like lubing the cable to prevent rust and ensure smooth operation. Take your time to remove the old cable carefully, and double-check the new one’s fit before tightening everything. Proper installation ensures your dropper post functions reliably and lasts longer.
Are There Different Cable Types for Various Dropper Post Models?
Of course, there are different cable types for various dropper post models—because who doesn’t love a good puzzle? You’ll want to check cable compatibility and guarantee you get model-specific cables, so everything fits and functions smoothly. Ignoring this might turn your upgrade into an impromptu circus act, complete with squeaks and sluggish responses. Always double-check your bike’s specs to avoid cable chaos and keep your dropper post working flawlessly.
Conclusion
Replacing your dropper post cable is like rewiring the heart of your bike, reigniting its ability to respond smoothly to your commands. When you update that cable, you’re not just fixing a component—you’re restoring trust in your ride’s control and confidence. Think of it as giving new life to your connection with the trail, a symbol of your commitment to maintenance and mastery. With each smooth drop, you’re reaffirming your bond with your bike’s soul, ready for whatever adventure awaits.