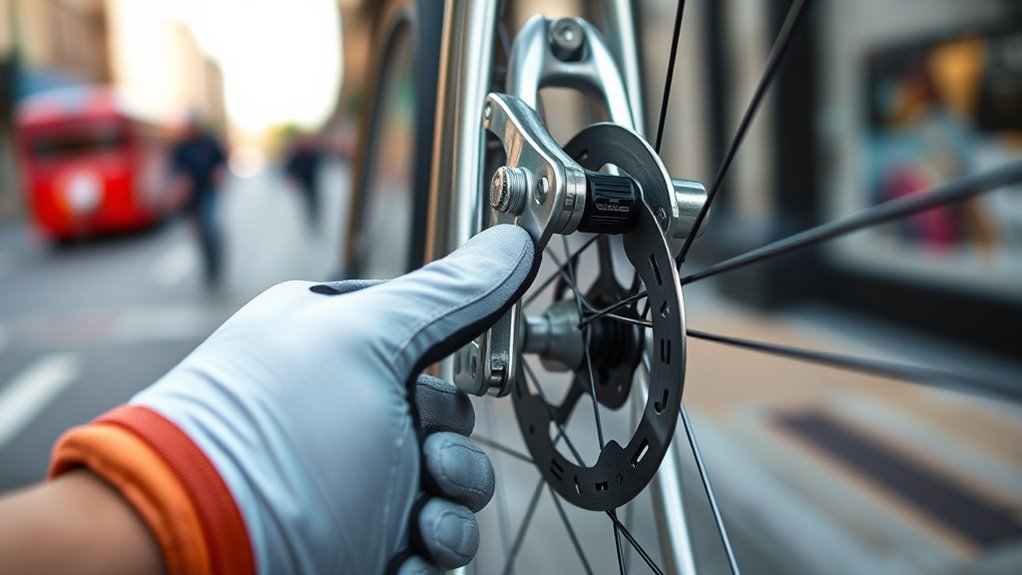

To replace rim brake pads, first remove the old pads by loosening the brake cable and carefully pulling them out. Clean the rim surface to make certain a smooth contact area. Then, insert the new pads, making sure they align properly with the rim and aren’t touching the tire side wall. Adjust the brake cable tension so the pads contact the rim evenly. If you want to make your braking system work better, keep exploring for more tips.
Key Takeaways
- Verify rim compatibility and select brake pads matching your rim type and shape.
- Remove old brake pads carefully, clean the rim surface, and inspect for damage.
- Install new pads, ensuring proper alignment with the rim for even contact.
- Adjust brake cable tension to achieve balanced braking force and responsiveness.
- Test the brakes gently and fine-tune for optimal stopping power and safety.

Replacing rim brake pads is a straightforward process that can considerably improve your bike’s stopping power. When you decide to replace your brake pads, it’s crucial to pay attention to the brake pad materials and rim compatibility. These factors directly influence braking performance and safety. First, consider the brake pad materials. Different pads are made from various compounds, such as rubber, rubber composites, or even ceramic materials. Rubber pads are common on many bikes because they provide reliable braking and are relatively inexpensive. However, if you ride in wet or muddy conditions, you might prefer pads made from more advanced compounds that offer better grip and durability. Some brake pads are designed with softer materials for increased friction, giving you better stopping power, while others use harder compounds to extend the lifespan of the pads. Make sure to choose the right material based on your riding style and environmental conditions.
Next, check rim compatibility before purchasing new pads. Not all brake pads fit all rims. Some rims have unique profiles or widths that require specific pad shapes or sizes. For example, alloy rims often work best with standard V-brake pads, but carbon or specialized rims might need pads with a particular shape or softer compound to prevent damage. Always verify the manufacturer’s recommendations for your bike’s rims. Inspect your current brake pads to see what type they are, and note the shape, size, or any specific markings. When shopping for new pads, compare these details carefully. Proper rim compatibility ensures your brake pads sit correctly against the wheel rim, which is crucial for effective braking and preventing uneven wear or rim damage. Additionally, proper brake pad selection can help optimize your braking performance and extend the lifespan of your components.
Once you’ve selected compatible brake pads with suitable materials, the installation process is simple. Loosen the brake cable and remove the old pads. Clean the rim surface to remove debris or dirt that could hinder braking. Insert the new pads, making sure they align properly with the rim’s braking surface. Adjust the brake cable tension so the pads contact the rim evenly and with enough force to stop efficiently without causing excessive wear. Test the brakes by gently squeezing the levers and observe how the pads engage with the rim. If needed, fine-tune the cable tension for maximum performance.
Frequently Asked Questions
How Often Should I Replace My Rim Brake Pads?
You should replace your rim brake pads when you notice signs of wear or the brake pad lifespan is reached, typically every 1,000 to 3,000 miles depending on riding conditions. Keep an eye out for thinning pads, decreased braking power, or metal contact with the rim. Regular inspection guarantees your brakes stay effective and safe, preventing damage to your rims and maintaining peak stopping performance.
Can I Upgrade to Different Brake Pad Types?
Yes, you can upgrade to different brake pad materials, but you should check compatibility questions first. Different brake pad types, like rubber, carbon, or ceramic, offer various performance benefits, so choose based on your riding style and conditions. Make certain your brake calipers can accommodate the new pads, and consult your bike’s manual or a professional to ensure a proper fit. Upgrading can enhance braking performance markedly.
What Tools Are Needed for Replacing Brake Pads?
Imagine your bike’s heart needing precise care—tools are your heartbeat. To replace brake pads, you’ll need a Allen wrench or hex key, a screwdriver, and possibly pliers. Use the Allen wrench for caliper alignment, ensuring smooth braking. Comparing pad materials helps choose the right grip and durability. With these tools, you can confidently swap pads, restoring your ride’s control and safety—your journey’s steady rhythm.
How Do I Know if My Brake Pads Are Worn Out?
You’ll know your brake pads are worn out when the brake pad material is less than 1/8 inch thick or if you notice squealing, reduced braking power, or grinding sounds during rim brake maintenance. Check the pads regularly, especially if you ride frequently. Worn brake pad materials can cause damage to your rim, so replacing them promptly guarantees safe riding and peak performance.
Are There Specific Brake Pads for Different Riding Styles?
Did you know that choosing the right brake pads can improve your stopping power by up to 20%? For different riding terrains, you’ll want specific brake pad materials—such as rubber for city commuting or carbon for mountain biking. Your riding style influences this choice, ensuring you get peak performance and durability. Select brake pads tailored to your terrain and riding needs to enhance safety and efficiency every time you hit the road or trail.
Conclusion
Now that you’ve replaced your rim brake pads, you’re ready to conquer the streets with a stopping power that’s faster than a lightning bolt. Remember, maintaining your brakes isn’t just routine—it’s your secret weapon for safety and control. Treat your bike like royalty, and it’ll reward you with a ride smoother than silk. With these skills, you’re practically a brake-changing superhero, ready to take on any ride that comes your way. Happy cycling!