
To tune up your bike at home, start by gathering essential tools like tire levers, a pump, screwdrivers, and lubricants. Inspect for any wear or damage on the frame, tires, rims, and components. Clean your bike thoroughly, focusing on the drivetrain, and then adjust the brakes and gears for smooth operation. Check your tire pressure and true the wheels if needed. Continuing your efforts will help you master each step for a safe, efficient ride.
Key Takeaways
- Inspect and identify wear or damage on frame, tires, and components before beginning repairs.
- Clean and lubricate the chain, drivetrain, and moving parts to ensure smooth operation.
- Adjust brake and gear systems for proper alignment, responsiveness, and safety.
- Check tire pressure, inspect for damage, and true wheels to eliminate wobbling.
- Test ride and fine-tune components for optimal performance and safety.

UYIii Bicycle Tire Levers 3 Pack – Ultra Strong Tire Removal Tool for Road or Mountain Bike Tires.
- Designed for Bicycle Tires: Fits closely for easy removal
- Self-Lubricating Plastic: Rounded edges prevent rim scratches
- Ergonomic Design: Thumb press grooves for comfortable grip
As an affiliate, we earn on qualifying purchases.
As an affiliate, we earn on qualifying purchases.
Gathering the Necessary Tools and Supplies

Before you begin tuning up your bike, it’s essential to gather all the necessary tools and supplies. Start by organizing basic bike accessories like tire levers, a pump, and screwdrivers. Having the right tools makes the process smoother and more efficient. Also, consider your bike storage area; verify it’s clean and well-lit to prevent accidents. You might need a bike stand or mount to stabilize your bike while working. Don’t forget to gather cleaning supplies such as rags and degreasers. Having everything ready beforehand saves time and keeps you focused. Additionally, understanding appliances can help you appreciate the mechanics behind different watercraft and ensure safe handling if working around jet boats. Furthermore, familiarizing yourself with sound vibrations can enhance your understanding of how different components in your bike operate and respond to tuning. Once you’ve collected your tools and organized your workspace, you’ll be better prepared to perform a thorough tune-up. Proper preparation ensures a safer, easier process and helps maintain your bike’s performance longer.
Inspecting Your Bike for Wear and Damage
Start by carefully checking your bike for any cracks or dents on the frame, as these can compromise safety. Next, examine your tires for worn tread and make sure they’re properly inflated to avoid flats or poor handling. Additionally, inspecting your bike for wear and damage helps ensure all components are in good condition and safe to ride. Taking these simple steps helps catch issues early and keeps your ride smooth.
Check for Cracks or Dents
Inspecting your bike for cracks or dents is a crucial step in ensuring it’s safe to ride. Cracks can compromise the frame’s integrity, while dents may indicate structural weaknesses. Use good lighting to carefully examine the frame, fork, and handlebars for any damage. Checking for structural damage is essential to maintain safety and prevent future issues. Pay attention to areas around welds and joints for signs of fatigue. Look for paint cracks or chips that could hide deeper issues. If you spot a crack, avoid riding until it’s properly inspected and repaired through crack detection techniques or dent repair. Additionally, inspecting ergonomic considerations can help identify discomfort caused by damage or misalignment. For a more thorough assessment, consider examining filtration systems if your bike has any integrated components that could be affected by damage. Also, check rims and spokes for dents or warping that could affect your ride. Recognizing potential hazards early helps prevent accidents and extends your bike’s lifespan. Being aware of damage signs can help you catch issues before they worsen. Addressing damage early helps prevent accidents and extends your bike’s lifespan. Regular inspections keep you safe and confident on the road.
Examine Tire Tread and Pressure
Examining your tire tread and pressure is essential for maintaining a safe and efficient ride. Worn or damaged tires can lead to flats, poor traction, and accidents. Check the tire tread for signs of excessive wear, cuts, or embedded debris. Use a pressure gauge to verify your tire pressure matches the recommended PSI printed on the sidewall. Proper tire pressure improves ride comfort and prevents pinch flats. Additionally, inspecting for pressure maintenance ensures your tires stay in optimal condition between rides. Being aware of symptoms of tire failure, such as sidewall bulges or frequent flats, can help you identify issues early and avoid potential accidents. Regularly monitoring your tires with smart features or simple tools can further assist in maintaining optimal performance. Staying informed about tire health can help you prevent unexpected breakdowns and extend the lifespan of your tires.
Cleaning Your Bike Before Starting
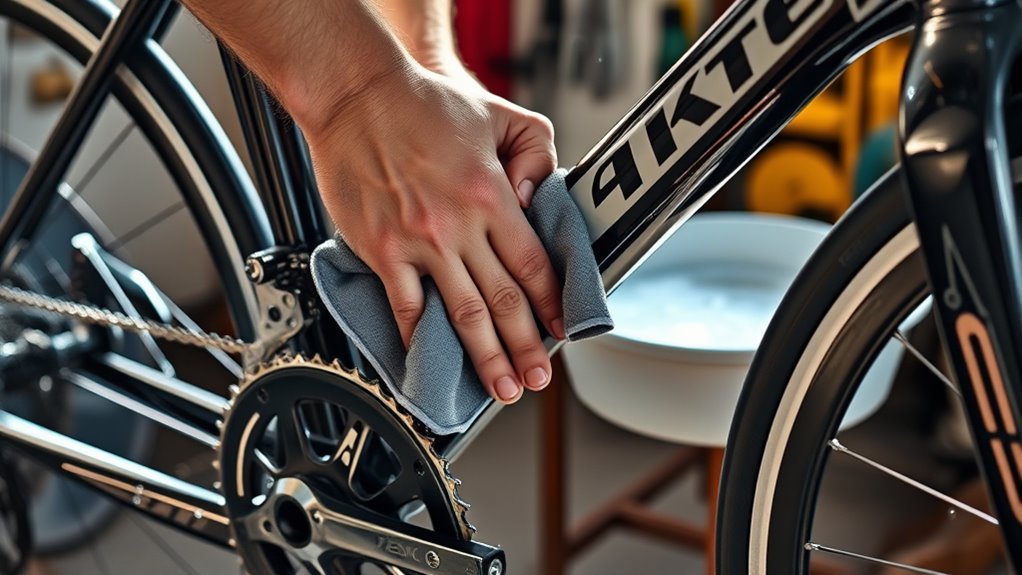
Before you start tuning, give your bike a thorough clean to remove dirt and debris. This helps you see any hidden damage and makes sure parts move smoothly. Don’t forget to lubricate the moving parts to keep everything functioning properly. Additionally, understanding regulatory compliance related to maintenance practices can help ensure you follow safety standards and avoid potential issues. Checking your vehicle’s performance upgrades can also provide insights into how modifications may impact your bike’s safety and longevity. For example, inspecting suspension and handling modifications can help identify potential safety concerns. Regular cleaning and maintenance can also prevent the buildup of exfoliants like glycolic acid residues that might affect the bike’s components over time.
Remove Dirt and Debris
Cleaning your bike thoroughly before starting any maintenance is essential to guarantee you can identify issues and work effectively. Dirt removal is a vital step in bike cleaning, as dirt and debris can hide problems and cause wear over time. Take your time to carefully remove dirt from all parts, including the drivetrain, wheels, and frame. Using appropriate tools and cleaning solutions helps avoid damage. Focus on areas prone to buildup, like the chain and cassette. Regular dirt removal keeps your bike in top shape and makes subsequent maintenance easier. Proper cleaning also prevents damage caused by dirt accumulation, ensuring the longevity of your bike components. Here are some tips for effective dirt removal:
- Use a soft brush for delicate areas
- Apply degreaser to the chain
- Rinse with low-pressure water
- Dry thoroughly to prevent rust
- Check for hidden debris during cleaning
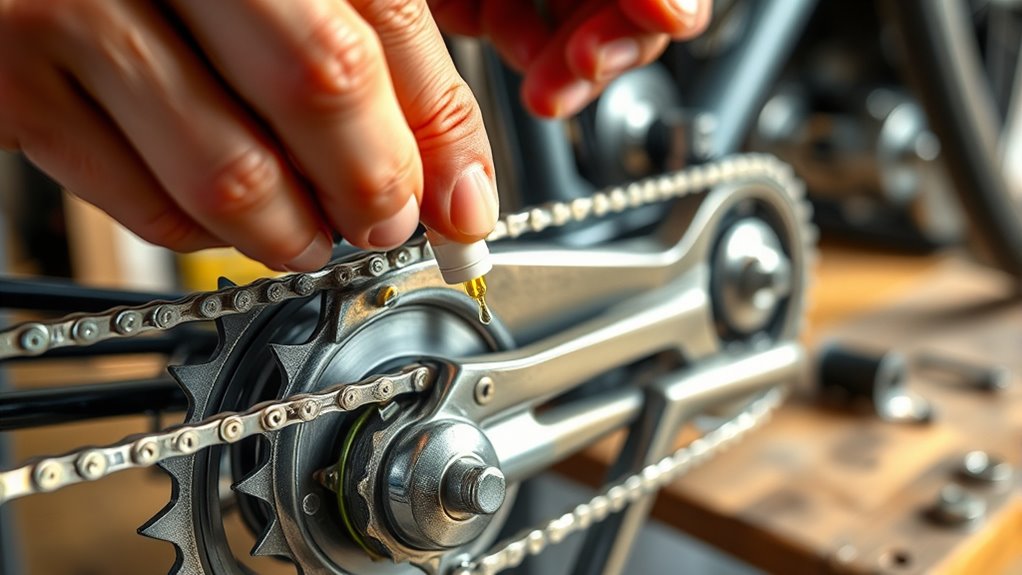
Lubricate Moving Parts
Once you’ve thoroughly removed dirt and debris from your bike, it’s time to lubricate the moving parts. Start with chain lubrication by applying a suitable bike-specific lubricant along each link, then wipe off excess to prevent dirt buildup. Proper chain lubrication ensures smooth pedaling and extends chain life. Using appropriate lubricants designed for your bike’s components is essential for optimal performance.
Next, focus on bearing maintenance; check hubs, bottom brackets, and headset bearings for smooth rotation. If you notice any roughness or play, clean and re-lubricate or replace the bearings as needed. Applying fresh lubricant to these parts reduces friction and prevents rust. Regular lubrication helps to prevent rust and corrosion, maintaining the longevity of your bike’s components.
Additionally, using a high-pressure airless sprayer can make cleaning stubborn dirt and grime more efficient, ensuring your bike stays in top condition. Incorporating proper maintenance techniques can also extend the lifespan of your bike’s parts.
Adjusting the Brakes for Optimal Performance
To guarantee your bike brakes perform reliably, start by inspecting the brake pads and making sure they’re aligned properly with the wheel rim or rotor. If the pads are worn out, consider brake pad replacement.
Next, check the brake cable tension and adjust the brake cable if needed to ensure responsive braking. Proper adjustment prevents excessive hand effort and improves stopping power.
You may also need to tighten or loosen the brake calipers for even pad contact. When adjusting, make sure the brake levers engage smoothly without excessive pull.
Here’s what to do:
- Inspect brake pads for wear
- Adjust brake cable tension
- Realign brake calipers
- Tighten caliper mounting bolts
- Test brake responsiveness before riding
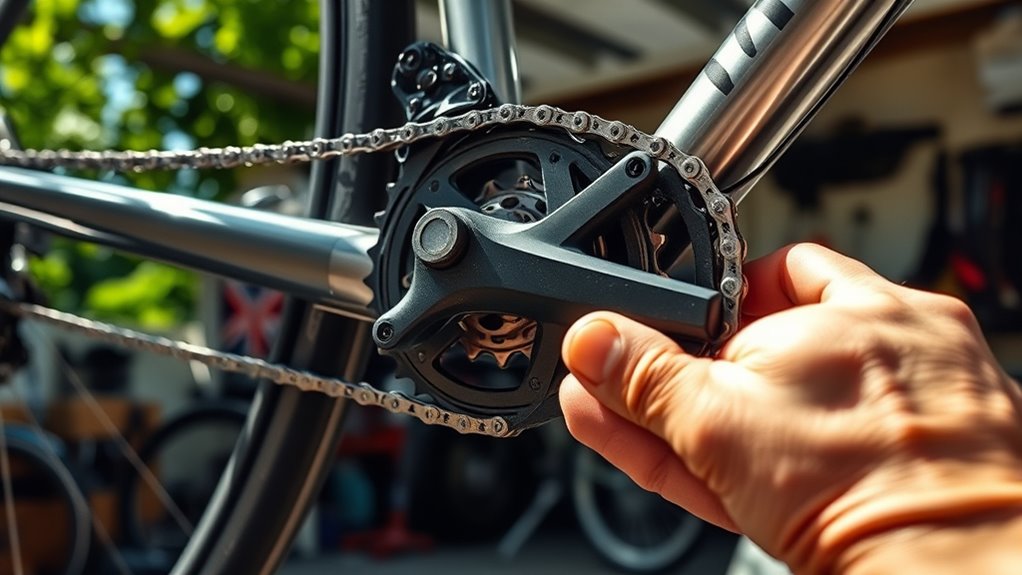
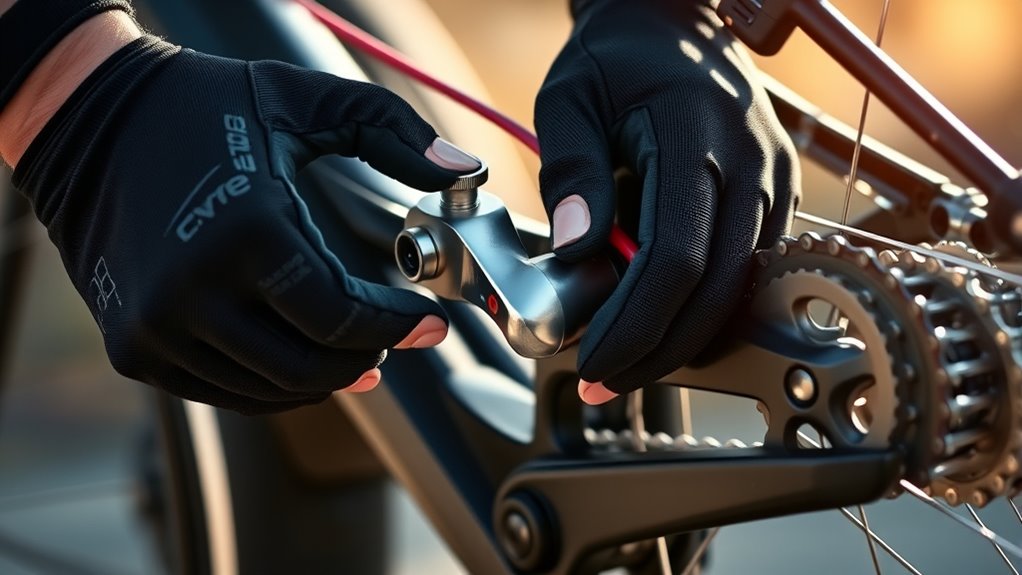
Lubricating the Chain and Moving Parts
After ensuring your brakes are properly adjusted, the next step is to lubricate the chain and moving parts to keep your bike running smoothly.
Proper chain maintenance involves applying the right lubricant to reduce friction and prevent rust. There are various lubricant types, including wet lube for wet conditions and dry lube for dry, dusty environments. Choose the appropriate one for your riding conditions.
Applying the correct lubricant prevents rust and ensures smooth riding in any condition.
To lubricate, wipe the chain with a clean cloth to remove dirt, then apply a small amount of lubricant to each link while rotating the pedals backward. Let the lubricant sit for a few minutes, then wipe off any excess to avoid attracting dirt.
Regular lubrication guarantees smooth gear shifting and prolongs the life of your bike’s components.
Checking and Tuning the Gears
Checking and tuning your gears guarantees smooth shifting and efficient riding. To do this, start by testing your gear shifting across all gears. Look for any hesitation or slipping. If shifting isn’t smooth, you may need to adjust the derailleur. Proper derailleur adjustment ensures the chain moves cleanly between gears.
Here are key steps to follow:
- Inspect the derailleur for damage or misalignment
- Use the barrel adjuster to fine-tune cable tension
- Check the cable for fraying or rust
- Ensure the derailleur hanger is straight
- Test shifting again and make incremental adjustments
Regularly checking and tuning your gears keeps your bike shifting smoothly and prolongs component life. With some practice, gear shifting adjustments become quick and easy.
Inflating Tires and Inspecting for Damage
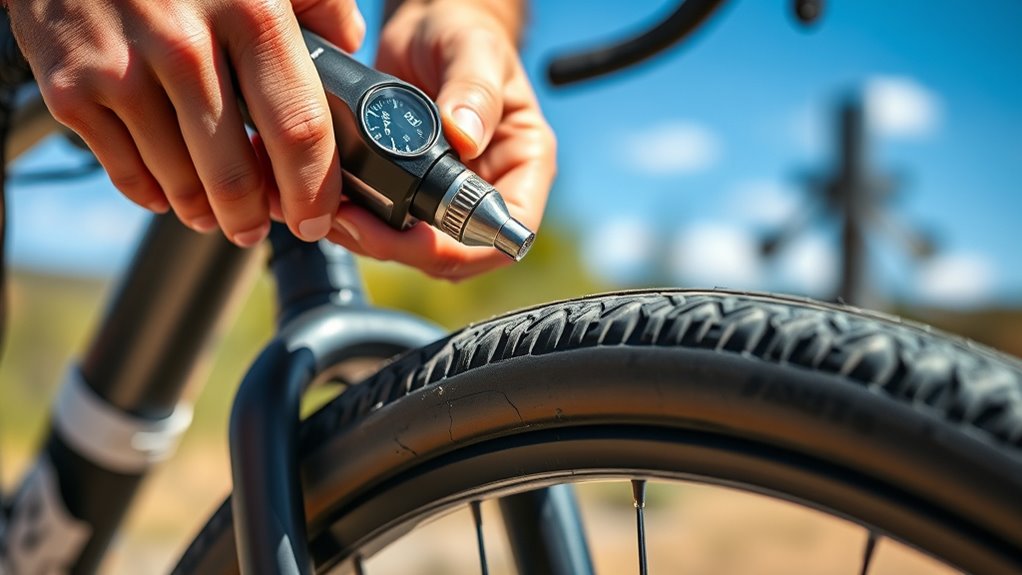
Ensuring your tires are properly inflated and free of damage is essential for a safe and smooth ride. Start by checking the recommended tire pressure, which is usually printed on the sidewall. Use a reliable pump to perform tire inflation, making sure each tire reaches the correct PSI.
During tire inspection, look for cuts, punctures, or embedded debris that could cause flats. Feel for any sidewall bulges or uneven wear, which indicate damage or alignment issues. Don’t forget to spin the wheel and listen for any irregular sounds, and manually check for wobbling.
Proper tire inflation improves your bike’s performance and efficiency, while thorough tire inspection helps prevent sudden flats and accidents. Regular attention to your tires keeps your ride safe and enjoyable.
Aligning and Truing the Wheels
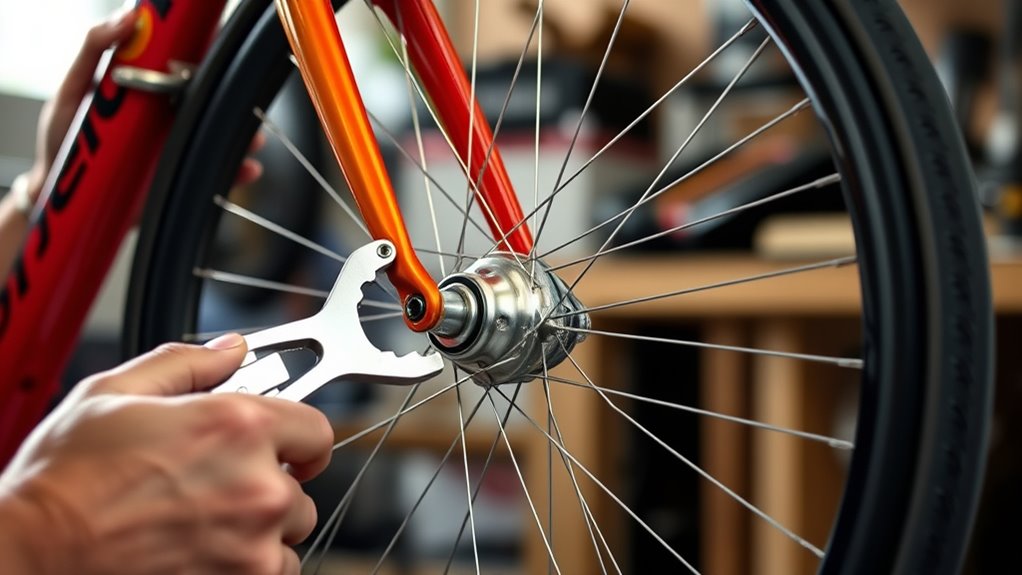
Aligning and truing your wheels is essential for a smooth, safe ride. Properly adjusting spoke tension helps eliminate rim wobble and keeps your wheel straight.
Start by spinning the wheel and observing any wobbling or side-to-side movement. If the rim wobbles, you’ll need to tighten or loosen spokes to correct it. Use a spoke wrench to make small adjustments, working gradually around the wheel.
Keep an eye on spoke tension, ensuring it’s even across all spokes for stability. Regularly check for loose or broken spokes, and address these issues promptly.
Properly trued wheels improve handling, prevent uneven wear, and extend your bike’s lifespan. Remember, patience and small adjustments lead to the best results.
Performing a Test Ride and Final Checks

Once you’ve completed the adjustments, take your bike for a test ride to verify that everything feels right. Focus on bike safety by checking that brakes engage smoothly and gears shift correctly.
Use proper test ride techniques: start slow to feel how the bike responds and listen for unusual noises. Pay attention to how the bike handles turns, accelerates, and brakes. Ensure your handlebars are straight and the saddle height feels comfortable.
During the ride, test the responsiveness of your brakes and check for any wobbling or vibrations, especially after wheel truing. Final checks include inspecting tire pressure, chain tension, and quick releases.
A confident, smooth ride indicates your tune-up is successful, and your bike is safe for regular use.
Frequently Asked Questions
How Often Should I Tune up My Bike at Home?
You should tune up your bike every 6 to 12 months for ideal bike maintenance and to keep it performing well.
If you ride frequently or in harsh conditions, consider doing DIY repairs and tune-ups more often.
Regular maintenance helps prevent costly repairs and extends your bike’s lifespan.
Pay attention to signs like squeaking or sluggishness, and don’t hesitate to perform basic tune-ups at home to stay on top of your bike’s health.
What Common Mistakes Should I Avoid During Tuning?
Ah, the classic mistake of ignoring proper lubrication techniques—because squeaks and rust are just your bike’s way of saying hello.
You should avoid rushing gear alignment, which leads to cluttered shifting and frustration.
Over-tightening bolts or neglecting chain tension also hampers your ride.
Can I Tune My Bike Without Professional Tools?
You can definitely do DIY bike repair without professional tools, but it’s important to know your limits. Basic bike maintenance, like adjusting brakes or lubing chains, often only needs simple tools or household items.
However, for more precise tasks, investing in some essential bike maintenance tools makes the job easier and safer. Always research specific repairs beforehand and prioritize safety to make sure your DIY bike repair is effective and enjoyable.
How Do I Know if My Bike Needs a Professional Repair?
You might wonder if your bike needs a pro when simple bike maintenance isn’t fixing that squeak or wobble.
If your chain’s slipping, brakes feel unresponsive, or gears won’t shift, it’s time for repair essentials from a professional.
Don’t ignore warning signs—trust your instincts. Sometimes, DIY isn’t enough, and a skilled mechanic’s touch can save you from costly damage, ensuring your ride stays smooth and safe.
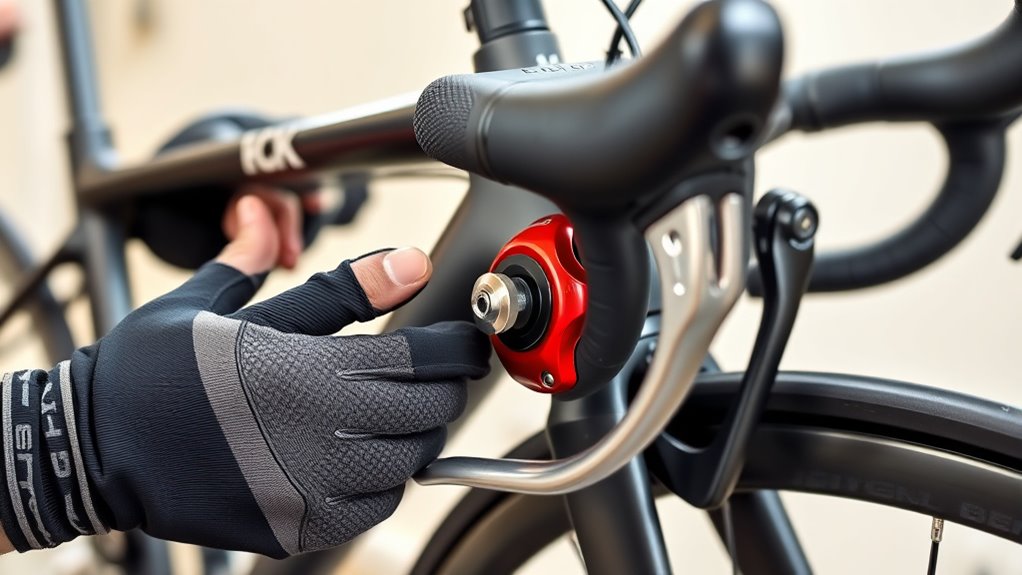
What Safety Precautions Should I Take During the Process?
When tuning up your bike at home, safety comes first. Always wear protective gear like gloves and glasses to prevent injuries.
Make sure your workspace is well-lit with proper lighting so you can see clearly and avoid mistakes.
Keep your tools organized to prevent accidents, and work in a dry, stable area.
Taking these precautions helps you stay safe and ensures a smooth, successful bike maintenance process.
Conclusion
Now that you’ve gone through all the steps to tune up your bike at home, it’s almost like you’re rediscovering it all over again. With a little effort, you’ve not only improved its performance but also uncovered a new connection to your ride. Sometimes, the simplest maintenance can turn a routine ride into a moment of pure enjoyment. So, go ahead—hop on and enjoy the smooth, effortless ride you’ve just created.