TL;DR
Start with a properly fitted helmet, water, and a repair kit you know how to use. Add protection, storage, lights, and navigation to match your route and kind of riding, checking fit and bike compatibility before you buy. A lighter setup can suit a short local loop; a remote all-day ride calls for more supplies.
A ride can turn from smooth singletrack to a long walk when a thorn opens your tire two miles from the trailhead. The right mountain bike accessories help you handle that moment, stay comfortable, and ride with more confidence.

Get sports gear delivered free with Prime
- Fast, free delivery on millions of items
- Prime Video, Amazon Music and more included
- Member-only deals all year
Your setup should fit your kind of riding, the route, and the weather. A short loop close to home needs less gear than a remote day in the hills. This guide helps you distinguish essential safety gear from optional upgrades, pack for common trail problems, and check compatibility before spending money.
You don’t need a drawer full of gadgets to get started. A helmet that fits, enough water, and a repair kit you’ve practiced with can make a bigger difference than an expensive computer or a sleek new mount. Build from there, one useful ride at a time.
Wear a properly fitted helmet on every ride, and choose pads to match your terrain and speed.
Carry a tube or tubeless plugs, tire levers, a pump or inflator, and a multitool; practice with them before leaving home.
Use a hip pack for a small load and consider a backpack when you need more water, food, clothing, or supplies.
Check fit and compatibility for lights, mounts, racks, and e-MTB electrical accessories before buying.
Charge, inspect, and restock your gear as part of your pre-ride and post-ride routine.
Start with the safety gear that protects every ride
For every mountain bike ride, start with a properly fitted helmet, then add eye protection and gloves for comfort and coverage. Choose additional pads according to the terrain and speed you expect. A helmet should sit level, feel secure when you move your head, and follow the maker’s fit and care guidance.
Gloves give you a better grip when your palms get sweaty, while glasses help keep dust, insects, and low branches out of your eyes. On a mellow cross-country trail, an open-face helmet and light gloves may suit you. At a bike park, where steep runs and faster impacts are more likely, knee pads and a properly fitted full-face helmet may make more sense.
Imagine you’re riding a damp forest trail after rain: wet roots can surprise even an experienced rider. Pads can add coverage, but they don’t make a trail risk-free. If you’re new to technical terrain, build skills gradually and consider a qualified coach. Good protection supports your riding; it doesn’t replace judgment.
Fit comes before labels. Try pads while moving and bending, since a knee pad that slides down while you pedal won’t protect the spot you want covered. Check straps and seams regularly, and replace or inspect a helmet after a significant impact according to its maker’s guidance.
Products Worth Considering
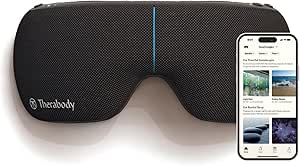
Therabody SmartGoggles 2nd Gen Heated Eye and Temple Massager

Garmin Montana 760i GPS Handheld Navigator with Built-in Camera and inReach

YETI Tundra Haul Wheeled Cooler
As an affiliate, we earn on qualifying purchases.
Pack a flat kit you can actually use on the trail
A useful mountain bike repair kit lets you address common tire and bolt problems without walking back to the car. Carry a spare tube or tubeless plugs, tire levers, a pump or CO₂ inflator, and a multitool with the sizes your bike needs. Practice using each item before you depend on it miles from help.
For example, a tubeless rider may plug a small thorn hole, but a long sidewall cut can still spill sealant and defeat the plug. A spare tube can get you rolling again if the tire casing allows it. Tubeless setups can reduce small punctures, but they need compatible tires and rims, periodic sealant checks, and a backup plan.
Use this quick packing routine before a ride:
- Match the kit to the wheels. Check whether your setup is tubeless or uses tubes, and confirm valve type.
- Test your tools at home. Remove a wheel, use the levers, and check that the pump fits the valve.
- Secure the kit. Put it in a pocket, pack, or frame storage where it won’t rattle loose.
- Refill after use. Replace plugs or CO₂ cartridges and return the tools before your next ride.
A rider who has practiced changing a tube in a warm garage will have an easier time doing it with cold fingers beside a muddy trail. A small, tested kit beats a heavy collection of unfamiliar tools.
Choose a pack that fits the length of your ride
The right storage option carries what your route requires while staying comfortable as you move. A small hip pack can suit a quick loop with a tube, keys, and snack; a backpack can carry more water, extra clothing, food, and first-aid supplies for a long day out. The best choice depends on the load, fit, and how the pack feels when you ride.
Suppose you are doing a familiar 45-minute lap after work. A hip pack may hold your phone, a snack, and a compact repair kit without feeling like luggage. For a remote half-day ride, you may want a backpack with room for a hydration reservoir, a warm layer, and more food. A roomy pack can also feel hot against your back on a climb, so ventilation and fit matter.
Match your load to the day. A charged phone and water make sense for most rides, while navigation, extra food, and a layer become more useful when you travel farther from roads or the weather may change. A compact first-aid kit can help with small scrapes, but serious incidents call for emergency services and local response guidance.
- Short local ride: water, phone, keys, snack, and flat kit.
- Longer or remote ride: add food, navigation, suitable clothing, and basic first aid.
- Hot weather: plan water capacity and refill points, not just pack size.
Try a loaded pack on a short ride before taking it into the backcountry. A bouncing strap feels minor on the driveway and maddening on rocky singletrack.
Check compatibility before you buy useful upgrades
Mountain bike accessories work well only when they fit your bike and riding conditions. Before buying, check wheel and tire setup, valve type, handlebar diameter, mounting points, suspension layout, and electronic-system compatibility. A product’s feature list won’t help if it cannot mount securely or work with your bike.
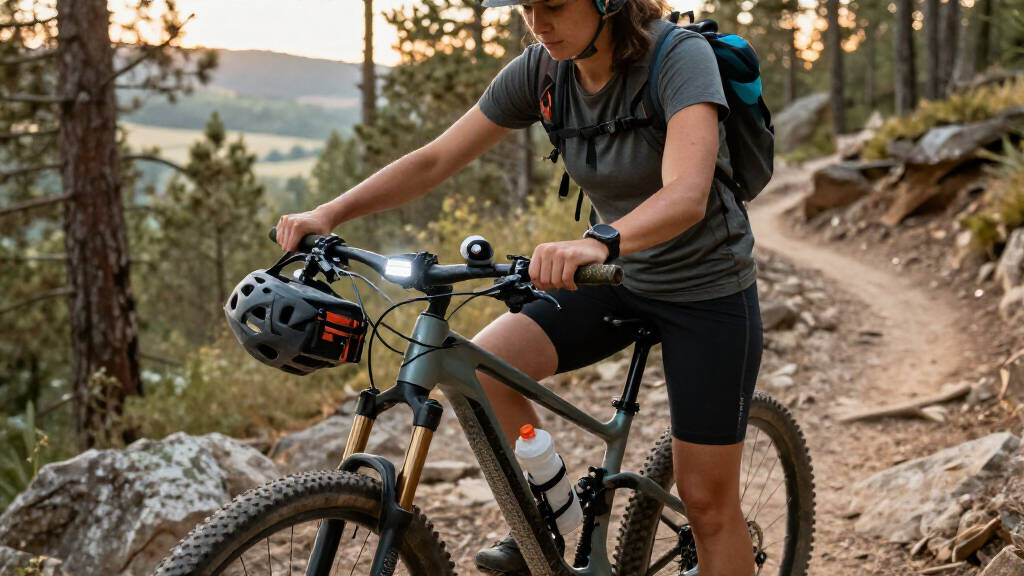
Take lights as an example. A light for being seen on a road transfer may not cast a wide, useful beam on a dark forest trail. Check beam shape, runtime, weather resistance, mount security, and battery behavior alongside brightness claims. A light that shifts over bumps can point into the dirt just when you need to see a root or turn.
Compatibility matters even more with racks, fenders, and e-MTB accessories. Suspension movement and frame design can limit where you can attach gear. For an e-MTB, follow the bike maker’s advice on batteries, chargers, and mounts; aftermarket electrical parts may affect safety, reliability, or warranty coverage.
It helps to check the bike before you check out. Read the maker’s fit notes and compare the product with your actual frame, bar, rim, and tire details. If you’re unsure, a local bike shop can help you confirm fit. For example, two handlebars can look nearly identical but use different diameters at the mounting point, leaving a new accessory loose or unusable.
Spend on comfort and performance only where you feel the difference
Optional upgrades earn their place when they solve a problem you notice on your rides. A cycling computer can help you follow a route or track a training session; a phone mount offers navigation if the mount holds securely and you can use it safely. Neither replaces a charged phone or a plan for getting help on a remote route.
Consider a rider who keeps stopping to check a phone tucked inside a pack. A secure GPS device or phone mount may make navigation smoother, especially on unfamiliar trails. But if you mostly ride a well-marked local loop, that money may serve you better as a spare tube, better-fitting gloves, or a lesson with a coach.
Weight and durability involve tradeoffs. A cross-country racer may value a compact pump and light storage, while someone riding rough downhill trails may favor more protective gear and robust carrying options. No accessory improves every kind of riding. A bright, powerful light is useful after dark; it adds little to a midday ride.
Recent gear includes smaller rechargeable lights, more flexible pads, quick-adjust accessories, and phone-friendly mounts. Features can change quickly, so check current manufacturer information before choosing a specific model. Buy for a real need, not the promise of a faster or more capable ride. If you cannot name the problem an upgrade solves, ride without it for a few more weeks.
Make a simple pre-ride check part of your routine
A quick check helps you catch low batteries, loose straps, and missing tools before they become trail problems. Before a ride, confirm your helmet and pads fit, your repair kit is complete, your lights are charged if needed, and your phone has enough battery for the route. Adjust the checklist to the ride rather than carrying every item you own.
Picture a late-afternoon ride that runs longer than planned. A charged front light can help you get back if the forest darkens, but only if its runtime suits the trip and its mount stays put. For a short local loop in daylight, you may not need a light at all. Conditions and route plans matter more than a universal packing list.
Use this short checklist:
- Protection: helmet fit, glove condition, and pads suited to the terrain.
- Repairs: tube or plugs, levers, pump or inflator, and multitool.
- Route needs: water, food, clothing, navigation, and emergency supplies for distance and weather.
- Electronics: charge lights and devices, and secure their mounts.
After the ride, replace anything you used and inspect straps, fasteners, and tool bits. If you found yourself improvising around the same problem twice, that is a good clue about the next accessory worth buying.
Frequently Asked Questions
What mountain bike accessories should a beginner buy first?
Start with a properly fitted helmet, gloves, water, and a basic flat-repair kit. Add eye protection and pads to suit your comfort and the terrain, then practice using your tools before you ride somewhere remote.
Are tubeless tires worth it?
Tubeless tires can reduce many small punctures, but the setup needs compatible rims and tires plus sealant checks. A larger cut or sealant failure can still end your ride, so carry plugs or a tube and know how to use them.
Do I need a full-face helmet for mountain biking?
Not every rider needs one. Many cross-country and general trail riders choose an open-face helmet, while downhill and bike-park riders may prefer a properly fitted full-face model. Match protection to terrain and follow the manufacturer’s care and replacement guidance.
Should I use a backpack or a hip pack?
A hip pack can feel less bulky on shorter rides with a small load. A backpack usually carries more, including extra water, food, or layers, but may feel warmer on a long climb. Try each with your normal load to see what stays comfortable while riding.
What tire pressure should I use?
There is no single pressure that suits every rider. Rider weight, tire width and construction, terrain, and riding style all matter. Follow tire and rim guidance, then adjust carefully; pressure that is too low can cause rim strikes or unstable handling.
What accessories are useful for an e-MTB?
A secure phone or GPS mount, suitable lights, and practical carrying options can be useful. Follow your bike maker’s guidance for batteries, chargers, and electrical accessories, since incompatible parts can affect reliability or warranty coverage.
Conclusion
Build your setup around the problems your rides actually bring: a flat tire, fading light, a thirsty climb, or a cold descent. Start with a fitted helmet, water, and a repair kit you’ve practiced using, then add accessories that fit your bike and route.
Pack for the ride ahead, not every ride you could imagine. A few well-chosen tools can turn a muddy trail-side delay into a quick fix and send you back toward the sound of tires on dirt.