
To bleed hydraulic disc brakes safely, start by confirming you’re using the correct brake fluid as specified by the manufacturer. Attach the bleed kit properly and open the bleed port while gently squeezing the brake lever to remove trapped air. Keep the reservoir topped up and watch for bubbles until they disappear. Close everything securely and wipe away excess fluid. If you want to guarantee your brakes work perfectly, you’ll find tips that help you master the process step by step.
Key Takeaways
- Use the correct brake fluid type specified by the manufacturer to prevent seal damage.
- Attach the bleed kit securely and keep the brake fluid reservoir topped up throughout the process.
- Open the bleed valve gradually and pump the brake lever slowly to effectively remove air bubbles.
- Monitor for persistent air bubbles or spongy feel; repeat bleeding if necessary to ensure complete air removal.
- Close the bleed port tightly, clean excess fluid, and confirm the brake lever feels firm before riding.
Bleeding hydraulic disc brakes is a critical maintenance step that guarantees your braking system remains responsive and safe. When you start this process, one of your primary concerns is ensuring brake fluid compatibility. Using the correct brake fluid type for your bike’s brake system is essential; mixing incompatible fluids can cause damage to seals and reduce braking performance. Always check your manufacturer’s specifications before adding or replacing the fluid. If you’re unsure, stick to the recommended DOT or mineral oil, as using the wrong fluid can lead to costly repairs and unsafe braking.
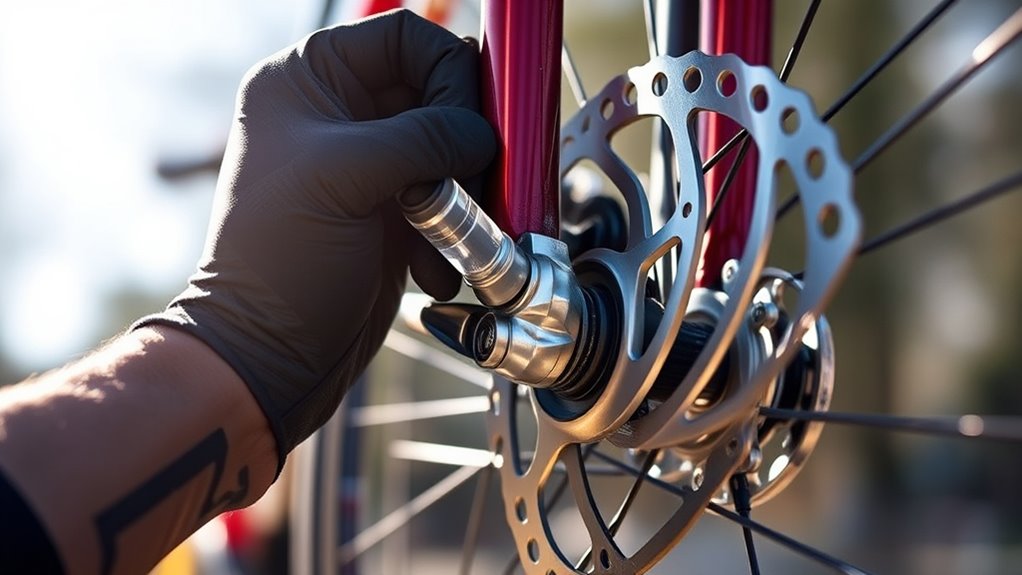
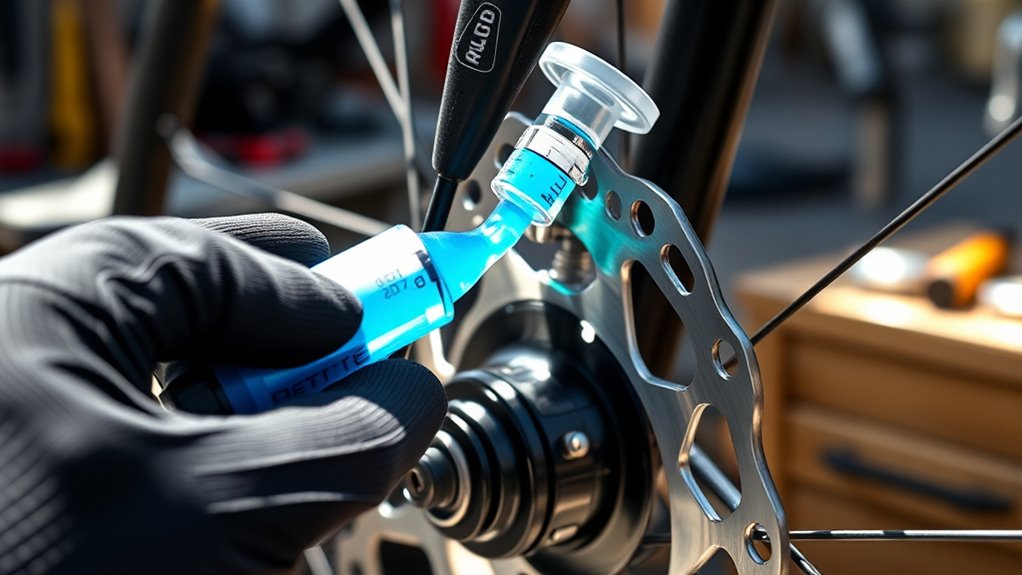
Once you’ve confirmed the correct brake fluid, you can proceed with the bleeding process. During bleeding, air bubble removal is imperative. Air trapped in the brake lines compress more easily than brake fluid, which results in a spongy brake lever feel and diminished braking power. To guarantee safety and maximum performance, you need to carefully expel these air bubbles from the system. Start by attaching your bleed kit to the brake caliper and master cylinder, then open the bleed port. As you gently squeeze the brake lever, you’ll notice air bubbles rising to the surface or escaping through the bleed valve. Keep an eye on the brake fluid reservoir, making sure it stays topped up to prevent introducing new air into the system.
Proper air bubble removal ensures a firm, responsive brake lever feel, allowing you to brake confidently when needed. You should also be aware that brake fluid can absorb moisture over time, which can decrease braking efficiency and cause corrosion within the system. As you continue to pump the brake lever, you’ll see bubbles diminish and eventually disappear. It’s important to work slowly and methodically during this process. If you notice persistent bubbles or sponginess in the brake lever even after several attempts, you might need to repeat the bleeding process or check for leaks. Proper air bubble removal ensures a firm, responsive brake lever feel, allowing you to brake confidently when needed. Once you’re satisfied that air is fully removed and the brake fluid level is correct, close the bleed port securely and wipe away any excess fluid.
Frequently Asked Questions
Can I Bleed Hydraulic Disc Brakes Without Professional Tools?
You can attempt DIY maintenance to bleed hydraulic disc brakes without professional tools, but it’s not ideal. Use clear, compatible brake fluid types like mineral oil or DOT fluid, depending on your brake system. Gather basic tools such as a syringe or tubing, and follow detailed guides. However, improper bleeding can cause safety issues, so if you’re unsure, it’s best to consult a professional for safe, effective results.
How Often Should I Bleed My Hydraulic Disc Brakes?
Like tending a garden, you should bleed your hydraulic disc brakes when you notice sponginess or reduced braking power, usually every 1-2 years. Use the correct brake fluid types—mineral oil or DOT fluid, depending on your system—and follow the bleeding procedure steps carefully. Regular maintenance keeps your brakes responsive, just as regular watering keeps plants healthy. Don’t wait for problems to grow; stay ahead with timely bleeding.
What Are Signs My Brakes Need Bleeding?
You’ll notice your brakes need bleeding if you experience a spongy or soft brake lever, or if braking feels less effective. Brake pad wear or rotor damage can cause air to enter the system, worsening brake performance. If your brake lever sinks too low or takes more force to stop, it’s a clear sign to bleed your hydraulic brakes promptly to restore proper function and safety.
Is It Safe to Ride After Bleeding Brakes?
Yes, it’s safe to ride after bleeding your hydraulic disc brakes, but only if you’ve used the correct brake fluid compatibility and completed proper disc brake maintenance. Make sure the brake fluid is fresh and appropriate for your system, and double-check that there are no leaks or air bubbles. Test your brakes thoroughly before hitting the trail to ensure responsive stopping power and ride safely.
Can I Use Any Brake Fluid for Bleeding?
You can’t use any brake fluid for bleeding, as fluid compatibility is vital. Different brake fluid types, like DOT 3, DOT 4, or mineral oil, aren’t interchangeable; mixing them can damage your brake system. Investigate the specific requirements of your bike’s brakes before bleeding. Always follow the manufacturer’s recommendations to guarantee safety and proper function. Using the correct brake fluid type maintains system integrity and prevents costly repairs.
Conclusion
Think of bleeding your hydraulic disc brakes like tending a delicate garden. Just as you carefully remove weeds to help your plants thrive, you eliminate air bubbles to keep your brakes responsive. With patience and attention, you guarantee your braking system remains lush and reliable, ready to support your ride. When you finish, you’ll feel confident knowing your brakes are as healthy and strong as a well-tended garden—ready for whatever your journey brings.