
To diagnose electronic shifting issues quickly, start by checking your battery health and ensuring all wiring connections are secure, clean, and corrosion-free. Inspect the shift sensor cables and housing for damage or wear. Verify the derailleur alignment and adjust cable tension if needed. Test the shifter’s response and confirm firmware is updated. If problems persist, resetting the system and recalibrating may help. Keep going to discover more tips for troubleshooting effectively.
Key Takeaways
- Check the battery health and ensure it provides steady power; replace if degraded or swollen.
- Inspect wiring connections, terminals, and connectors for corrosion, damage, or looseness.
- Verify shift sensor cables are properly routed, secured, and free of wear or frays.
- Confirm derailleur and hanger alignment; straighten or adjust for proper gear positioning.
- Test system responsiveness, update firmware, and perform quick cable and housing inspections.
Check the Battery and Power Supply
To diagnose electronic shifting issues, start by inspecting the battery and power supply. Check the battery health to ensure it holds a proper charge and isn’t degraded or swollen. A weak or failing battery can cause inconsistent shifting or communication errors with the derailleur. Next, verify power supply stability by inspecting connections, cables, and contacts for corrosion or damage. Loose or dirty connections can interrupt power flow, leading to shifting problems. If your battery is old or shows signs of poor health, consider replacing it. Confirm that the power supply is steady and free of interruptions. Maintaining a healthy battery and reliable power supply is essential for smooth, responsive electronic shifting. Additionally, understanding Vetted can provide insights into how advanced technology ensures reliable data and system performance. Regularly monitoring sound healing science principles can help optimize electronic system stability by reducing electromagnetic interference and enhancing device longevity. Ensuring proper electronic component maintenance is also crucial for preventing future shifting issues.
Inspect the Shifter and Derailleur Alignment

Start by checking the shifter’s position to make sure it’s correctly aligned with the derailleur. Next, verify the derailleur itself is straight and properly adjusted. Finally, assess the cable tensions to confirm they’re neither too tight nor too loose for smooth shifting. Additionally, understanding your personality traits can help you stay patient and methodical during the troubleshooting process. Remember, performance tuning principles emphasize gradual adjustments to achieve optimal results. Being aware of nutritional advantages such as proper cable lubrication can also prevent premature wear and ensure smooth operation over time. Incorporating technology compatibility considerations can further streamline your adjustments and maintenance routines, especially when using professional-grade components for better durability and precision.
Check Shift Lever Position
Since proper alignment between the shift lever and derailleur is essential for smooth gear changes, you should begin by inspecting their positions. First, check if the shift lever is in the correct gear position on the handlebar. Second, verify that the lever’s position calibration matches the gear indicator. Third, ensure the shift lever moves smoothly without sticking or excessive force. Fourth, confirm that the shift cable is properly connected and not loose. If the lever feels off or unresponsive, perform a shift lever adjustment to correct the lever position calibration. Proper alignment here helps prevent mis-shifts and ensures your electronic shifting system functions accurately. Additionally, understanding repair fundamentals can help you identify common issues with electronic shifting components more effectively. Regularly inspecting cable tension and component compatibility can also prevent many shifting problems before they occur.
Verify Derailleur Alignment
Inspecting the alignment between your shifter and derailleur is essential for accurate gear changes. Proper derailleur positioning ensures the chain moves smoothly across gears without hesitation or slipping. To verify alignment, shift to the smallest chainring and sprocket, then inspect the derailleur hanger. It should be straight and parallel to the wheel. If it’s bent or misaligned, perform an alignment adjustment by gently realigning the hanger back into position. Check that the derailleur cage lines up directly with the sprocket, without skewing inward or outward. Correct derailleur positioning prevents improper gear indexing and enhances overall shifting performance. Ensuring derailleur adjustment is correctly performed can significantly improve your electronic shifting system’s reliability and precision. Taking a few moments to confirm and adjust the derailleur alignment guarantees your electronic shifting system functions reliably and precisely. Additionally, regularly inspecting the shifter-cable connection can help maintain optimal performance and prevent shifting issues. Periodic inspection of the derailleur hanger can also prevent misalignment caused by impacts or wear.
Assess Cable Tensions
After confirming your derailleur is properly aligned, the next step is to assess the cable tensions. Start by checking the cable slack; too much slack can cause shifting issues, while too little can hinder movement. To do this: 1. Shift to the highest gear and observe the cable tension—there should be a slight amount of slack. 2. If the cable is too tight, loosen it slightly at the shifter. 3. Shift to the lowest gear and verify there’s enough tension to keep the derailleur in place without overstretching. 4. Adjust the cable tension accordingly using the barrel adjuster until shifting feels smooth and precise. Proper cable tension ensures accurate shifting and prevents electronic shifting issues caused by improper cable slack. Regularly inspecting and maintaining cable tension can also extend the lifespan of your shifting system. Additionally, understanding performance upgrades can help optimize your bike’s overall responsiveness and efficiency. Keeping your cable system clean and well-lubricated can further improve shifting performance and reduce wear. Being aware of cookie management and maintaining privacy settings can also contribute to a smoother online experience when troubleshooting or sourcing parts online.
Verify Connections and Wiring
Start by checking your battery terminals to guarantee they’re clean and properly connected, as low or loose power can cause shifting issues. Next, inspect the shift sensor cables for any damage or loose fittings that might disrupt signal transmission. Finally, confirm all wiring connections are secure and free of corrosion to prevent communication errors between components. Additionally, ensuring proper wiring practices can help optimize performance and prevent future problems. Regularly inspecting and maintaining electronic components can also reduce the risk of shifting malfunctions. Incorporating ethical hacking principles such as thorough testing can help identify vulnerabilities in electronic systems before they cause operational issues. Moreover, following proper wiring standards can further enhance safety and system reliability. Proper wiring techniques that adhere to industry standards can also help prevent malfunctions and improve overall system longevity.
Check Battery Terminals
Have you checked whether your battery terminals are securely connected and free of corrosion? Loose or corroded terminals can cause shifting issues. To guarantee proper connection, follow these steps:
- Turn off your vehicle and disconnect the negative terminal first.
- Inspect the terminals for any signs of battery corrosion—white, powdery deposits.
- Clean corrosion with a mixture of baking soda and water, then dry thoroughly.
- Tighten the terminal clamps firmly to eliminate any looseness, ensuring proper terminal tightening.
Properly secured terminals prevent electrical glitches. Corrosion can impede current flow, leading to shifting malfunctions. Regularly inspecting and maintaining your battery terminals is a quick, effective way to keep your electronic shifting system running smoothly.
Inspect Shift Sensor Cables
To guarantee your electronic shifting system functions correctly, you need to carefully inspect the shift sensor cables for secure connections and proper wiring. Start by checking the cable routing to ensure cables aren’t pinched, bent sharply, or tangled, which can cause signal issues. Confirm that the shift sensor’s connectors are firmly plugged in and free of corrosion or dirt. Loose or damaged cables can lead to shifting problems, so tighten any loose connections. Look for any signs of wear, fraying, or cuts along the cables that could disrupt communication between the sensor and shifter. Proper cable routing not only prevents damage but also ensures consistent signal transfer. Taking these steps helps identify potential wiring issues before they escalate, keeping your electronic shifting system operating smoothly.
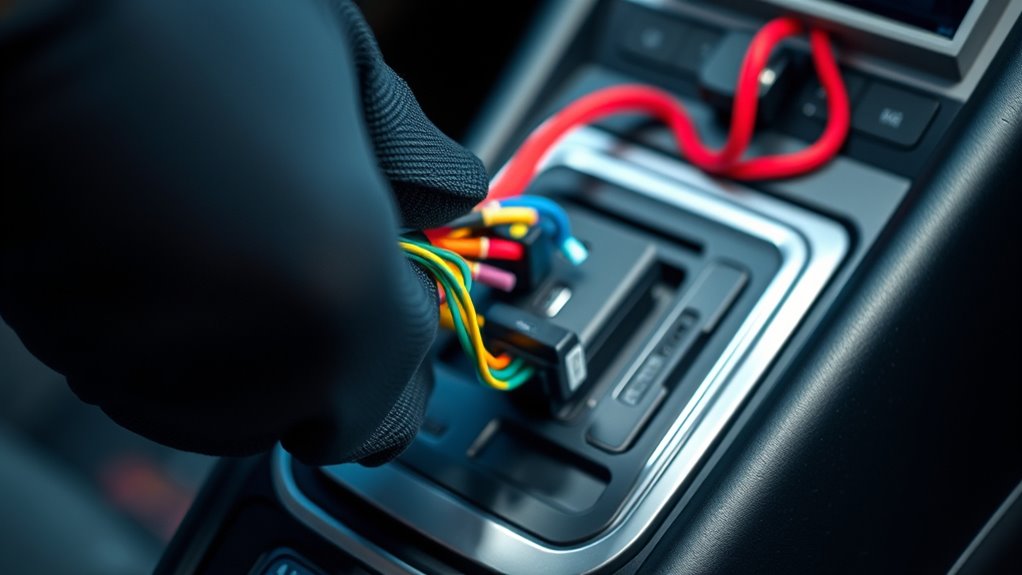
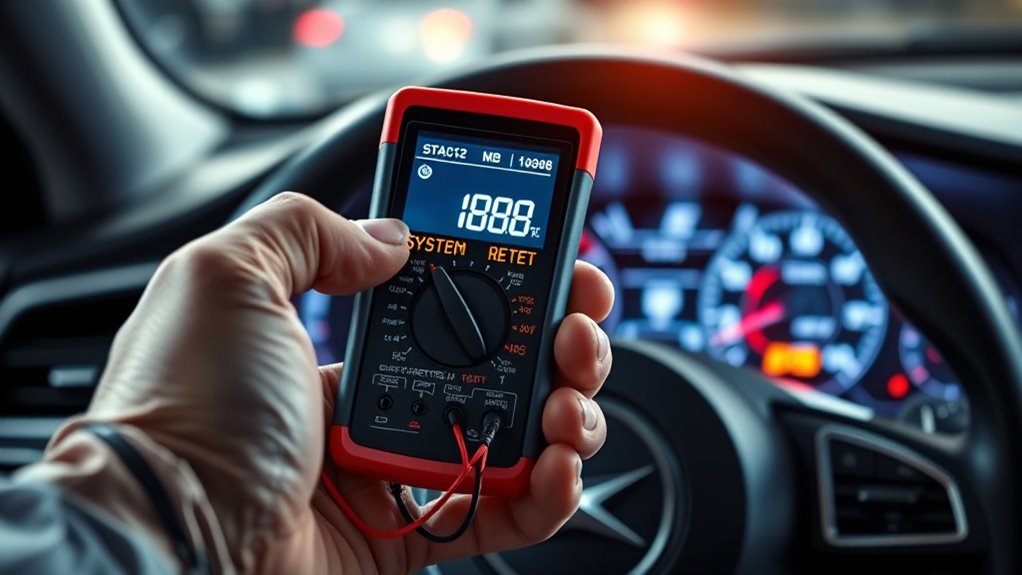
Confirm Wiring Connections
How can you be sure that your wiring connections are solid and reliable? Start with a connector check—inspect each connector to ensure it’s fully seated and free of corrosion. Next, refer to your wiring diagram to verify that all wires are connected correctly, matching colors and pinouts. Then, perform a visual inspection to look for damaged or frayed wiring that could cause issues. Finally, test the wiring with a multimeter to confirm continuity and proper voltage levels. By following these steps, you can quickly identify loose or faulty connections that might disrupt your electronic shifting system. Confirming wiring connections guarantees your shift sensor receives accurate signals, preventing shifting problems and saving you time troubleshooting later.
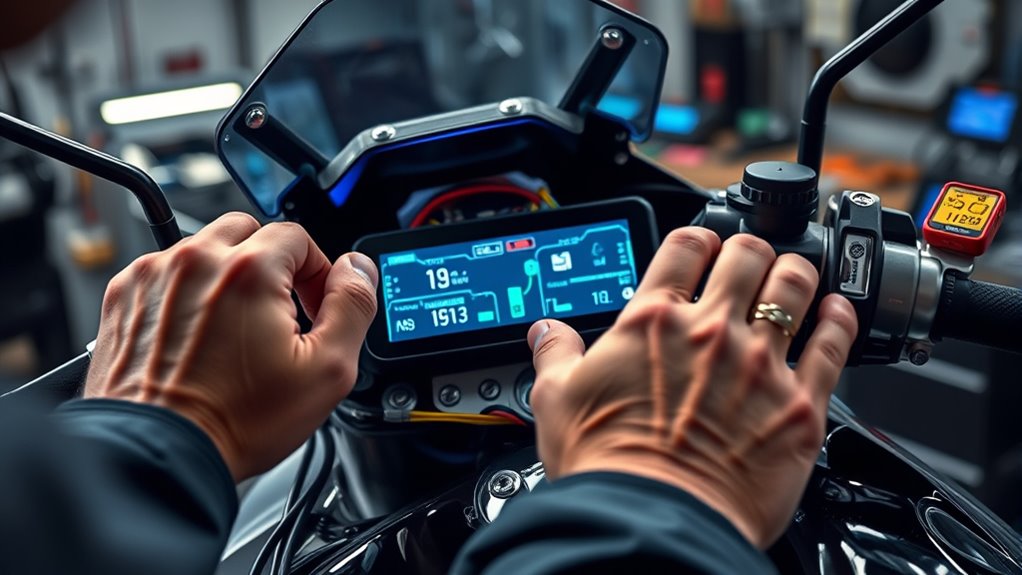
Test the Shifter’s Functionality

Before attempting any adjustments, it’s essential to verify that your electronic shifter is functioning correctly. Start by testing the shifter’s responsiveness and ensuring it moves smoothly through all gear positions. Pay attention to shifter ergonomics—how comfortably it fits your hand and how easily you can operate it based on your rider preferences. If the shifter feels stiff or unresponsive, it could indicate a problem that needs addressing before making adjustments. Make sure to press the shifter button firmly and observe if the derailleur responds promptly. Confirm that the shifter’s display accurately reflects changes. If it doesn’t, the issue may lie elsewhere. Testing the shifter’s functionality thoroughly helps identify whether it’s a user issue or a mechanical/electronic fault needing further diagnosis.
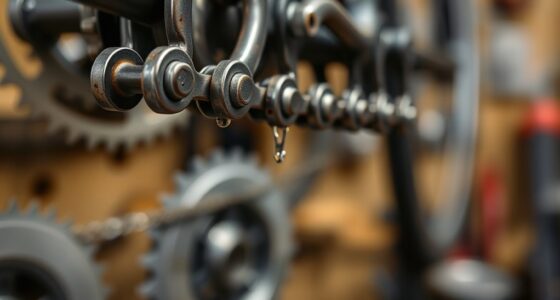
Examine the Cables and Housing for Damage
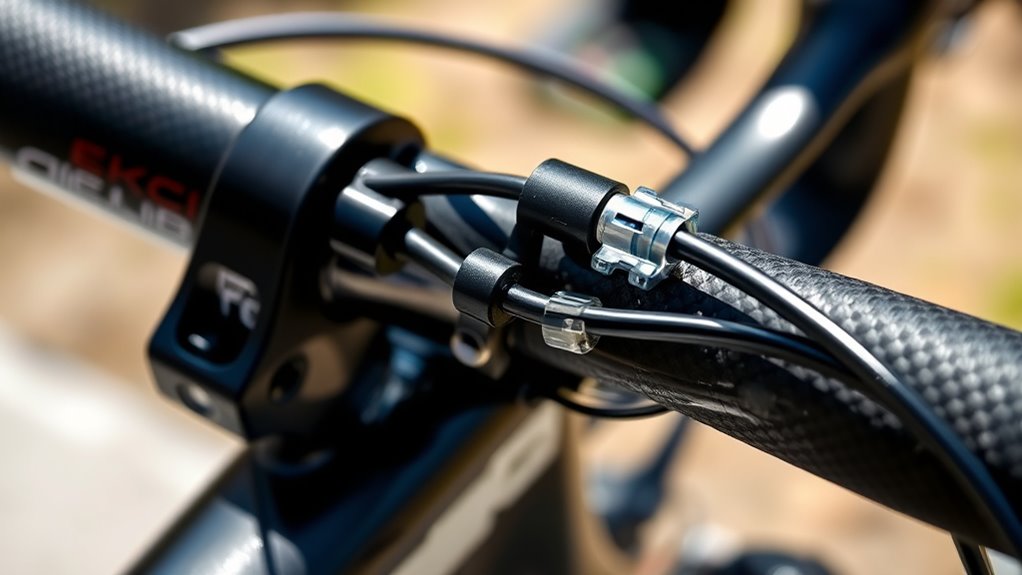
Inspecting the cables and housing for damage is a crucial step in diagnosing electronic shifting issues. Damaged cables or worn housing can cause shifting problems or unresponsiveness. To check thoroughly, start by:
Inspect cables and housing for damage to ensure smooth, responsive electronic shifting.
- Inspecting the cables for visible signs of cable damage like frays, kinks, or corrosion.
- Examining the housing for wear, cracks, or splits that could hinder smooth cable movement.
- Ensuring the housing is properly seated and not pinched or compressed.
- Sliding the cables through the housing to feel for any resistance or rough spots indicating damage or wear.
If you notice cable damage or housing wear, replacing these components can restore proper shifting function and prevent future issues. Always address these physical problems before moving on to more complex diagnostics.
Update Firmware and Software

Have you checked if your electronic shifting system’s firmware and software are up to date? Firmware updates are crucial because they fix bugs, improve performance, and add new features. Software patches can address compatibility issues and enhance shifting accuracy. To update, connect your bike’s computer or app to your device and follow the manufacturer’s instructions. Regularly checking for updates ensures your system runs smoothly and minimizes shifting problems. Skipping updates may leave your system vulnerable to glitches or miscommunications between components. Keep your firmware current to optimize shifting precision and reliability. Remember, manufacturers often release updates to fix known issues, so staying up to date is a simple but essential step in diagnosing and preventing electronic shifting troubles.
Reset the System and Recalibrate
Sometimes, electronic shifting issues can be resolved by resetting the system and recalibrating the components. Start by turning off your bike and disconnecting the Bluetooth device. Next, follow these steps:
Reset your bike and recalibrate components to fix electronic shifting issues quickly and restore smooth performance.
- Power on the bike and check the digital display for any error messages.
- Use the reset button or menu options to reboot the system.
- Reconnect your Bluetooth device and ensure it’s properly paired.
- Calibrate the shifting system according to your bike’s instructions, checking the digital display for confirmation.
This process helps clear minor glitches and ensures the system communicates correctly. Recalibration aligns the electronic components, improving shift accuracy. Always verify Bluetooth connectivity and digital display readings after the reset to confirm everything’s functioning smoothly.
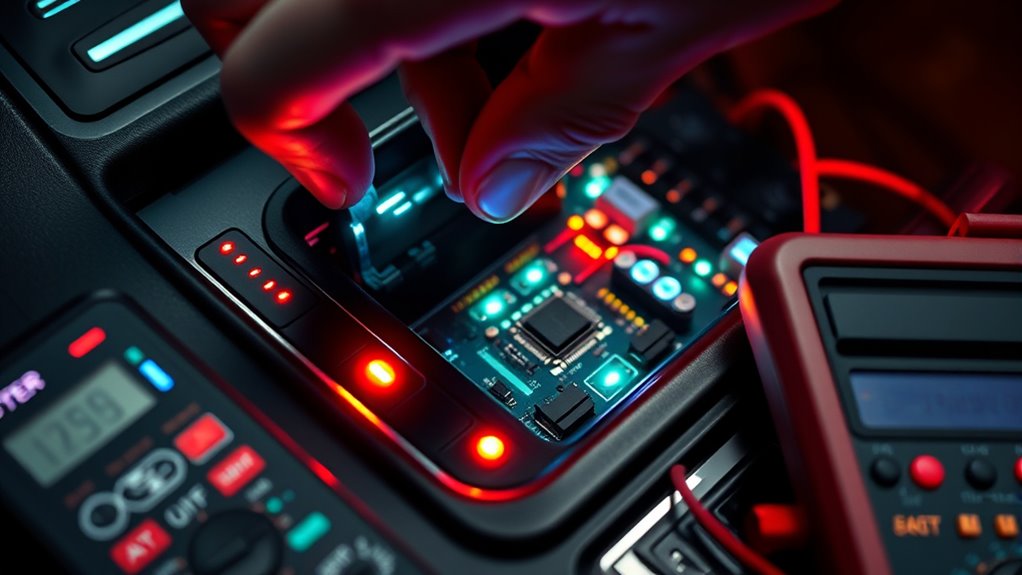
Identify and Resolve Error Codes

After resetting and recalibrating your system, the next step is to identify any error codes that may indicate underlying issues. Error code interpretation is key to efficient electronic troubleshooting. Use your diagnostic tool to scan the system and retrieve stored codes. These codes reveal specific problems, such as sensor malfunctions or wiring issues, guiding your next steps. Pay attention to the codes’ details and cross-reference them with the manufacturer’s manual or online resources. Resolving error codes promptly can prevent further damage and restore smooth shifting. If you’re unsure, consult technical support or a professional. Accurate error code interpretation simplifies troubleshooting, saving you time and effort. Addressing these codes quickly is essential for maintaining ideal electronic shifting performance.
Frequently Asked Questions
Can Weather Conditions Affect Electronic Shifting Performance?
Weather impact can definitely influence electronic shifting performance. Extreme temperatures, rain, and humidity affect the bike’s electronic components, causing potential delays or malfunctions. Climate considerations, like cold weather, might slow down signal transmission or cause corrosion, leading to shifting issues. So, you should regularly check your system and safeguard it from harsh weather to guarantee smooth, reliable shifting regardless of the weather conditions.
How Often Should I Perform Maintenance on My Electronic Shifter?
Think of your electronic shifter as a well-oiled machine that needs regular TLC. You should perform maintenance every 6-12 months, depending on riding conditions. Keep the shift cable lubricated to guarantee smooth shifts, and check the battery regularly—replace it when it’s low to prevent power hiccups. Proper upkeep keeps your shifting crisp and reliable, saving you from unexpected issues on the road.
Are There Specific Tools Required for Troubleshooting?
When troubleshooting electronic shifting issues, you’ll need specific diagnostic tools like a scan tool or diagnostic scanner to read error codes and assess system performance. Additionally, consulting troubleshooting guides can help you identify common problems and solutions. These tools make the process quicker and more accurate, allowing you to pinpoint issues efficiently. Make sure you have the right diagnostic equipment on hand to streamline your troubleshooting process effectively.
What Should I Do if the System Still Malfunctions After Troubleshooting?
If your system still malfunctions after troubleshooting, you should first check for a software update, as outdated software can cause issues. If updating doesn’t help, consider replacing the faulty component. Always follow the manufacturer’s instructions for software updates and component replacement to guarantee proper functioning. If problems persist, consult a professional technician to diagnose deeper system issues and prevent further damage.
Is Professional Assistance Recommended for Complex Electronic Shifting Issues?
Imagine your bike’s electronic shifting like a delicate dance that needs perfect coordination. When you face complex repairs or persistent issues, it’s wise to seek professional help. These experts have the tools and expertise to diagnose and fix intricate problems efficiently. Trying to tackle complex electronic shifting issues alone might lead to more damage or frustration. Trusting professionals guarantees your system receives the care it needs, so your ride remains smooth and reliable.
Conclusion
By following these steps, you can quickly diagnose and fix electronic shifting issues, saving time and avoiding costly repairs. Did you know that about 60% of electronic shifting problems stem from simple wiring or connection errors? Regular maintenance and timely updates can prevent most malfunctions, ensuring smooth, reliable gear changes on every ride. Stay vigilant, keep your system updated, and enjoy flawless shifting performance every time you hit the trails.