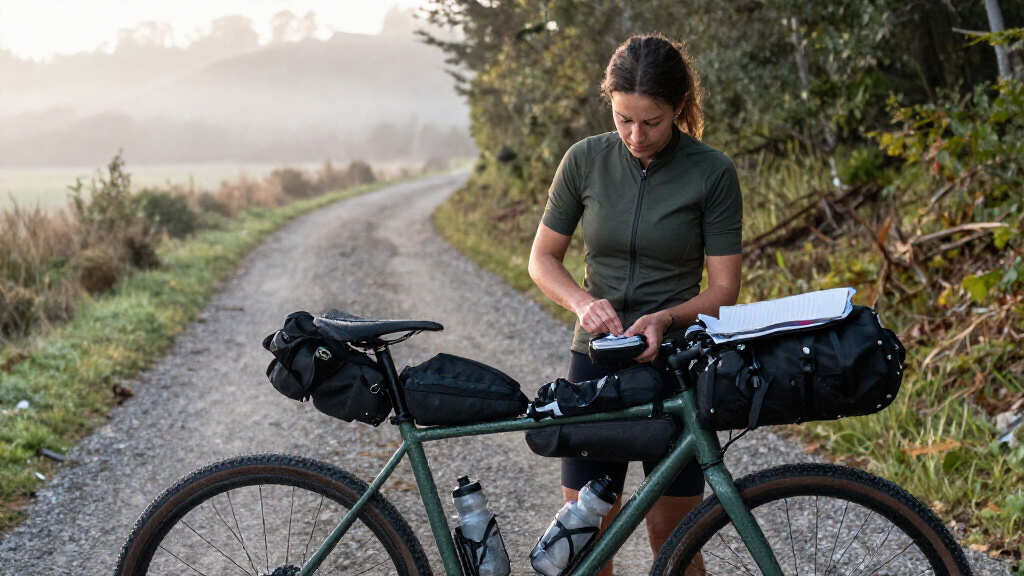

This checklist is for riders planning overnight trips by bike who want to think through the essentials before packing. It covers carrying gear, sleeping outdoors, and handling basic repairs, with practical choices for the listed products and advice where no pick is specified.

Get sports gear delivered free with Prime
- Fast, free delivery on millions of items
- Prime Video, Amazon Music and more included
- Member-only deals all year
The sections follow the gear categories in the checklist: handlebar, seat, and frame storage; a tent; a sleeping pad; and a repair kit. Each item gets a distinct role in the overall setup, so you can consider how the pieces fit together before deciding what to bring.
Use the notes as a starting point, then check each item against your bike, route, and overnight plans. Confirm dimensions and attachment compatibility with your actual setup, and keep frequently needed items accessible. A careful fit check helps avoid packing something that cannot be secured or used comfortably on your trip.
Bikepacking Handlebar Bag
A handlebar bag gives you a place to carry gear at the front of the bike, where access can be convenient during a ride. The listed pick is the ROCKBROS Waterproof Bicycle Handlebar Bag Set, 21 L. Before choosing it, check how its mounting system attaches to your handlebar and whether the bag will have clearance from cables, brake levers, lights, and any front accessories.
A common mistake is treating capacity as the only consideration. A bag that holds the planned load still needs to sit securely, avoid interfering with steering, and suit the bike’s cockpit. Check the product’s stated dimensions and mounting details against your handlebar shape and available space. Also consider how the contents will be organized: items you need on the move should be reachable without unpacking everything. The product name describes the bag set as waterproof, but review its closure and use instructions and protect sensitive contents appropriately for your conditions. Secure attachment and cockpit clearance matter as much as room for gear.
What to look for:
- Confirm the mounting system fits your handlebar.
- Check clearance around cables, levers, lights, and accessories.
- Compare bag dimensions with available cockpit space.
- Plan which items need to be easy to reach.
- Review closure and weather-protection details.
ROCKBROS Waterproof Bicycle Handlebar Bag Set, 21 L

This two-bag handlebar set is made from 600D nylon with a TPU film and features roll-up closures to help protect contents from wet weather. The bags can be used together or separately, attach with adjustable quick-release straps, and include a reflective logo for visibility.
Pros:
- Two bags can be used together or separately
- Roll-up closure and water-resistant materials help protect contents
- Quick-release straps support convenient mounting
- Reflective logo improves visibility
Cons:
- The listed capacity is inconsistent: 19–21 L total, with component capacities of 5–6 L and 14–15 L
- The description calls the bags waterproof while also describing them as water-repellent
Best for: Riders who want handlebar storage for their trip essentials
Not ideal for: Bikes whose cockpit or accessories leave insufficient mounting clearance
Bottom line: Check fit and access on your bike before packing the ROCKBROS bag.
Bikepacking Seat Pack
A seat pack adds storage behind the saddle and can help keep gear off the handlebars and frame. No specific product is listed for this slot, so start by deciding what you want to carry there and measure the space available beneath and behind your saddle. The pack should attach to your seatpost and saddle securely while leaving enough room for the rear tire, especially when the bike is loaded or the terrain is rough. Available clearance is the first fit check.
A common buying mistake is selecting a pack by its stated capacity without checking its shape against the bike. Seatpost length, saddle hardware, dropper-post use, and tire clearance can all affect compatibility. Check the manufacturer’s fit guidance for your frame and intended setup, and consider whether the attachment points can support your planned load. Pack items so the contents stay stable and the bag can be closed fully; shifting or poorly secured gear can make handling less predictable. If you use a dropper post, verify that the bag and its straps will not interfere with its movement. Fit, stability, and access should guide the choice.
What to look for:
- Measure saddle-to-tire and seatpost clearance.
- Check compatibility with saddle rails and seatpost type.
- Confirm fit guidance for dropper-post use, if applicable.
- Choose a shape suited to the gear you plan to carry.
- Check how the pack secures and closes when loaded.
Bikepacking Frame Bag
A frame bag uses space within the bike’s frame, keeping some gear centered and close to the bike. The listed pick is the Rhinowalk Bike Triangle Frame Bag Waterproof IPX4 Slim Fit Cycling Sto. Since frame shapes and bottle-cage layouts vary, compare the bag’s dimensions and attachment points with your specific frame before buying. Check that it leaves room for your knees, bottle access, and any cables or accessories routed through the frame.
A frequent mistake is assuming a triangle bag will fit every frame because of its category name. Measure the usable triangle and consider the space taken by bottle cages, suspension components, or other equipment. Check the product’s IPX4 designation and the maker’s guidance so you understand the intended weather protection; keep items that must stay dry in suitable protection for your conditions. Also consider how the bag opens and whether its contents can be reached while the bike is stopped. Frame measurements and attachment compatibility are essential to a clean fit.
What to look for:
- Compare product dimensions with the usable frame triangle.
- Check strap locations against cables and frame fittings.
- Confirm room for bottles and other mounted accessories.
- Review the stated IPX4 protection and care guidance.
- Consider access to contents when the bag is mounted.
Rhinowalk Bike Triangle Frame Bag Waterproof IPX4 Slim Fit Cycling Storage Pouch

This waterproof bike frame bag offers a slim, aerodynamic design with a 2.6L capacity, suitable for MTB and road bikes. It features multiple compartments, adjustable straps, and a cable port for electronics, ensuring secure and organized storage during rides.
Pros:
- Waterproof materials protect gear from the elements
- Aerodynamic slim design reduces wind drag
- Multiple compartments and cable port for electronics
- Adjustable straps for secure fit
Cons:
- Limited capacity may not suit larger gear loads
- Only compatible with certain bike frame sizes
Best for: Riders whose frame measurements match the bag
Not ideal for: Frames with limited triangle space or obstructing accessories
Bottom line: Measure the frame and verify accessory clearance before selecting this bag.
Lightweight Camping Tent
A tent provides shelter for an overnight stop, so the right choice depends on where you plan to camp and how you will carry it. No specific tent is listed here. Begin with the conditions you expect and the space available in your bikepacking setup, then compare the packed dimensions and weight information supplied by each manufacturer. Packed size matters because a tent must fit securely alongside the rest of your load.
A common mistake is focusing only on the tent’s sleeping capacity while overlooking its packed shape, setup method, or compatibility with the campsite conditions. Check the interior dimensions against the number of occupants and the gear you want inside, and review the manufacturer’s guidance on weather use and care. Think through where the tent poles and fabric will ride; long or awkward components may not fit every bag. Practice the setup before departure so you know how the pieces work together. Capacity, packed dimensions, and intended conditions should all inform the choice.
What to look for:
- Check packed dimensions against your storage options.
- Match sleeping capacity to occupants and inside gear needs.
- Review manufacturer guidance for expected weather conditions.
- Check pole length and whether components can be packed separately.
- Practice setup before taking the tent on a trip.
Compact Sleeping Pad
A sleeping pad adds a layer between you and the ground, making it an important part of an overnight setup. The listed pick is the NEMO Equipment Switchback Foam Sleeping Pad. Check its packed size and length against the space available on your bike, and compare the sleeping dimensions with your height and preferred sleeping position. A compact item still needs to fit both the rider and the load plan.
A common mistake is judging a pad solely by its label rather than checking its measurements and intended use. Review the manufacturer’s specifications for dimensions, packed form, and care, then decide whether those details suit your trip and storage arrangement. Consider how you will attach or pack it so it does not shift or obstruct other gear. If you are choosing between different pad styles, compare their stated features and your own priorities without assuming one format suits every rider. Fit and packability are practical checks before the trip.
What to look for:
- Compare sleeping length and width with your needs.
- Check packed dimensions against available bike storage.
- Review the manufacturer’s stated specifications and care guidance.
- Plan how the pad will be secured for transport.
- Consider your sleeping position and overnight setup.
NEMO Equipment Switchback Foam Sleeping Pad

The NEMO Switchback Foam Sleeping Pad is an ultralight, insulated, and packable sleeping pad designed for backpacking and mountaineering. It features a hexagonal nesting pattern for increased plushness and warmth, with durable dual-density foam and thermal reflective film for enhanced comfort and heat retention.
Pros:
- Lightweight and highly packable for backpacking
- Provides excellent insulation and warmth
- Durable construction with supportive foam layers
Cons:
- May be less cushioned than inflatable pads
- Rigid structure might be less comfortable for side sleepers
Best for: Riders whose storage plan accommodates its packed dimensions
Not ideal for: Anyone whose bike setup cannot secure the pad comfortably
Bottom line: Verify the pad’s dimensions and attachment plan before packing it.
Portable Bike Repair Kit
A repair kit helps you address basic bicycle issues while away from home. The listed pick is the 23 Piece Bike Tool Kit – Bicycle Repair Tool Box. The product name identifies a 23-piece kit, but the name alone does not establish which tools it includes or whether they suit your bicycle. Review the full contents and compare them with your bike’s fasteners, components, and the simple repairs you are prepared to handle.
A common mistake is carrying a kit without checking that its tools match the bike. Confirm compatibility with your axle type, tire setup, and any components that require a particular tool. Consider whether the kit includes the supplies you need for your tires, and add any essentials that are missing. Check the case dimensions and decide where it can be carried without rattling or becoming difficult to reach. Before departure, learn to use the tools for the repairs you expect to attempt; a tool you cannot operate confidently may not help in the moment. Contents, bike compatibility, and familiarity make the kit useful.
What to look for:
- Inspect the full list of included tools and supplies.
- Match tools to your bike’s fasteners and components.
- Check suitability for your tire and axle setup.
- Confirm the case fits securely in your chosen storage spot.
- Practice using the tools before the trip.
23 Piece Bike Tool Kit – Bicycle Repair Tool Box
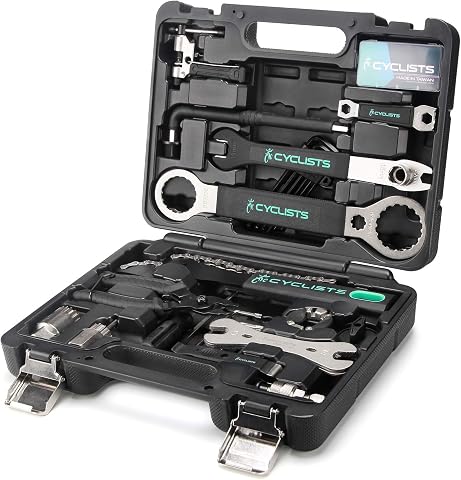
This comprehensive 23-piece bike tool kit includes all essential tools for routine maintenance, repairs, and upgrades. Designed for home use, work, or on-the-road repairs, it features durable, high-quality materials and comes with a storage case.
Pros:
- Complete set with all necessary bike repair tools
- Durable construction with high-quality materials
- Includes a convenient storage case
- Suitable for home, work, or on-the-road repairs
Cons:
- May be more than needed for casual cyclists
- Tools may require some familiarity to use effectively
Best for: Riders who confirm the included tools match their bicycle
Not ideal for: Bikes requiring tools or supplies absent from the kit
Bottom line: Review the contents and verify compatibility before relying on this kit.
Build your setup in a practical order: first confirm the repair tools match your bicycle, then choose storage that fits the frame and cockpit, and finally check that shelter and sleep gear fit the remaining carrying space. Prioritize the items that support your route and overnight plan, and make each fit and compatibility check before packing.
You do not need to solve every gear decision at once. Measure your bike, make a short packing list, and test how the loaded setup rides and carries. With a few careful checks and a plan for the essentials, you can head into your next trip with more confidence in your setup.
Halloween Picks

Fun Costumes Creepy Twin Boys Halloween Animatronic

HOPOCO Halloween Pumpkin Fog Machine with 12 LED Colors & Remote Control

Vexalify 11-Inch Halloween Pumpkin Fog Machine with 12-Color Lights
As an affiliate, we earn on qualifying purchases.