
To replace your shift cables and housing, first check for signs like sluggish or inconsistent shifting. Remove the old cables carefully, noting their routing so you can replicate it or improve it. Choose quality housing that suits your riding conditions, and thread the new cables through the housing smoothly, ensuring no sharp bends. Secure everything firmly and make precise adjustments. If you continue, you’ll discover detailed tips to get the best results and keep your bike shifting perfectly.
Key Takeaways
- Inspect cables for fraying, corrosion, or sluggish shifting to determine if replacement is needed.
- Remove old cables and housing, noting routing to ensure correct installation of new parts.
- Choose high-quality housing and inner cables to improve durability and shifting performance.
- Thread new cables through properly routed, straight housing segments, securing at mounting points.
- Test and adjust shifting after installation for smooth gear changes and optimal response.
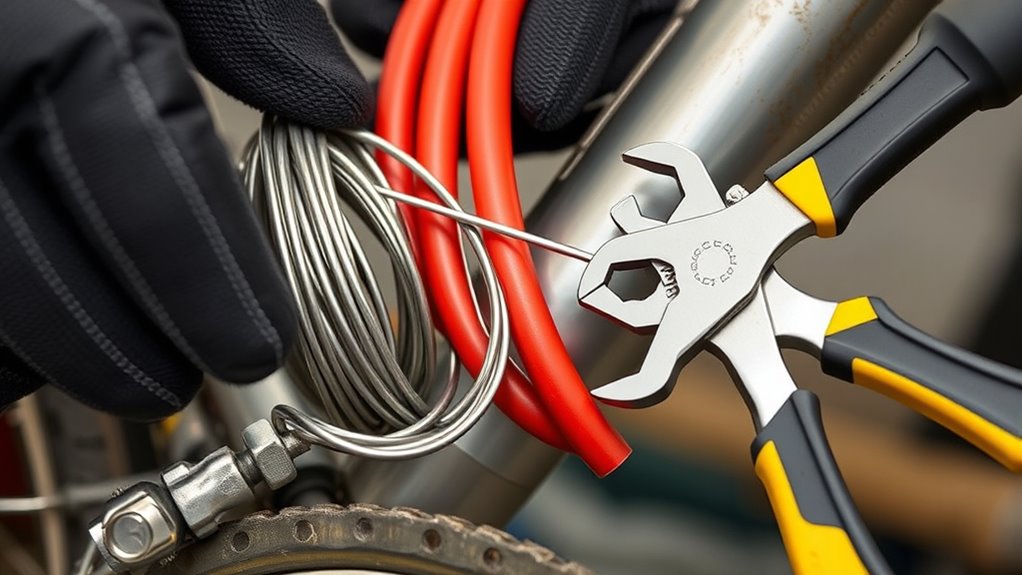
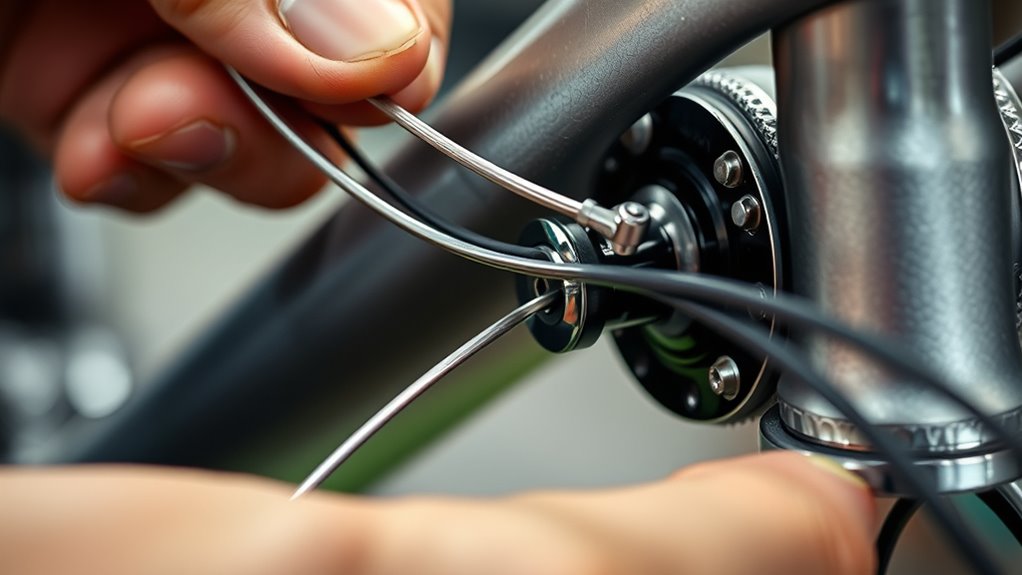
If your bike’s shifting feels sluggish or inconsistent, it might be time to replace the shift cables and housing. Over time, cables can stretch, fray, or corrode, and the housing can accumulate dirt or develop cracks, all of which hinder smooth gear changes. When replacing these parts, paying attention to cable routing is essential. Proper cable routing ensures that the cables glide smoothly without unnecessary bends or kinks, which can cause friction and delay shifting. Before removing old cables, check how they’re routed along your frame, as this will guide you in installing the new ones correctly. Keep the existing routing pattern or optimize it for smoother operation, especially around tight bends or complicated frame junctions. Using high-quality housing material** can significantly improve shifting performance and durability. The housing material plays a critical role in how well your shifting performs. Most bike housing is made from a combination of an inner steel or stainless steel cable and an outer shell, which can be made from various materials like plastic, alloy, or even composite compounds. Plastic housing is lightweight and affordable but might crack or wear out faster, especially in rough riding conditions. Alloy or composite housings tend to be more durable and provide better protection against dirt and moisture, which is essential for maintaining consistent shifting. When choosing new housing, consider the material that best suits your riding style and environment. High-quality housing with smooth interior liners reduces friction, making gear changes feel more precise and effortless. Installing new shift cables and housing isn’t complicated, but it requires attention to detail. First, you’ll need to remove the old cables, ensuring you follow the existing cable routing or adjust it for a cleaner, more efficient path. As you thread the new cables through the housing, make sure they run straight without sharp bends, and secure the housing firmly at mounting points to prevent movement. Use cable end caps or ferrules to prevent fraying and ensure the cable ends are cut cleanly, allowing for smooth insertion into shifters and derailleurs. Proper housing length is essential; too long and it might cause sluggish shifts, too short and it could pinch or restrict movement. After installation, test your shifting carefully, making adjustments at the derailleur or shifters if needed. Properly routed cables and quality housing material will considerably improve your bike’s shifting response**, making your rides more enjoyable and reliable.
Frequently Asked Questions
How Do I Choose the Right Shift Cable Length?
To select the right shift cable length, start by measuring your bike’s cable routing path, guaranteeing smooth bends and minimal tension. Use your existing cable as a reference, or check the manufacturer’s specifications for housing compatibility. It’s essential the cable isn’t too tight or too loose, so test fit before final installation. Proper length ensures ideal shifting performance and prevents unnecessary wear on components.
Can I Upgrade to Higher-Quality Shift Cables?
Yes, you can upgrade to higher-quality shift cables, but make sure they resist cable corrosion and are compatible with your housing. Higher-quality cables often feature better coatings and materials, which can improve durability and shifting performance. Always check that the new cables fit your bike’s housing compatibility, and consider upgraded cables if your current ones show signs of rust or difficulty shifting. This guarantees smoother, more reliable gear changes.
What Tools Are Needed for Replacing Shift Housing?
You’ll need a few tools to replace shift housing—think of it as a quest for clarity, not chaos. Grab a cable cutter, hex wrenches, and a housing compression tool. Don’t forget to check cable lubrication and housing compatibility, or your shifting saga might turn into a comedy of errors. Proper tools help you avoid frustration, ensuring smooth gear changes and a bike that shifts like butter.
How Often Should Shift Cables and Housing Be Replaced?
You should replace your shift cables and housing when you notice cable corrosion or if shifting becomes sluggish. Typically, every 2-3 years, check for wear and ensure housing compatibility. If the cables are frayed or corroded, or if shifting feels inconsistent, it’s time for a replacement. Regular maintenance keeps your bike shifting smoothly and prevents more significant issues down the line.
Will Replacing Cables Improve Shifting Performance Immediately?
Replacing cables can considerably improve shifting performance right away, especially if you’ve maintained proper cable lubrication. Studies show that poorly lubricated or incompatible housing causes up to 50% more resistance, leading to sluggish shifts. When you replace cables, ensure housing compatibility to prevent future issues. This quick upgrade offers immediate smoother shifts and prolongs the life of your drivetrain, making your rides more efficient and enjoyable.
Conclusion
Replacing your shift cables and housing is like giving your bike a fresh set of wings, ready to soar smoothly through every gear change. With each new cable, you’re tightening the strings of control, transforming a rusty, sluggish tune into a crisp, responsive melody. Think of it as reviving a tired engine—suddenly, everything shifts seamlessly, and your ride feels brand new. Embrace the upgrade, and enjoy the symphony of effortless cycling ahead.