Before every trip, quickly inspect your hitch rack to guarantee safety. Check that the rack and mounting points are in good condition, free of rust or damage. Confirm all bolts and fasteners are tight, using a torque wrench if needed. Make sure safety pins and locking mechanisms are fully engaged and functioning smoothly. Examine straps and tie-downs for wear or fraying, replacing them if necessary. Regularly performing these simple checks helps keep your rack secure—continue to learn more for total peace of mind.

Get sports gear delivered free — and shop member deals
- Fast, free delivery on millions of items
- Access to Prime Big Deal Days deals on October 6–7
- Prime Video, Amazon Music and more included
Key Takeaways
- Inspect the overall rack condition and mounting points for rust, corrosion, or damage.
- Verify all bolts, nuts, and fasteners are tight using a torque wrench per manufacturer specs.
- Check that locking mechanisms and safety pins are fully engaged, secure, and free of debris.
- Examine straps, clamps, and tie-downs for fraying, wear, or damage; replace if necessary.
- Lubricate moving parts and perform visual checks for looseness or wobbling before each trip.
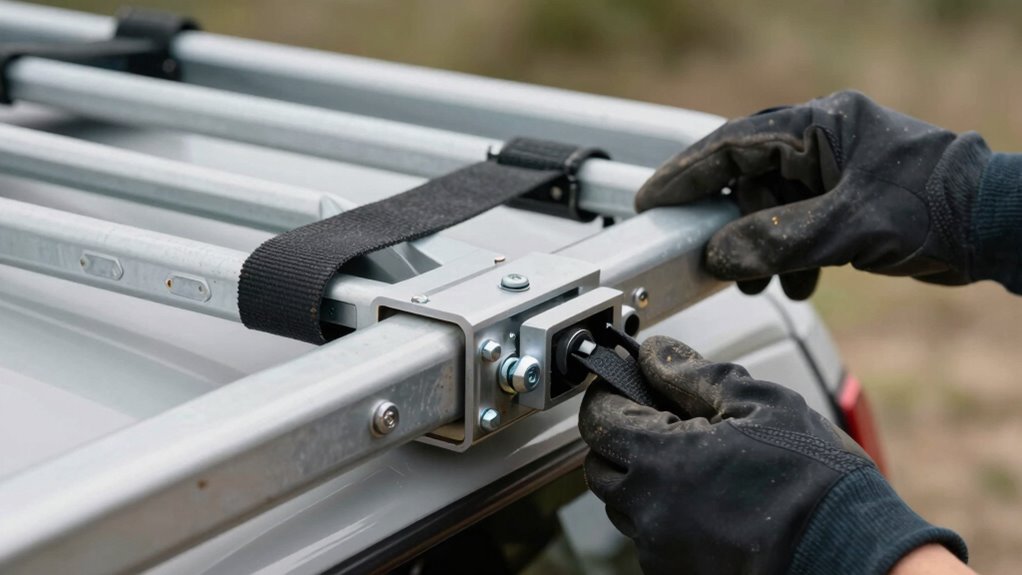
Maintaining your hitch rack is crucial to guarantee it stays safe and functional for years to come. Before hitting the road, it’s important to perform a quick check to ensure everything is in proper working order. Start with a safety inspection, focusing on the overall condition of the rack and its mounting points. Look for any signs of rust, corrosion, or damage that could compromise its integrity. Make sure the hitch receiver and the rack itself are securely attached to your vehicle. If you notice any looseness or wobbling, tighten the bolts and fasteners accordingly. A stable connection is critical to prevent accidents or damage during transport.
Next, pay close attention to torque adjustment. Proper torque levels are essential to keep your hitch rack firmly in place. Use a torque wrench to verify that all bolts and nuts are tightened to the manufacturer’s specifications. Over-tightening can cause damage, while under-tightening might lead to dangerous looseness. Regular torque checks are a simple yet effective way to maintain the rack’s stability over time, especially if you’ve recently driven on rough roads or after adjusting any components. Ensuring the correct torque also helps prevent wear and tear, extending the lifespan of your hitch and rack.
In addition to these primary checks, inspect the locking mechanisms and safety pins. Make sure they are fully engaged and free of rust or debris, which could hinder their function. Lubricate moving parts lightly with a suitable lubricant to keep everything operating smoothly. While you’re at it, examine the rack’s straps, clamps, and tie-downs for signs of fraying or deterioration. Replacing worn straps prevents load shifting, which could cause accidents or damage your cargo. Regularly checking the condition of projectors and maintenance routines can also help prevent unexpected failures during trips.
As an affiliate, we earn on qualifying purchases.
Frequently Asked Questions
How Often Should I Replace My Hitch Rack?
You should replace your hitch rack when it shows signs of significant wear, rust, or damage that compromise safety. Typically, the hitch rack lifespan is around 5 to 10 years, but this depends on usage and maintenance. Follow a regular replacement schedule, inspecting it before each trip, to make certain of secure transport. If you notice cracks, bent parts, or corrosion, it’s time for a replacement to keep your gear and vehicle safe.
Can I Use Any Lubricant on the Hitch Components?
You can’t just use any lubricant on hitch components; you need to verify lubricant compatibility first. Use a lubricant specifically designed for hitch racks or metal parts to prevent damage. Incorporate this into your maintenance schedule, applying lubricant regularly to keep parts moving smoothly. Avoid over-lubricating, as excess can attract dirt and debris, leading to wear. Proper maintenance ensures your hitch rack stays reliable and safe for every trip.
What Signs Indicate My Hitch Rack Needs Professional Repair?
Did you know that over 60% of hitch rack failures result from unnoticed damage? If you see rust, bent parts, or loose bolts, your hitch rack has signs of wear that indicate it needs professional repair. Also, if it doesn’t lock securely or makes unusual noises, these are clear signs of hitch rack damage. Don’t ignore these signs; getting it checked guarantees your safety and your gear’s security.
Is It Safe to Leave My Bike on the Rack Overnight?
It’s generally safe to leave your bike on the rack overnight if you’ve secured it properly. Make sure the rack’s security features are engaged, and consider using additional locks to prevent bike theft. Always park in well-lit, busy areas to deter theft. Remember, even with good rack security, never leave your bike unattended if it’s valuable or in an unsafe neighborhood. Taking these precautions helps keep your bike safe overnight.
How Do I Prevent Rust and Corrosion on My Hitch Rack?
To prevent rust and corrosion on your hitch rack, you should regularly clean and dry it after each use, especially if exposed to moisture. Apply a rust prevention spray or a thin coat of lubricant to prevent moisture buildup. Store your rack in a dry, covered area when not in use, and check for signs of corrosion regularly. These steps will help keep your rack in top condition and extend its lifespan.
Conclusion
Remember, a little maintenance goes a long way in keeping your hitch rack safe and ready for every trip. Quick checks before hitting the road make certain your gear stays secure and your journeys stay smooth. Don’t wait for a problem to arise—prevention is better than cure. As the saying goes, “A stitch in time saves nine.” So, take those few extra minutes to inspect, and enjoy worry-free adventures every time you rack up!
NFL season / tailgating Picks
team gear
As an affiliate, we earn on qualifying purchases.