
TL;DR

Get sports gear delivered free — and shop member deals
- Fast, free delivery on millions of items
- Access to Prime Big Deal Days deals on October 6–7
- Prime Video, Amazon Music and more included
Mountain bike hydration packs keep water within reach and make room for trail essentials, but the right choice depends on ride length, fit, and cleaning habits. Start with a secure, low-bounce fit and enough capacity for your usual route, then check that the reservoir is easy to refill, rinse, and dry.
A bottle can rattle loose just as the trail turns rocky; a hydration pack keeps water on your back and within easy reach. That convenience matters when your hands are busy steering through roots, gripping the brakes, or pushing your bike up a steep climb.
The best pack is not automatically the one with the largest bladder or the most pockets. You want a secure fit, practical water capacity, and storage that suits your rides—without a sloshing load or a damp, hard-to-clean reservoir.
Here’s how to choose a pack, adjust it for rough trails, and keep its bladder fresh. You’ll also see when a pack beats bottles, what newer features can and can’t do, and how to match capacity to a real ride rather than a marketing claim.
Match a 1-to-3-liter reservoir to ride length, conditions, and refill access rather than choosing the largest option by default.
Fit the pack while it is loaded; straps should limit bouncing without restricting breathing or reaching the bars.
Choose pockets, hose routing, and ventilation for the terrain and gear you actually use.
Use bottles for simple, short rides when convenient; choose a pack when hands-free access or extra storage helps.
Rinse after use and dry the bladder and hose fully before storing.
What should a mountain bike hydration pack do on the trail?
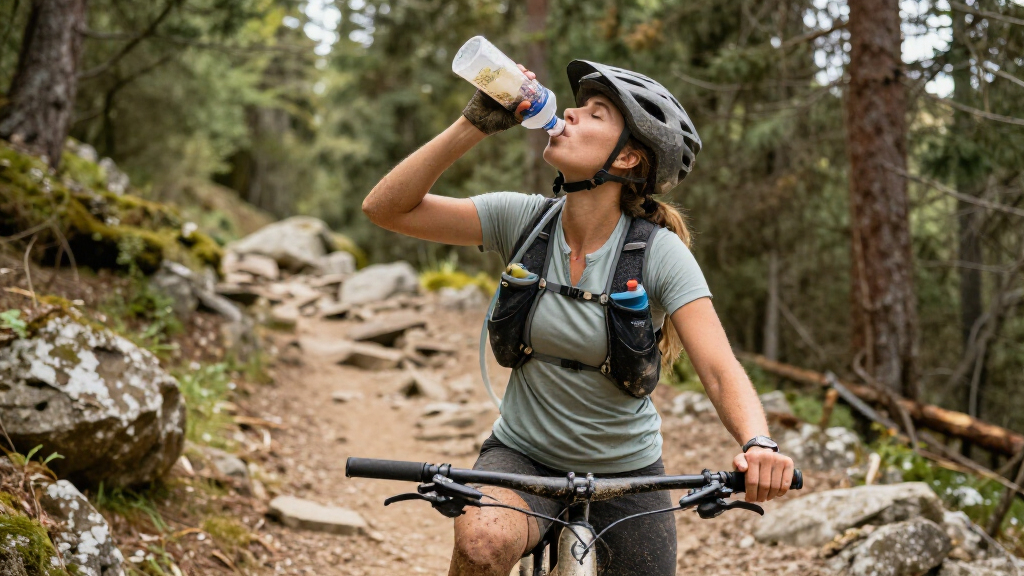
A mountain bike hydration pack carries water in a reservoir and lets you drink through a hose while riding, often with room for tools, snacks, and a phone. Its main job is simple: keep water accessible without shifting around when the trail gets rough. That stability matters because even a small amount of repeated movement can become distracting over a long ride, especially when you are choosing a line or braking on uneven ground. The best packs make that feel almost invisible.
Most reservoirs hold 1 to 3 liters. A 1-liter pack may suit a short loop with a refill point, while a longer, hotter ride can call for more water or a planned refill. Capacity is not a promise that you should carry the maximum: water adds weight, and every extra load can tug on your shoulders or move with the bike. The useful question is not “How much can this pack hold?” but “How much do I need before my next reliable refill?” That answer changes with route length, weather, effort, and personal drinking habits.
Think of the pack as a small trail kit, not just a water bag. A rider heading out for a two-hour forest loop might carry a mini pump, tire plug kit, snack, keys, and a light shell. Those items are useful only if pockets hold them quietly and you can reach what you need without unloading the whole pack. Poor organization can turn extra storage into dead weight: gear shifts, rattles, or gets buried when a quick repair matters.
Look for a low-profile shape, adjustable straps, and a hose you can secure near your shoulder. A compact profile usually keeps the load closer to your body, which can reduce the sensation of swinging when you move around the bike. Water-resistant fabric helps protect small items from splashes, but it does not necessarily make the whole pack waterproof. On a damp ride, a rain cover or a dry bag for electronics offers more reliable protection because water can enter through openings and seams even when the fabric sheds light spray.
Quick rule: Match the pack to your ride and refill options. A larger reservoir is useful when the route is long and water is scarce; it is extra weight when a tap is waiting at the trailhead.
mountain bike hydration pack 2-liter
As an affiliate, we earn on qualifying purchases.
As an affiliate, we earn on qualifying purchases.
How do you choose the right capacity and fit?
Choose capacity by matching your expected ride and refill access, then choose a fit that keeps the loaded pack close to your back. Mountain bike hydration packs commonly range from 1 to 3 liters, but a secure, comfortable 2-liter setup can serve you better than a larger pack that bounces on every descent. The difference is not just comfort: a pack that shifts can distract you, change how the load moves over rough ground, and make it harder to stay balanced when you need precise bike control.
- Estimate your route. Note ride time, expected heat, climbing, and whether you can refill. For example, a cool 60-minute local loop differs from a remote three-hour ride on an exposed ridge. A refill point can let you carry less at the start, but only count on it if you know it is accessible and working. Treating an uncertain source as guaranteed may leave you short; carrying water for every possible delay, meanwhile, means bearing that extra weight for the entire ride.
- Pick a starting capacity. Use 1 to 2 liters for many shorter outings and consider 3 liters when your ride is longer or refill points are limited. Your actual needs vary with conditions and your own drinking habits. Remember that water adds noticeable weight, so carrying extra capacity can trade a safety margin for a heavier load throughout the ride. Capacity is only useful if the reservoir is filled: a larger bladder does not improve your setup when you leave it partly empty but still carry a bulky pack.
- Load the pack before fitting it. Fill the bladder and add the tools and snacks you normally carry. An empty pack can feel fine in a shop and pull awkwardly once loaded. Keep heavier items close to your back so they move with you rather than swinging outward, and avoid placing hard tools where they can press against your spine. A sensible layout makes the load feel steadier and helps prevent pressure points; stuffing items wherever they fit can make a pack feel heavier than its actual weight.
- Adjust the straps and test movement. Tighten shoulder and chest straps until the pack sits close without restricting breathing or arm movement. Lean forward, reach for the bars, and mimic a quick side-to-side trail section. A snug fit limits bouncing, while straps tightened too far can rub, restrict your chest, or make it uncomfortable to ride uphill. The aim is controlled movement, not maximum compression; you need enough freedom to breathe deeply and shift your body on climbs and descents.
- Check hose reach and pocket access. You should be able to drink without stretching, and the hose should stay clear of your brake levers. Test the pockets you expect to use; a tool that is difficult to reach may be less useful in a roadside repair. Easy hose access encourages you to drink without stopping, while reliable pocket access can save time when you need a repair. Neither benefit is worth a hose that snags or a pocket that opens in a crash, so check how closures and clips behave while moving.
Good adjustable straps help create a secure fit, but a smaller rider may need a pack with a shorter back length rather than simply cinching every strap tight. A pack that is too long can sit on the lower back or lift at the shoulders, and tightening straps cannot reliably fix a mismatch in shape. That mismatch can keep returning as the pack shifts with each movement, even if it initially seems manageable. If the pack still lifts or swings after adjustment, try a different size or profile.
For example, if you feel the reservoir thump between your shoulder blades each time you land, the pack may sit too low, be too loose, or be overloaded. Remove nonessential gear, tighten the fit, and test again on an easy trail before heading into rough terrain. If the movement remains, treat it as a fit problem rather than something you must simply get used to. Finding the cause before a long ride prevents repeated impacts from turning a minor annoyance into a reason to stop or ride less confidently.
Which features make a pack more comfortable during rough terrain?
A pack stays comfortable during rough terrain when it fits close, distributes weight evenly, and lets heat escape from your back. Adjustable straps for a secure fit, a shaped back panel, and sensible padding matter more than a long list of extras. A pack should move with you, not tug at your shoulders every time you stand on the pedals. These features work together: padding can soften pressure, but it cannot compensate for a poor fit or a load that is too heavy. A well-shaped panel also helps spread contact across your back; if the load concentrates at one point, more padding may only hide the problem briefly.
Try the pack with a full reservoir and your usual gear. The shoulder straps should lie flat rather than dig into your collarbones, and the chest strap should keep them from spreading without squeezing your ribs. If your pack has a waist strap, check that it stabilizes the load without interfering with your riding position. A strap that is adjusted well reduces movement; one that is too tight can restrict your upper body when you breathe hard or shift your weight on a climb. Fit is personal, so a quick shop try-on is less informative than testing the pack in the position and with the load you actually ride.
Mesh panels and ventilation channels can let more air move between the pack and your shirt, though they cannot prevent a sweaty back on a hot climb. Picture grinding slowly uphill in humid weather: breathable material may reduce that sticky, trapped feeling, but it still covers part of your back and can hold heat. Ventilation is therefore a comfort tradeoff, not a cooling guarantee. If staying cool is a priority and your bike has an accessible bottle cage, bottles may be the more comfortable tradeoff for a short ride.
Consider storage layout, too. Put heavier items close to your back, where they are less likely to swing, and reserve easy-access pockets for snacks or a phone. Reflective details can help drivers or other trail users spot you at dusk, while external loops may hold a light layer—but loose straps can flap or snag if you leave them dangling. More pockets are only useful if they keep gear organized without making the pack bulky or harder to clean. A simpler layout can be lighter and easier to maintain, while a more compartmentalized one can prevent small essentials from disappearing into a single crowded pocket.
Some newer packs use recycled fabrics, modular pockets, or flexible reservoirs that collapse when empty. Recycled materials may reduce reliance on virgin fabric, while modular pockets let you change the load for different rides; both are useful only if the pack still fits and carries securely. Flexible reservoirs can take up less space when empty, but check whether their openings and fittings are still easy for you to clean and operate. A compact reservoir that is difficult to rinse may create more hassle than the storage space it saves. Smart hydration sensors also exist, but they are an extra, not a replacement for paying attention to thirst, route conditions, and your own routine. For beginners, a coach or experienced rider can help with pack adjustment and trail skills; increase ride distance gradually, and stop if pain, dizziness, or unusual weakness develops.
When should you use a hydration pack instead of bottles?
A hydration pack is a strong choice when you want hands-free drinking and extra storage; bottles are often simpler for short rides and quick cleaning. Neither setup wins every time. The right choice depends on your frame, route, water access, and how much gear you need to carry. Consider the whole setup: a pack may solve a bottle-access problem, but it also puts weight and warmth on your back and adds cleaning after the ride. Choosing well means weighing those ongoing costs against the specific convenience you need on that ride.
| Ride need | Hydration pack | Water bottles |
|---|---|---|
| Drink while riding | Hose stays near your mouth | You usually reach down and lift a bottle |
| Carry tools and layers | Multiple pockets can hold essentials | Often needs a separate hip pack or jersey pockets |
| Keep your back cool | Can feel warm against your back | Leaves your back uncovered |
| Clean after a ride | Reservoir and hose need rinsing and drying | Bottle is usually quick to wash |
| Fit on the bike | Works even when the frame has little bottle space | Depends on accessible bottle mounts |
Imagine a small full-suspension bike with a bottle cage tucked behind the shock. Reaching the bottle may be awkward, so a compact pack can solve a real problem and carry a spare tube at the same time. On a short, smooth after-work ride, though, a bottle may feel cooler, lighter, and easier to clean. The choice changes with the route: the pack’s storage and easy drinking matter more when you are far from the trailhead, while a bottle’s simplicity may matter more on a quick local lap. The main tradeoff is convenience during the ride versus weight, warmth, and cleanup afterward.
You can also mix the two. Carry a bottle for easy refills and a modest pack for tools, or take a pack on long rides and leave it behind for a quick lap. Pay attention to the total load: carrying two full liters “just in case” may not make sense if a reliable refill tap sits halfway along your route. A mixed setup can be a useful compromise, but only if the extra water and gear are worth carrying rather than duplicating what you do not need. Think of each item as solving a specific problem; if the bottle and pack carry the same reserve without improving access or range, the additional weight may not earn its place.
How do you keep a reservoir clean and easy to use?
Rinse your reservoir after each ride, wash it when needed, and let the bladder and hose dry completely before storage. Thorough drying helps prevent stale odors and buildup; leaving a damp bladder zipped inside a pack is an easy way to turn fresh water into a sour surprise by the next weekend. Cleaning is not just about smell: dried drink residue can make a valve sticky and narrow passages harder to rinse. A reservoir that stays clean and flows properly is more dependable on the trail, where a blocked bite valve is difficult to deal with.
Start with the manufacturer’s care instructions, since materials and valves differ. After a plain-water ride, empty the bladder and flush the hose with clean water. If you used a drink mix, clean it promptly: sweet residue can cling to corners and leave a sticky smell. This is why a reservoir that is easy to open can matter as much as its capacity; if access is awkward, thorough cleaning and inspection are more difficult. Choosing for easy access can make regular care less of a chore, which makes it more likely you will actually do it.
Use a reservoir brush for the long inner surfaces and a hose brush if the maker recommends one. Cleaning tablets can help with stubborn odors, but follow their directions rather than improvising with harsh chemicals. A wide-opening bladder is especially handy at a kitchen sink because you can reach inside and see what you are cleaning. That visibility helps you spot residue rather than assuming a quick rinse has reached every corner. Cleaning products should suit the reservoir material; an unsuitable chemical may damage it even if it removes an odor.
To dry it, hang the bladder open or prop it apart with a clean drying aid so air reaches the interior. Disconnect the hose if the design allows, and let both parts dry before packing them away. For instance, after a Saturday ride, a few minutes to rinse and hang the bladder can save you from scrubbing a musty reservoir on Sunday morning. Drying takes a little space and time, but skipping it can make the next cleanup harder. Airflow matters because water trapped in folds or the hose can remain after the outside looks dry.
Check the bite valve, seams, and quick-release connection for leaks or wear. A small drip can soak a spare layer or phone pouch long before you notice it. Store the pack empty, clean, and dry; if the reservoir’s maker gives different storage instructions, follow those instead. A quick inspection after cleaning also means you are more likely to find a worn connection at home, rather than discovering it on a remote ride. Regular care therefore does double duty: it keeps the reservoir fresher and gives you an early warning of parts that may need replacing.
What common pack mistakes can ruin a good ride?
The most common mistakes are carrying too much, skipping the fit test, and putting off reservoir cleaning. A pack that feels fine empty can become uncomfortable when loaded, while a hose that works in the driveway may snag when you turn your head or stand over the bike. Each problem tends to show up when attention is already needed on the trail, so a short test beforehand can prevent discomfort from becoming a distraction. The shared issue is relying on how the setup feels at rest instead of checking it under the conditions that make it useful.
Before your next ride, pack only what the route calls for. A short, familiar loop may need water, a tube or plug kit, a small pump, and a snack; a remote all-day ride calls for more planning. Keep critical repair items accessible, and avoid stuffing hard tools against your spine where they can press painfully over bumps. Extra gear can feel reassuring, but it adds weight and makes it easier for contents to shift; choose items for likely needs and route conditions rather than filling every pocket. A lighter, organized load is easier to carry and makes it clearer whether a particular item is worth bringing next time.
Test the pack on an easy route before trusting it far from the trailhead. Drink through the hose, reach for your tools, and notice whether the pack shifts on a descent. If the chest strap rubs or the back panel traps too much heat, adjust it or try another design rather than hoping it will disappear after a longer ride. Small fit problems often become more noticeable over time, especially when you are climbing, sweating, or repeatedly moving on and off the saddle. A short test lets you change the setup while the consequences are small, rather than learning about a persistent rub or snag miles from home.
Do not treat a large reservoir as a reason to ignore hydration planning. Conditions vary, and individual needs differ; hot weather, long climbs, and remote routes all change what makes sense. Check local trail and weather guidance, plan refill points, and take breaks if you feel unwell. Beginners should build ride duration and difficulty gradually, with guidance from a qualified coach when learning skills or training for longer efforts. The practical goal is to carry enough for the route while recognizing that capacity alone cannot account for delays, changing conditions, or how your body feels.
A practical pre-ride check takes less than a minute: fill and inspect the bladder, secure the hose, confirm the pack stays still, and make sure your essentials are inside. That small routine can prevent a sloshing descent, a leaky pocket, or a thirsty turnaround miles from the car. It also gives you a chance to catch an easy fix—such as tightening a loose strap—before the ride depends on it. Over time, the check helps you notice which parts of your setup repeatedly cause trouble and adjust your gear choices accordingly.
Frequently Asked Questions
How much water should a mountain bike hydration pack hold?
Many packs hold 1 to 3 liters. Choose based on ride duration, weather, your drinking habits, and refill access; a short loop with a tap nearby usually needs less capacity than a long remote route.
Are hydration packs hygienic?
Yes, when you rinse the reservoir and hose after use and let them dry fully. Clean promptly after using drink mix, and follow the reservoir maker’s care directions.
Can I use a different reservoir in my pack?
Often, but dimensions, hose connections, and attachment points vary. Check the pack and reservoir specifications before buying, especially if the original bladder uses a proprietary quick-release fitting.
Is a hydration pack better than water bottles?
A pack offers hands-free drinking and extra storage, which can help on technical or longer rides. Bottles are often cooler to carry and faster to wash, making them a good choice for short rides and bikes with accessible cages.
How do I stop a hydration pack from bouncing?
Load the pack, bring it close to your back, and adjust the shoulder and chest straps until it stays still without limiting your breathing. If it continues to bounce, remove unnecessary gear or try a pack with a shorter back length or different profile.
Conclusion
Choose a pack that carries the water your route calls for, sits close without squeezing, and is simple to clean after a muddy ride. Test it loaded before you head somewhere remote, and adjust your setup if it bounces, rubs, or makes drinking awkward.
When the trail tilts upward and the hose is right where you need it, good hydration gear should fade into the background—leaving you focused on the next turn.
NFL season / tailgating Picks
team gear
As an affiliate, we earn on qualifying purchases.